Manage Data Policies
Alation Cloud Service Applies to Alation Cloud Service instances of Alation
Customer Managed Applies to customer-managed instances of Alation
Important
You are viewing documentation for Alation’s Classic User Experience.
Data policies that are created on a Snowflake data source are extracted to Alation as a separate object type policy. The objects that are referenced in a policy are defined as the Policy Link object type. Policies extracted from Snowflake appear in the Policy Center page.
The following table provides information on the Snowflake data policy types supported by Alation.
Policy |
Feature |
Support |
|---|---|---|
Column Level Security |
Yes |
|
No |
||
Row Level Security |
Yes |
|
Access History |
No |
Row Access Policy - Row access policies implement row-level security to determine which rows are visible. A Row Access Policy can be applied to the rows in a table or view. When the Row Access Policy is applied to a row in a table, that row will be hidden in the table from unauthorized users.
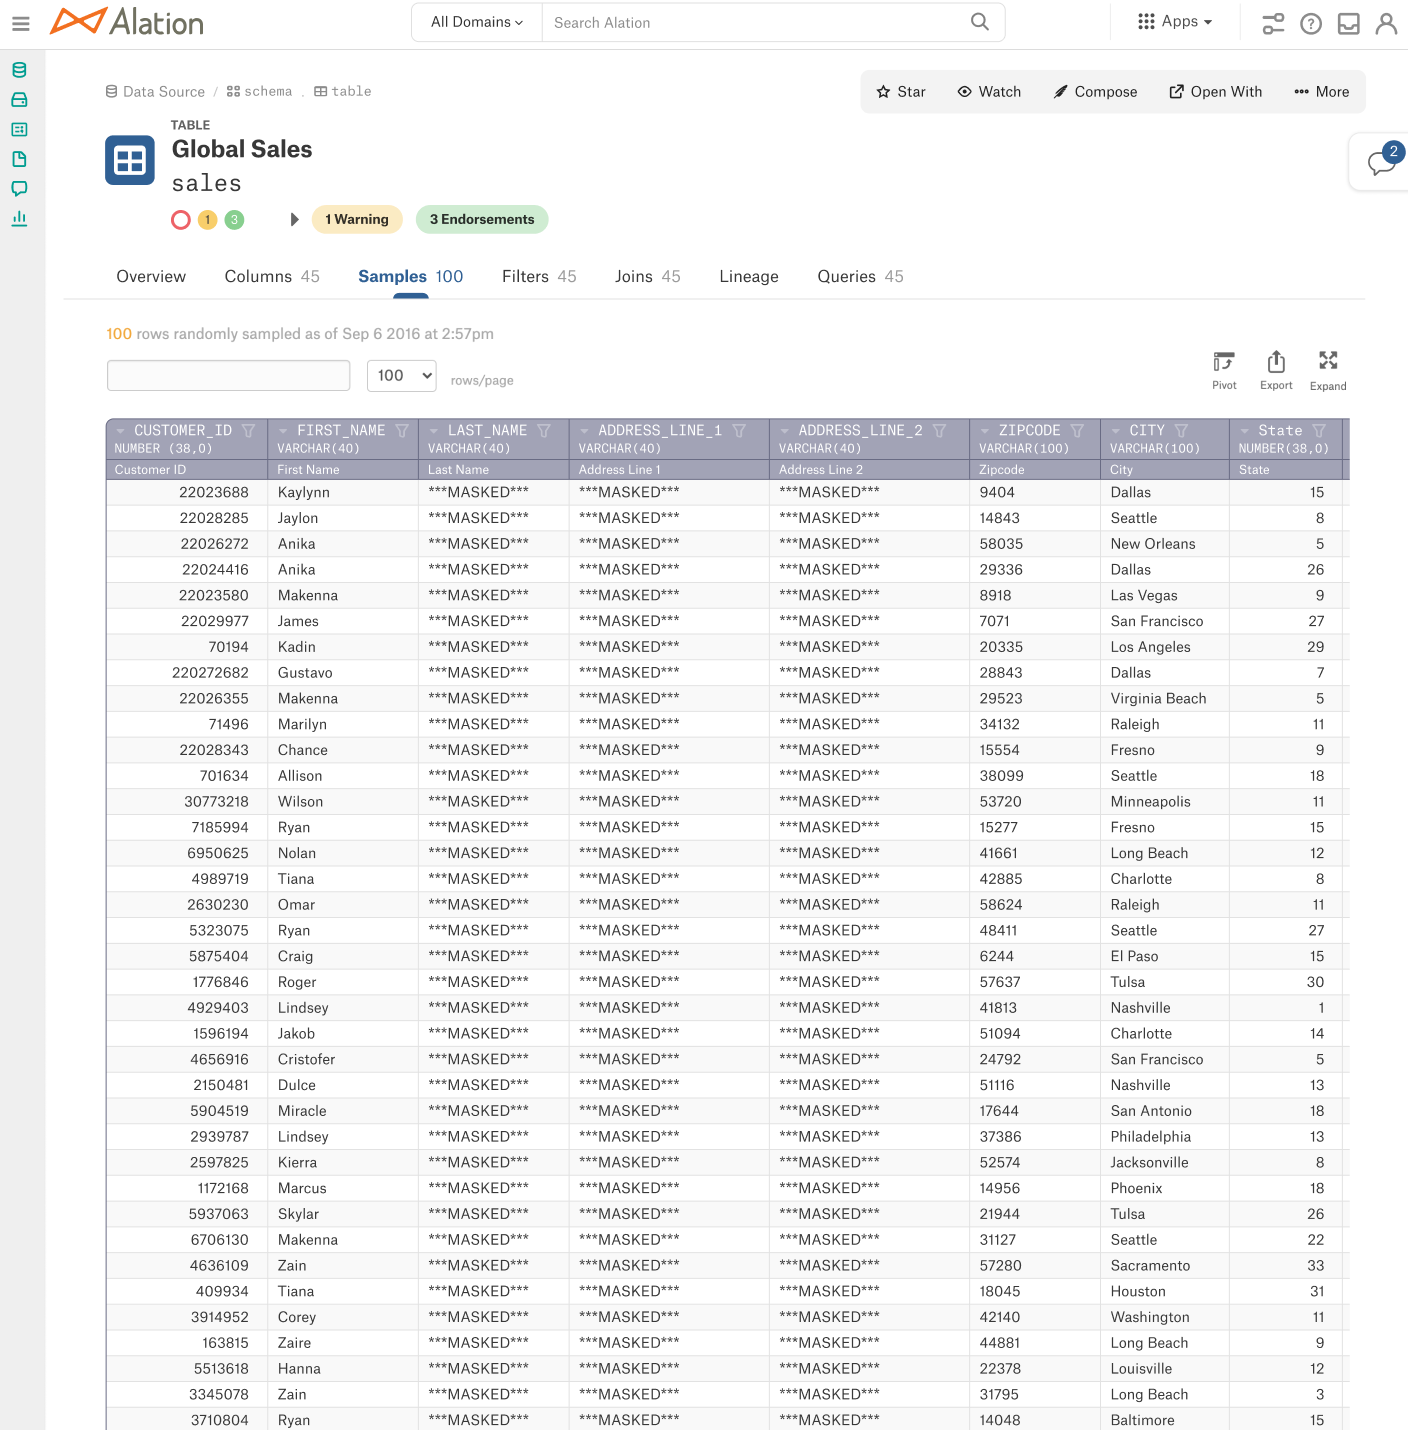
Dynamic Data Masking Policy - This is a column level security feature that uses masking policies to selectively mask data in particular columns. Data Masking policies can be applied to columns in views and tables. If the policy is applied to a column, that column will display the data for users as defined in the policy SQL rules, for example, it will display the word MASKED or asterisks (***) instead of actual values.
The screenshot below illustrates a data sample from a Snowflake table with the Dynamic Data Masking policy applied:
Curate Data Policies
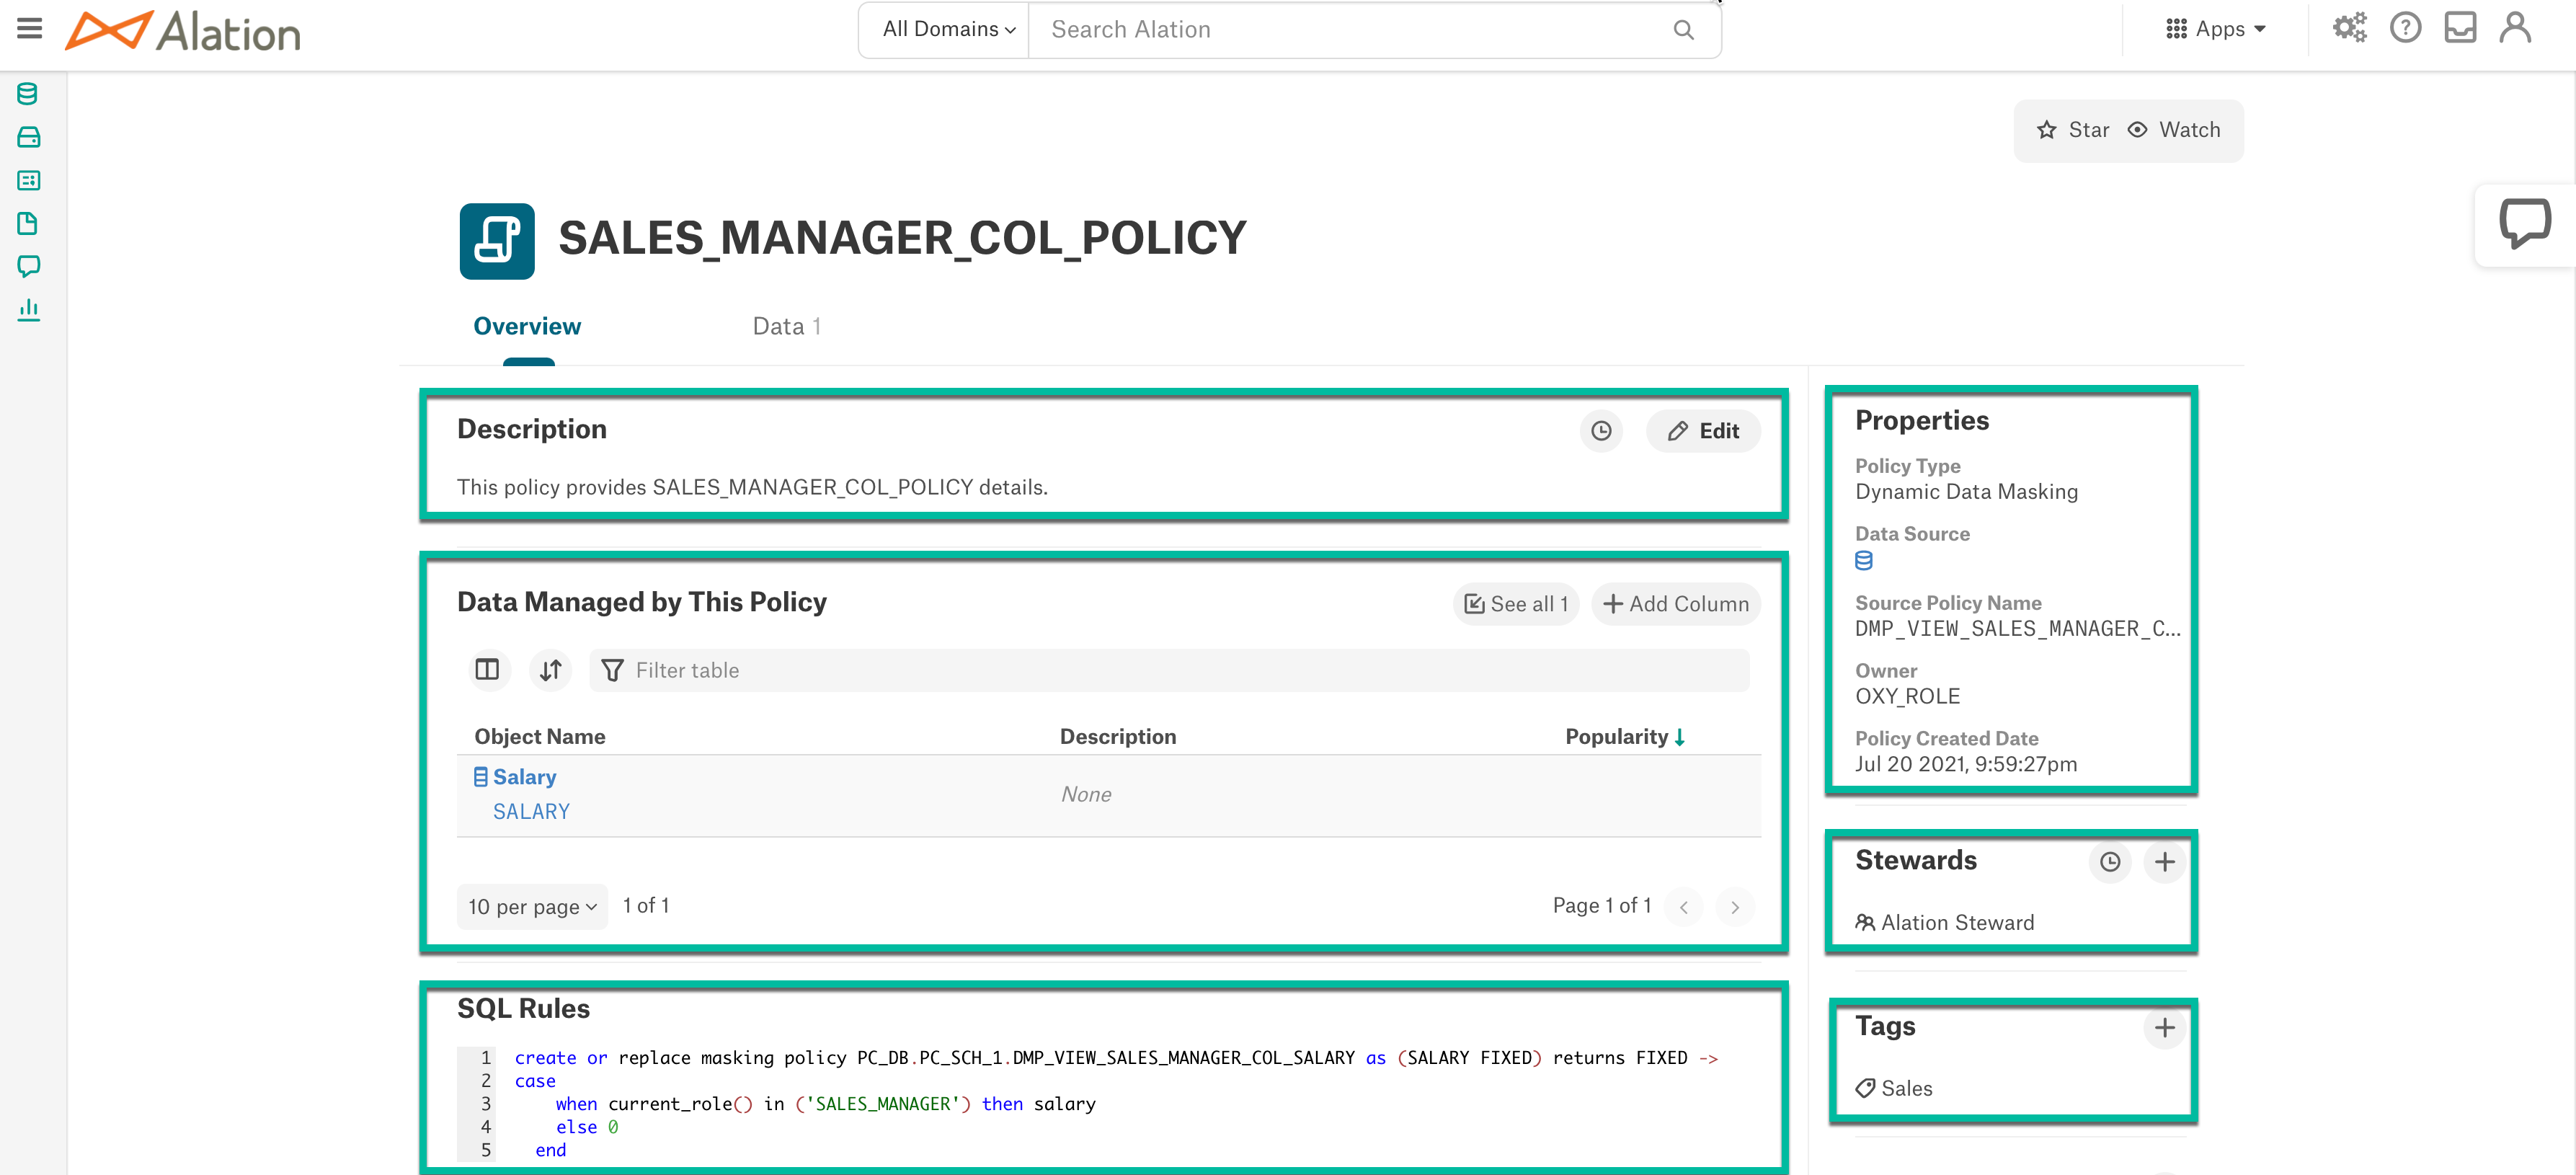
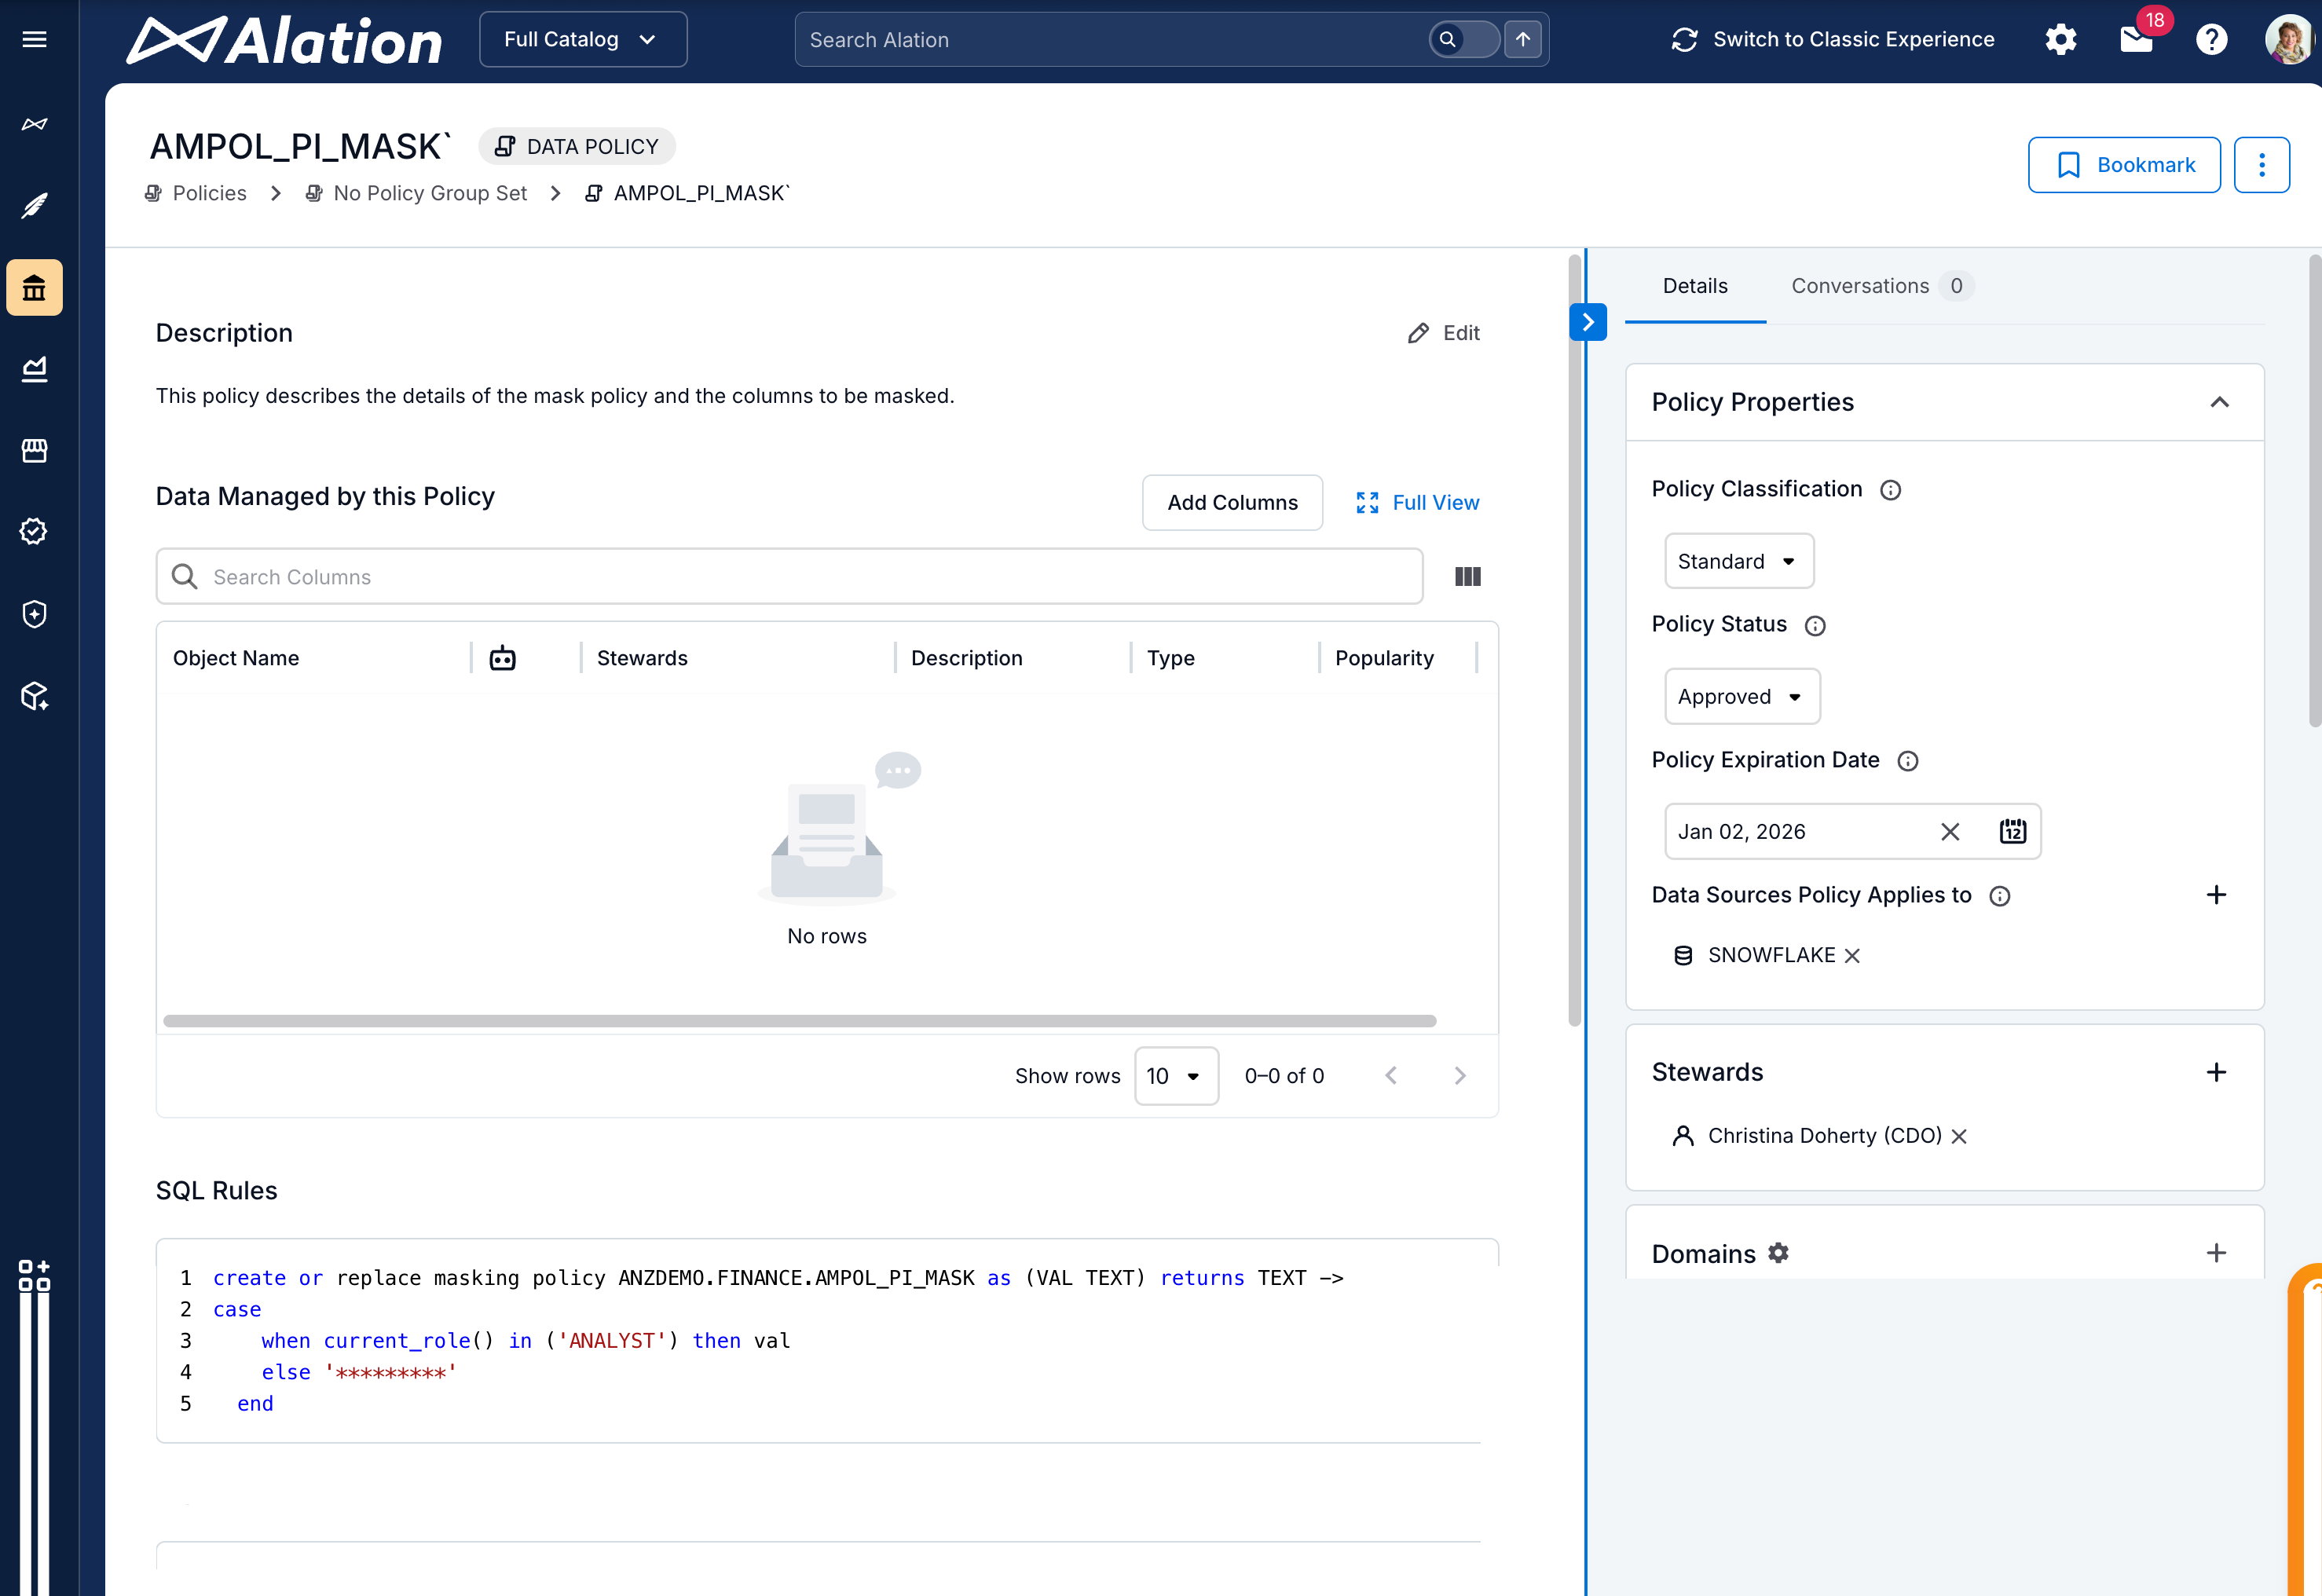
Policies extracted and displayed in the Policy Center page can be curated by users with appropriate permissions. Users who have view permissions only cannot curate catalog pages. Click on any policy to view the catalog page of this Policy object and curate the following sections:
Description - Click the Edit icon to add/edit the description of the policy.
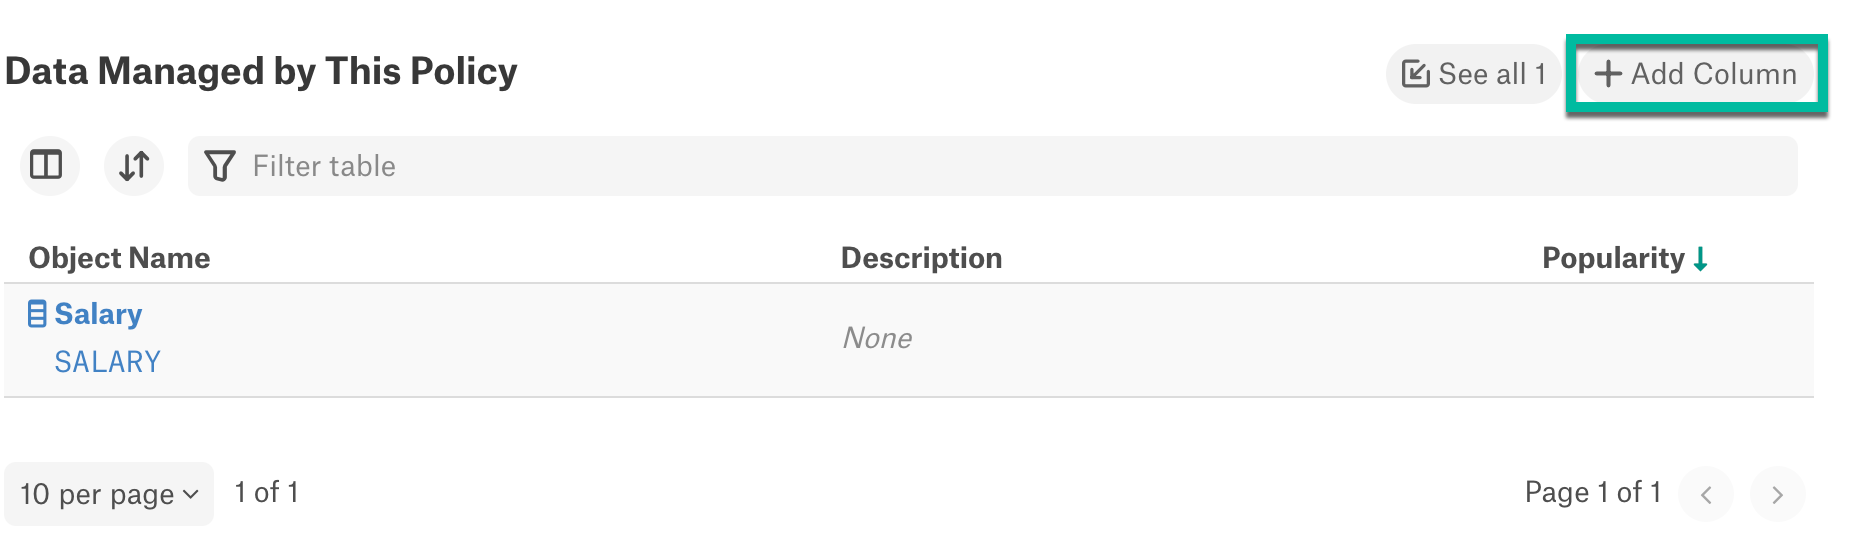
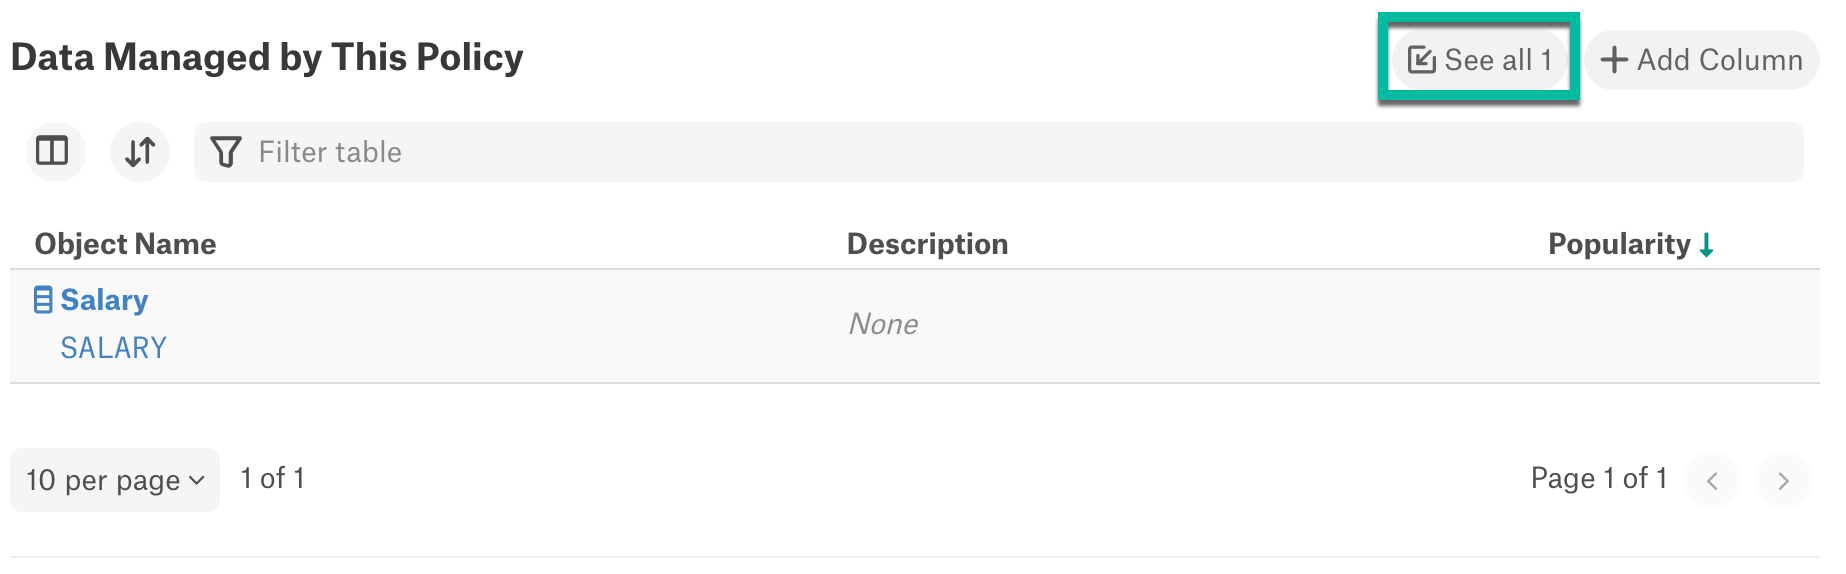
Data Managed by this Policy - This section displays the objects added to a policy. Users can add columns to any Data Masking Policy, refer to Apply Data Masking Policy to Columns.
Note
For Row Access Policies, you cannot add rows to the extracted policy. This must be performed directly in Snowflake or using Compose.
SQL Rules - This is a read-only section that displays the SQL rules which are applied to the columns or rows of the objects added to the policy. If any changes are to be made to the rules, it must be done in Snowflake or from Compose and extracted into Alation.
Properties - This is a read-only section that displays the following:
Type of policy
Name of the data source to which this policy is applied
Policy name
Owner of the policy
Last updated date.
Stewards - Click the Plus icon to add the Stewards to the policy.
Tags - Click the Plus icon to add tags to the policy.
You can also add custom fields to the catalog page for policies. See About Templates and Fields for more information.
Apply Data Masking Policy to Columns
Users who are authorized to use Snowflake data source with the service account credentials can add columns to any extracted Snowflake Data Masking Policy. Before you add a column to a Policy:
Make sure that Policy and Column are from the same data source. A column cannot be added to a Policy that is created for a different data source. You can Create a Policy in Compose for your data source and add the column.
Make sure that the data type specified in the SQL rules of a Policy matches with the data type of the column. An error notification email will be sent to the user if the data type does not match.
Note
A column can have only one policy applied at a time.
Make sure that the column does not have an existing policy. An error notification email will be sent to the user if a policy currently exists.
Perform the following steps to add columns to a policy:
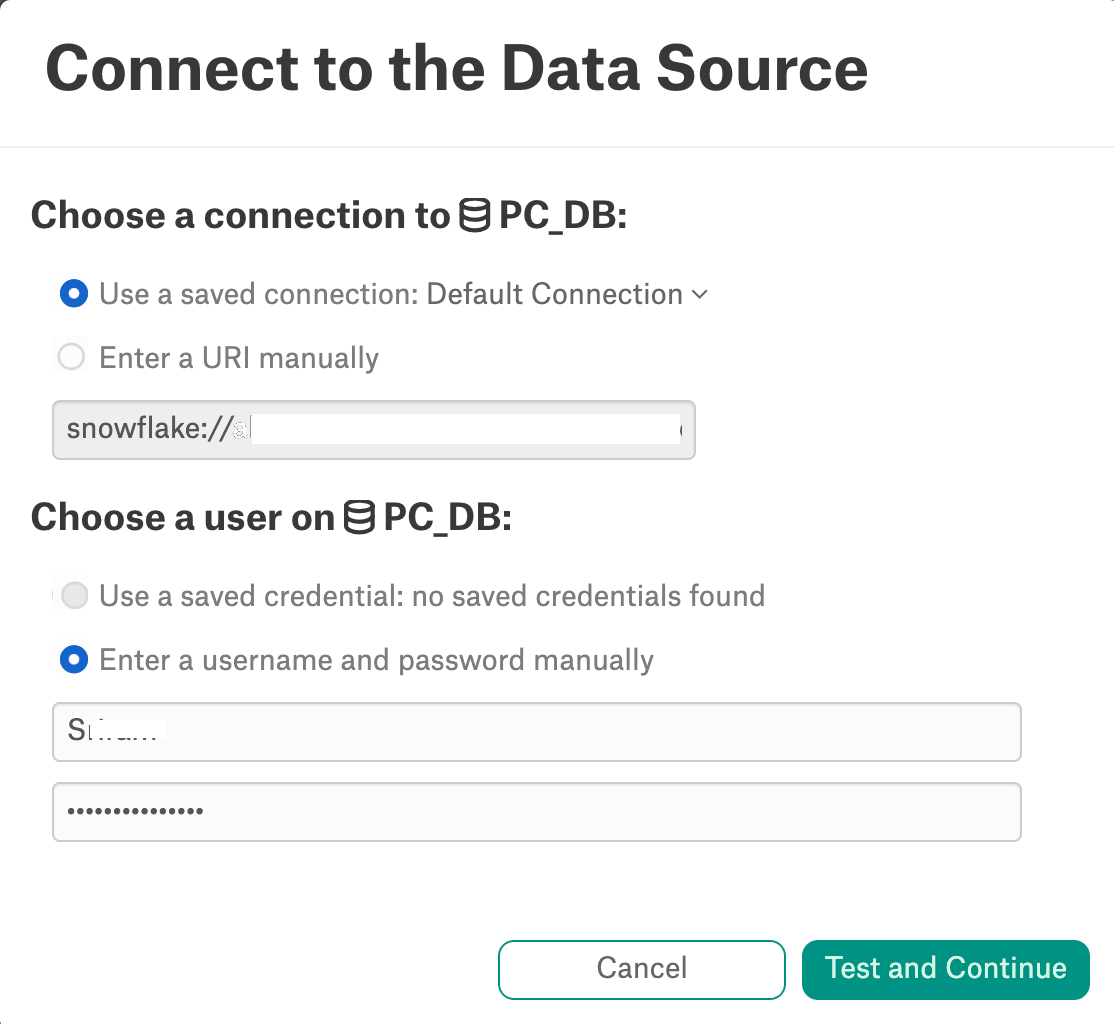
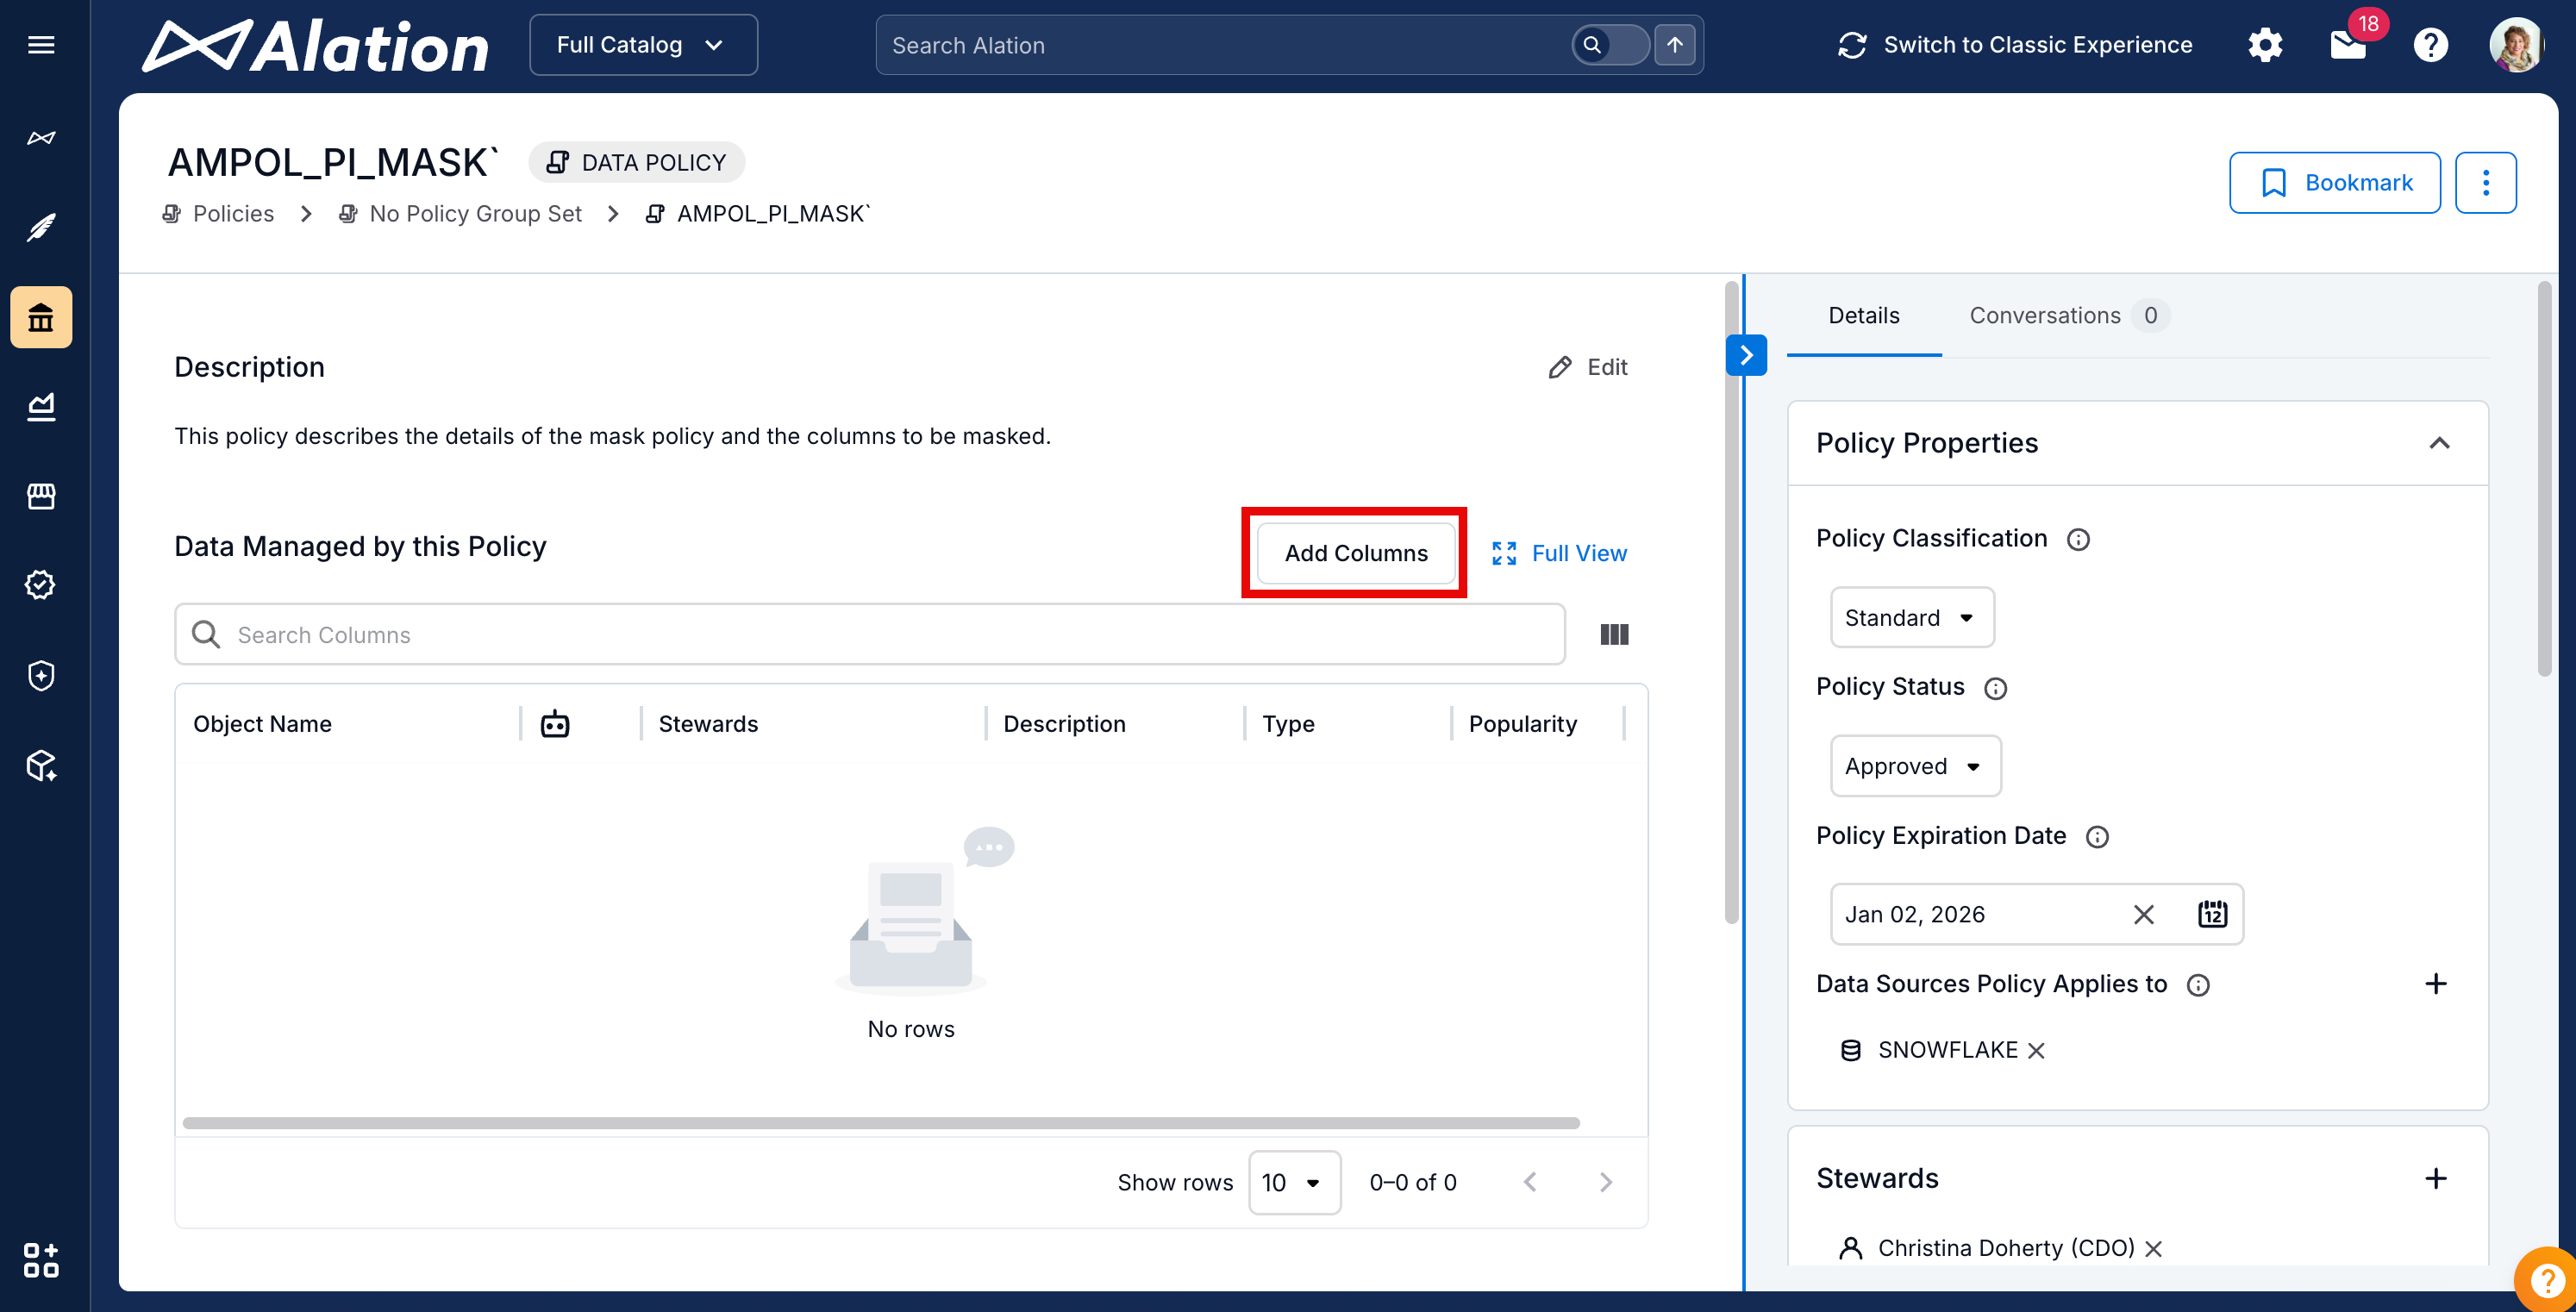
On the policy page, go to Data Managed by This Policy section and click Add Column. The Connect to the Data Source window appears.
In Connect to the Data Source window:
In Choose a Connection dropdown, select a saved connection that is already connected or click +Add New to provide the URI manually.
In Connect as (Select User) dropdown, use a saved credential or click +Add New to provide the Snowflake service account username and password. If the data source is configured with OAuth URI, username and password is not required in this window.
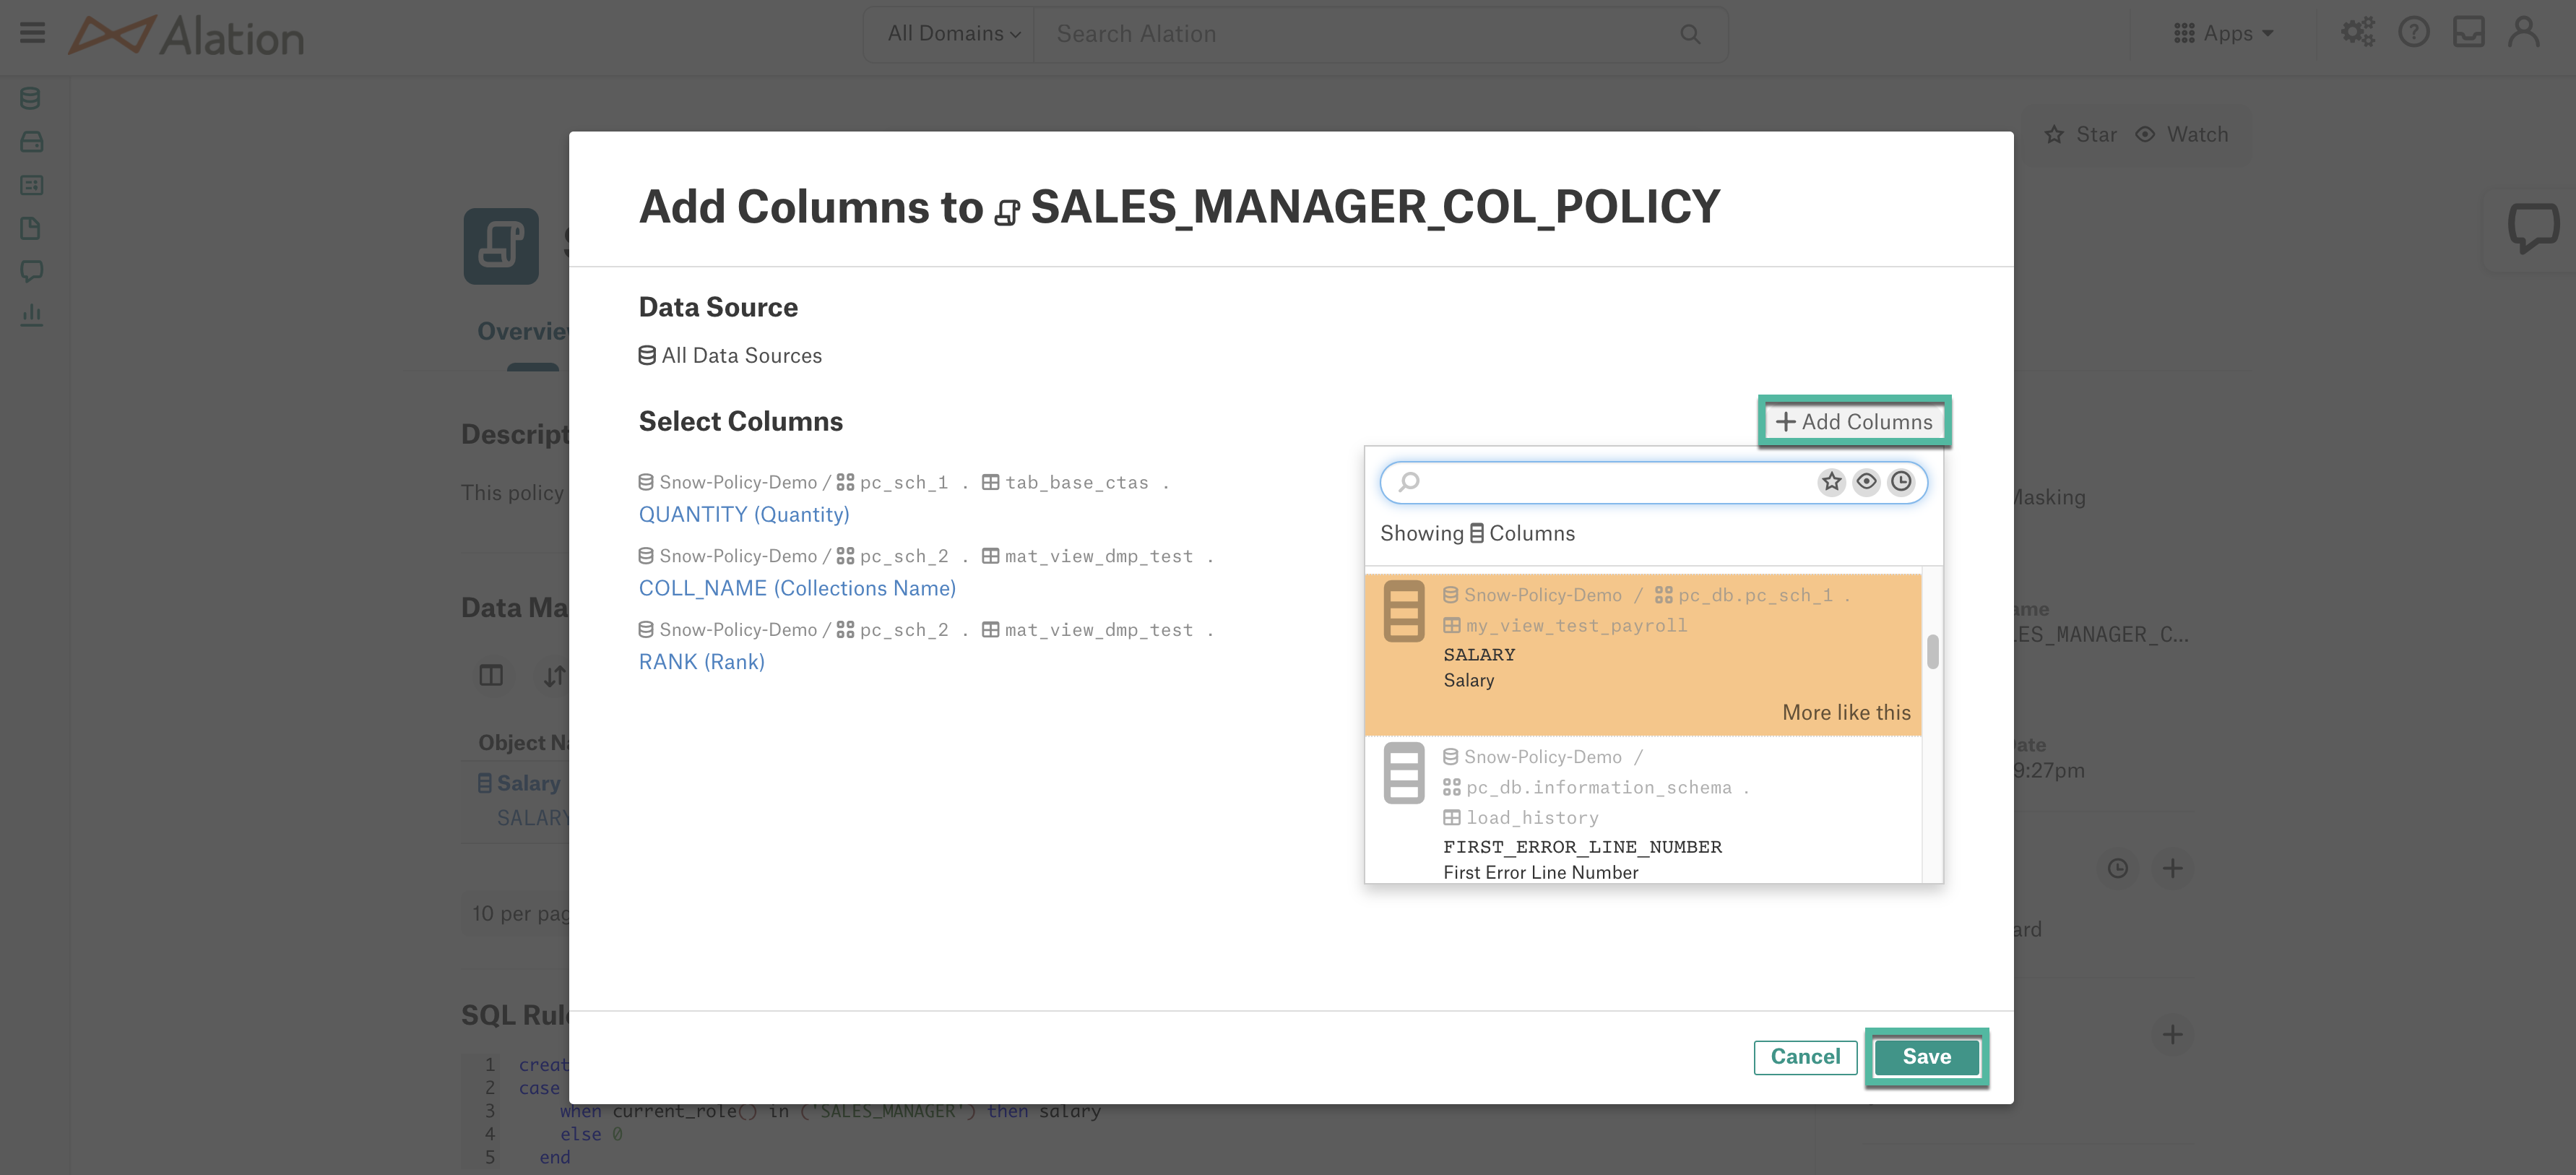
Click Set Active Connection. The Add Columns to <policy_name> dialog appears.
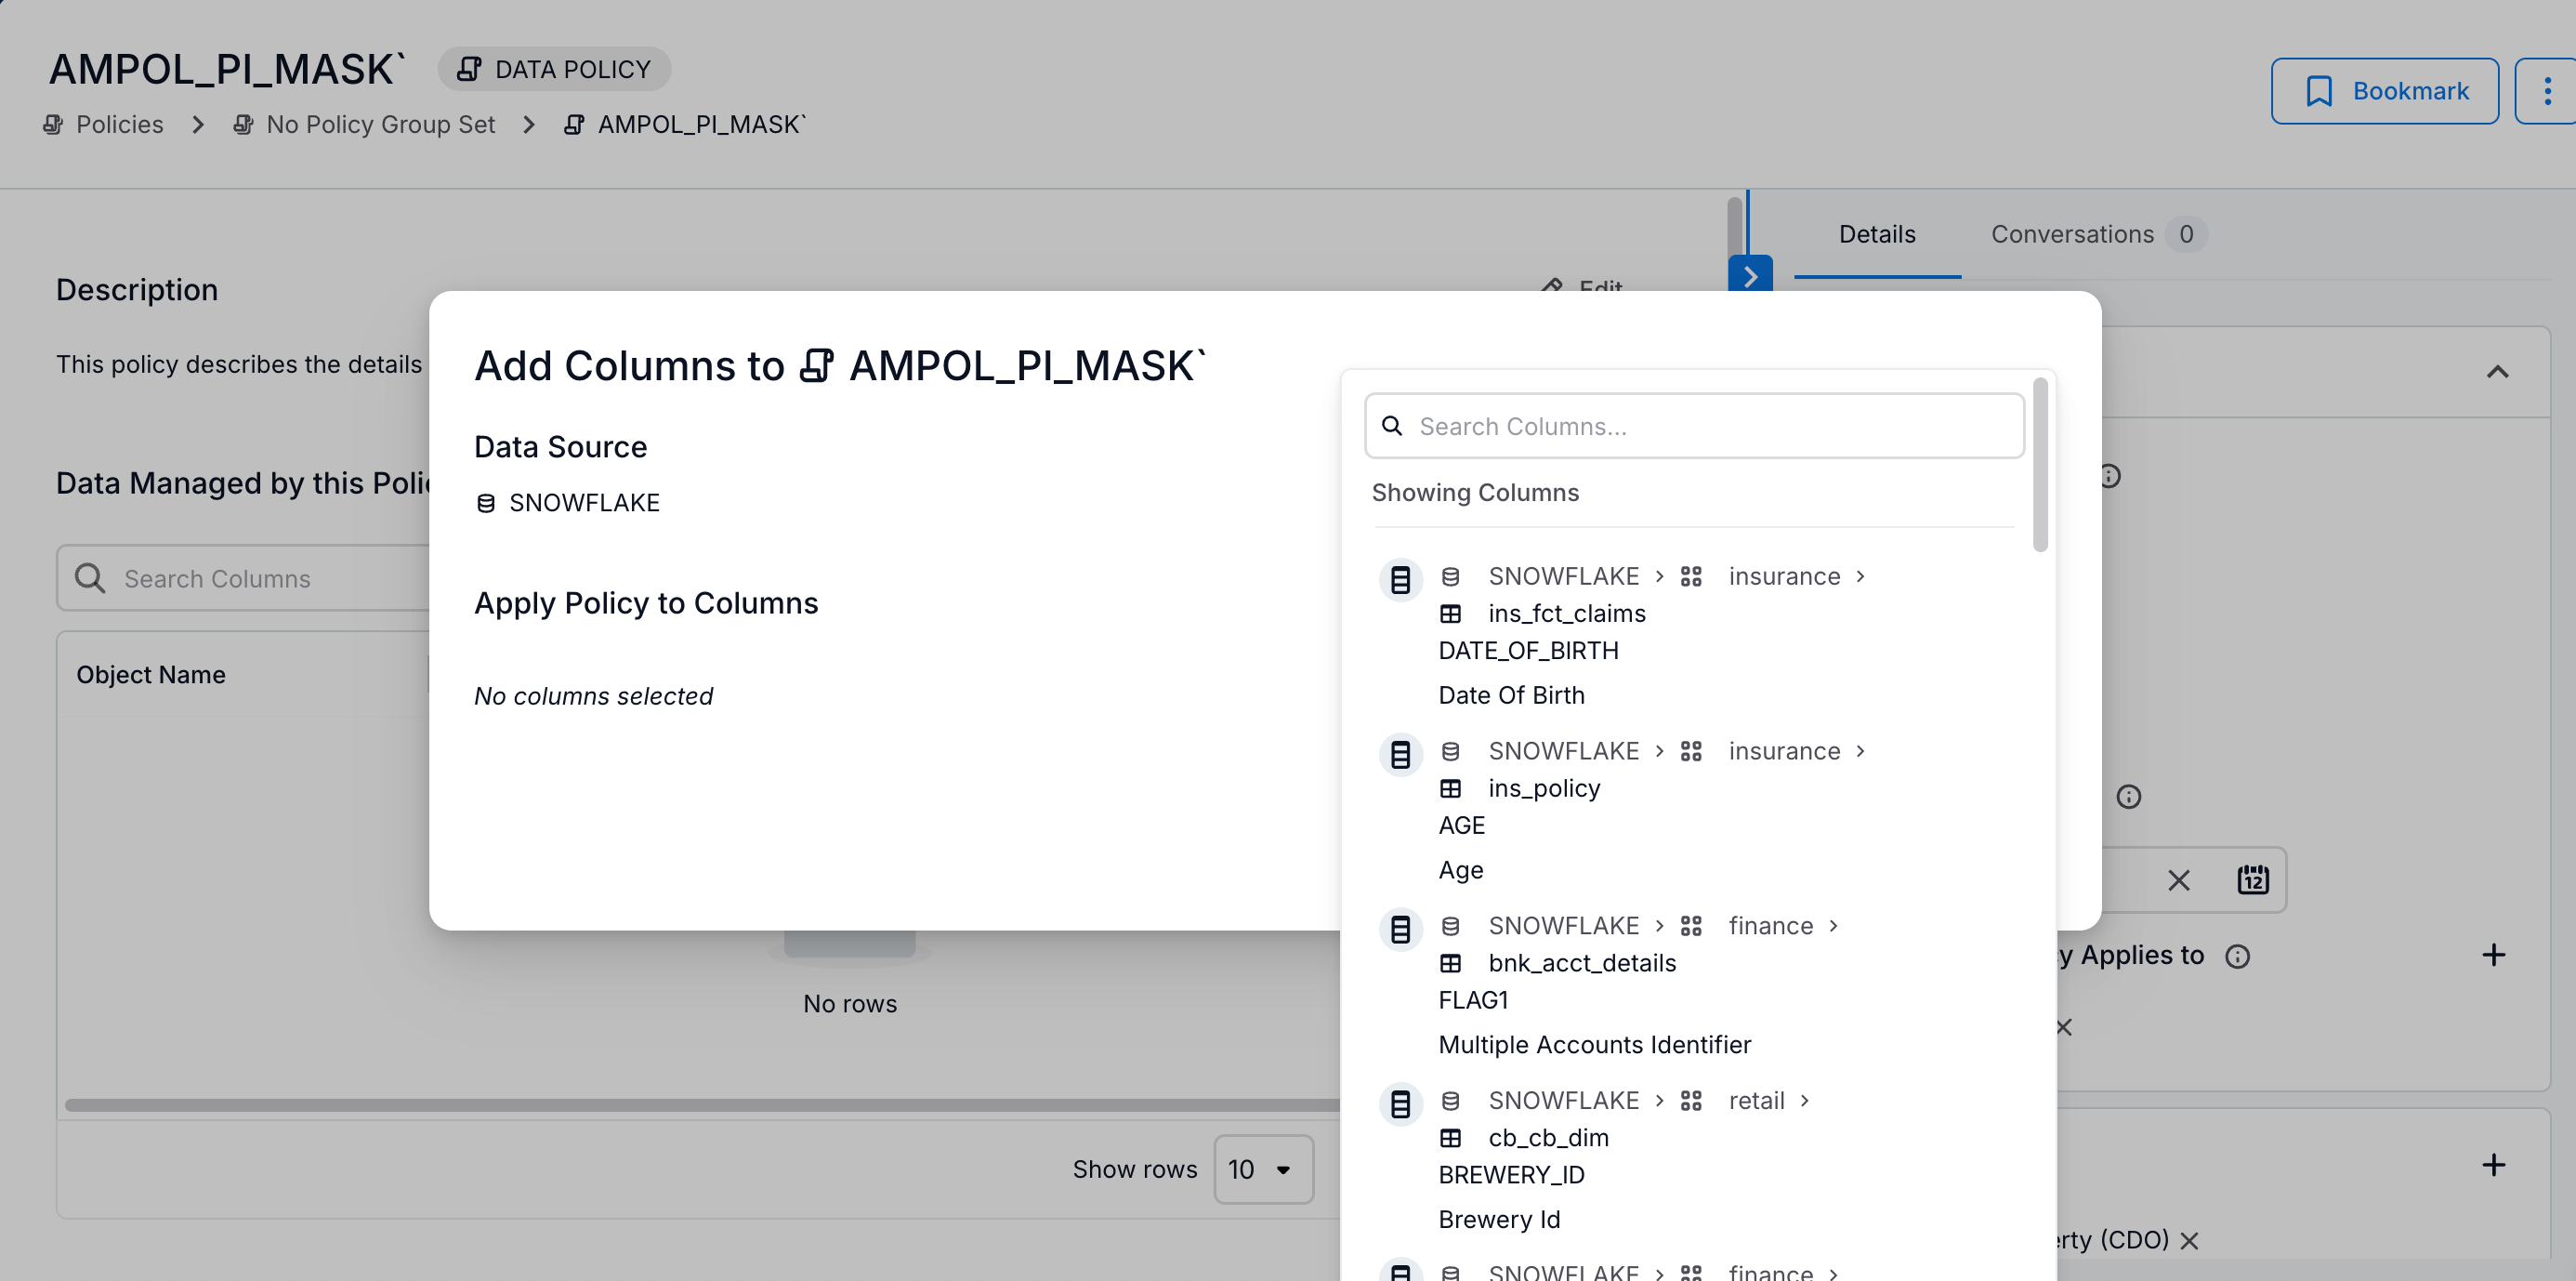
In the Add Columns to <policy_name> dialog, click the Add Columns button and select the columns. Click Save to finish adding the columns.
Note
A column can have only one policy applied at a time.
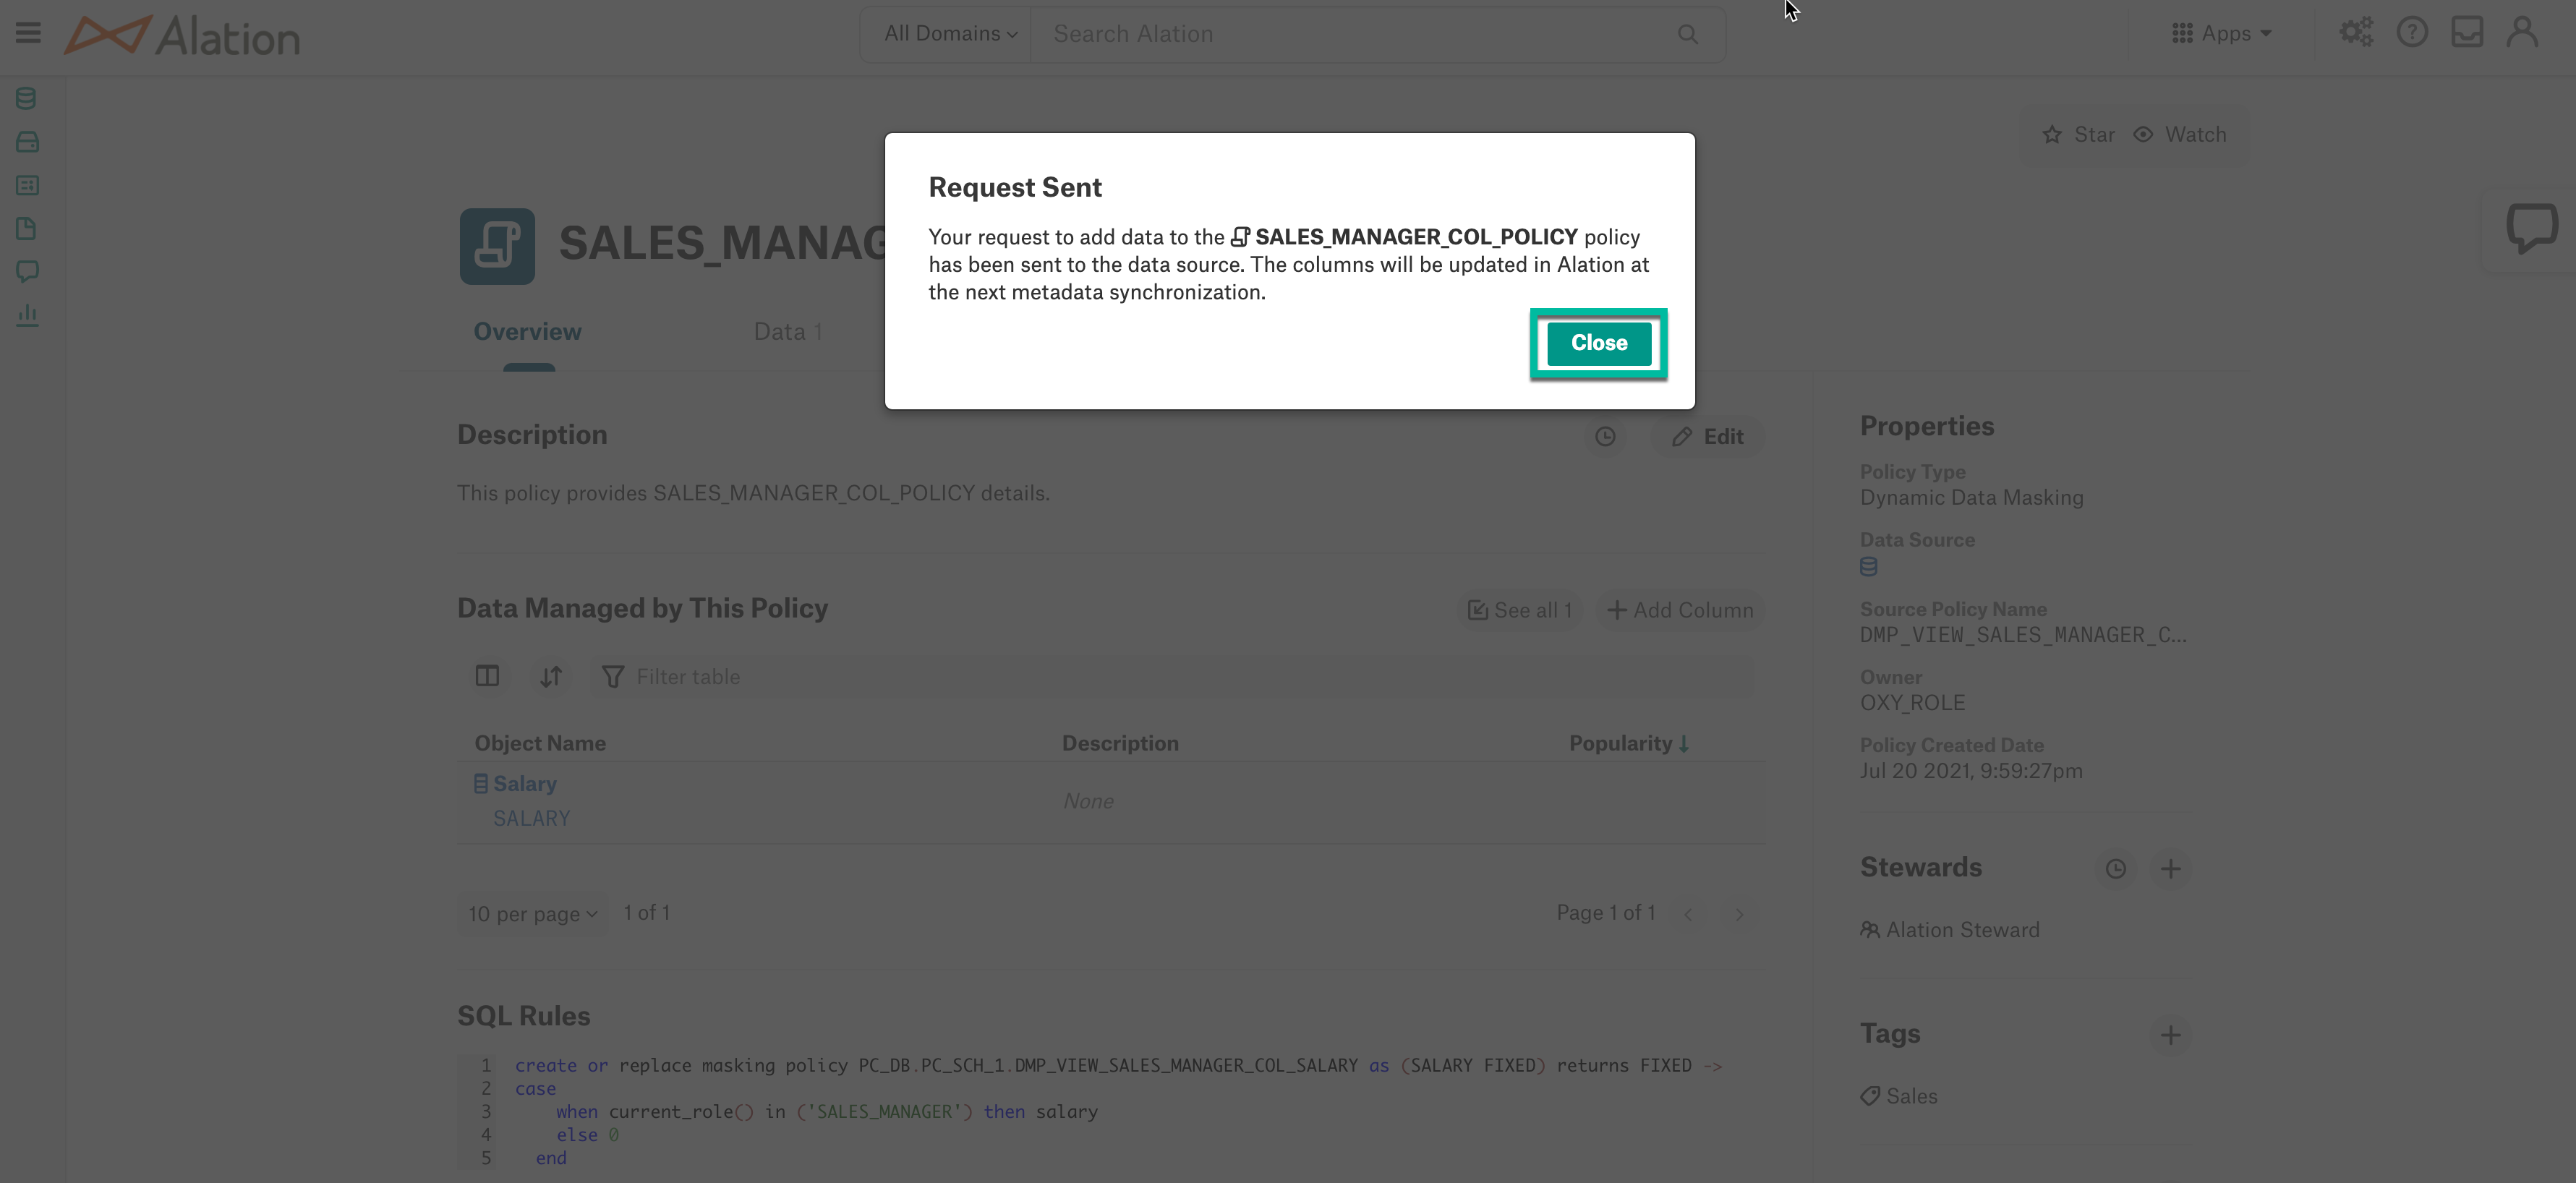
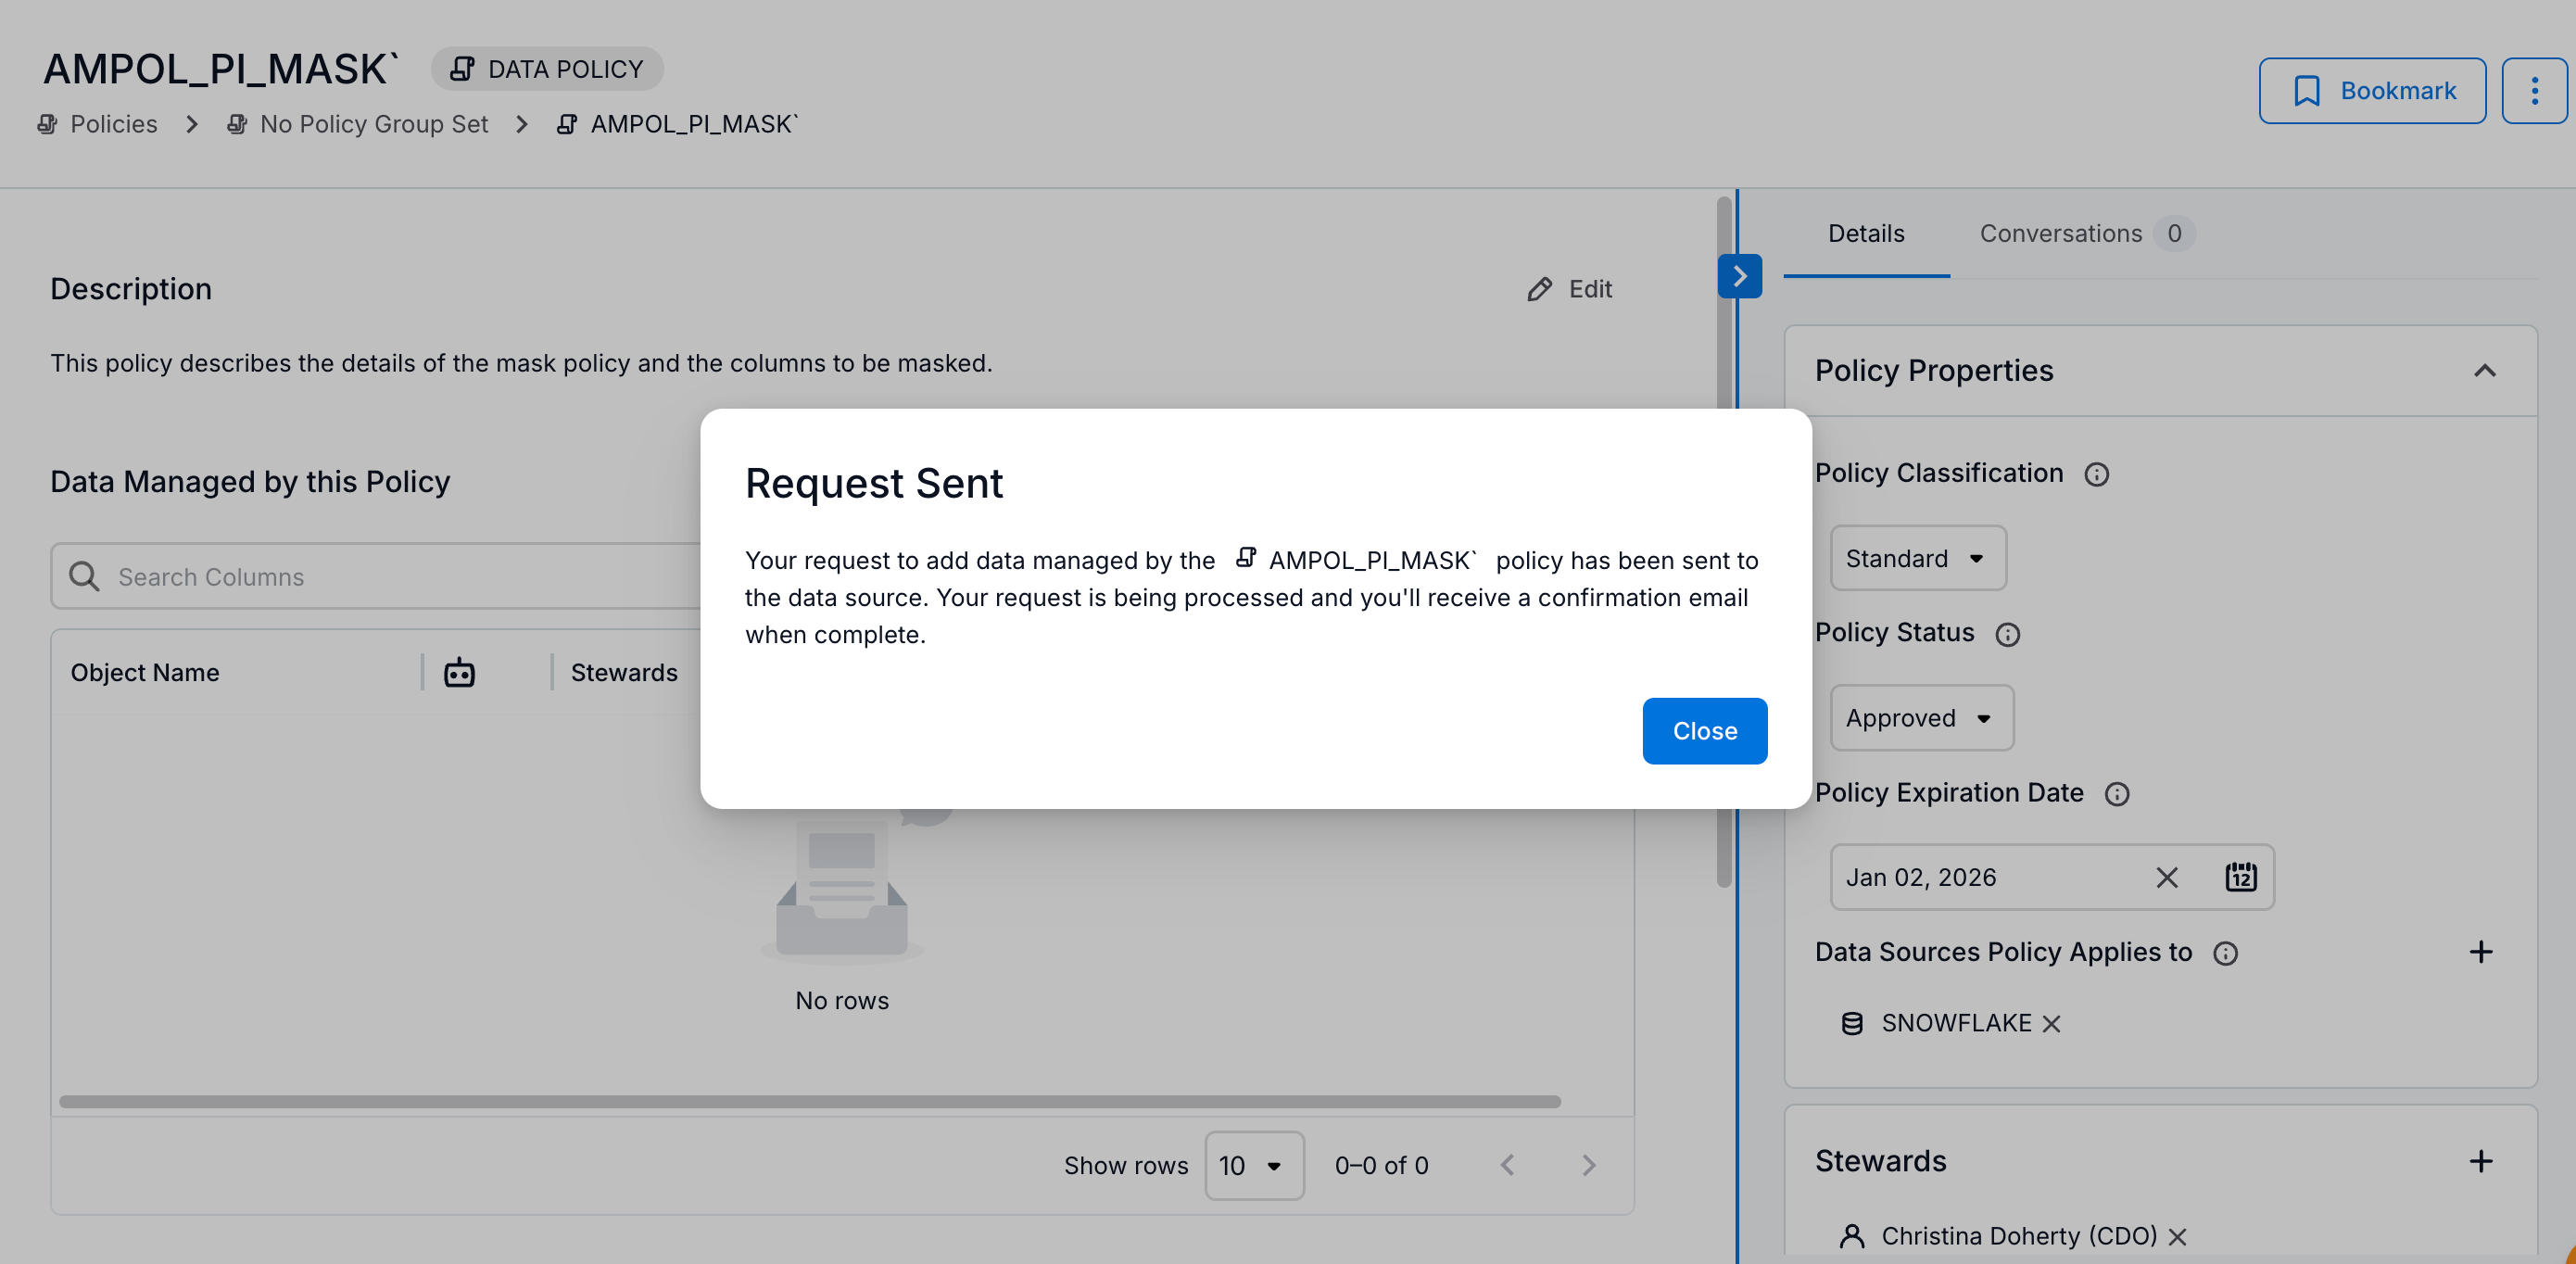
A message will appear with the information that the columns will be updated in Alation during the next metadata synchronization. Click Close to close the dialog.
Click See all button to view all the columns added to the policy.
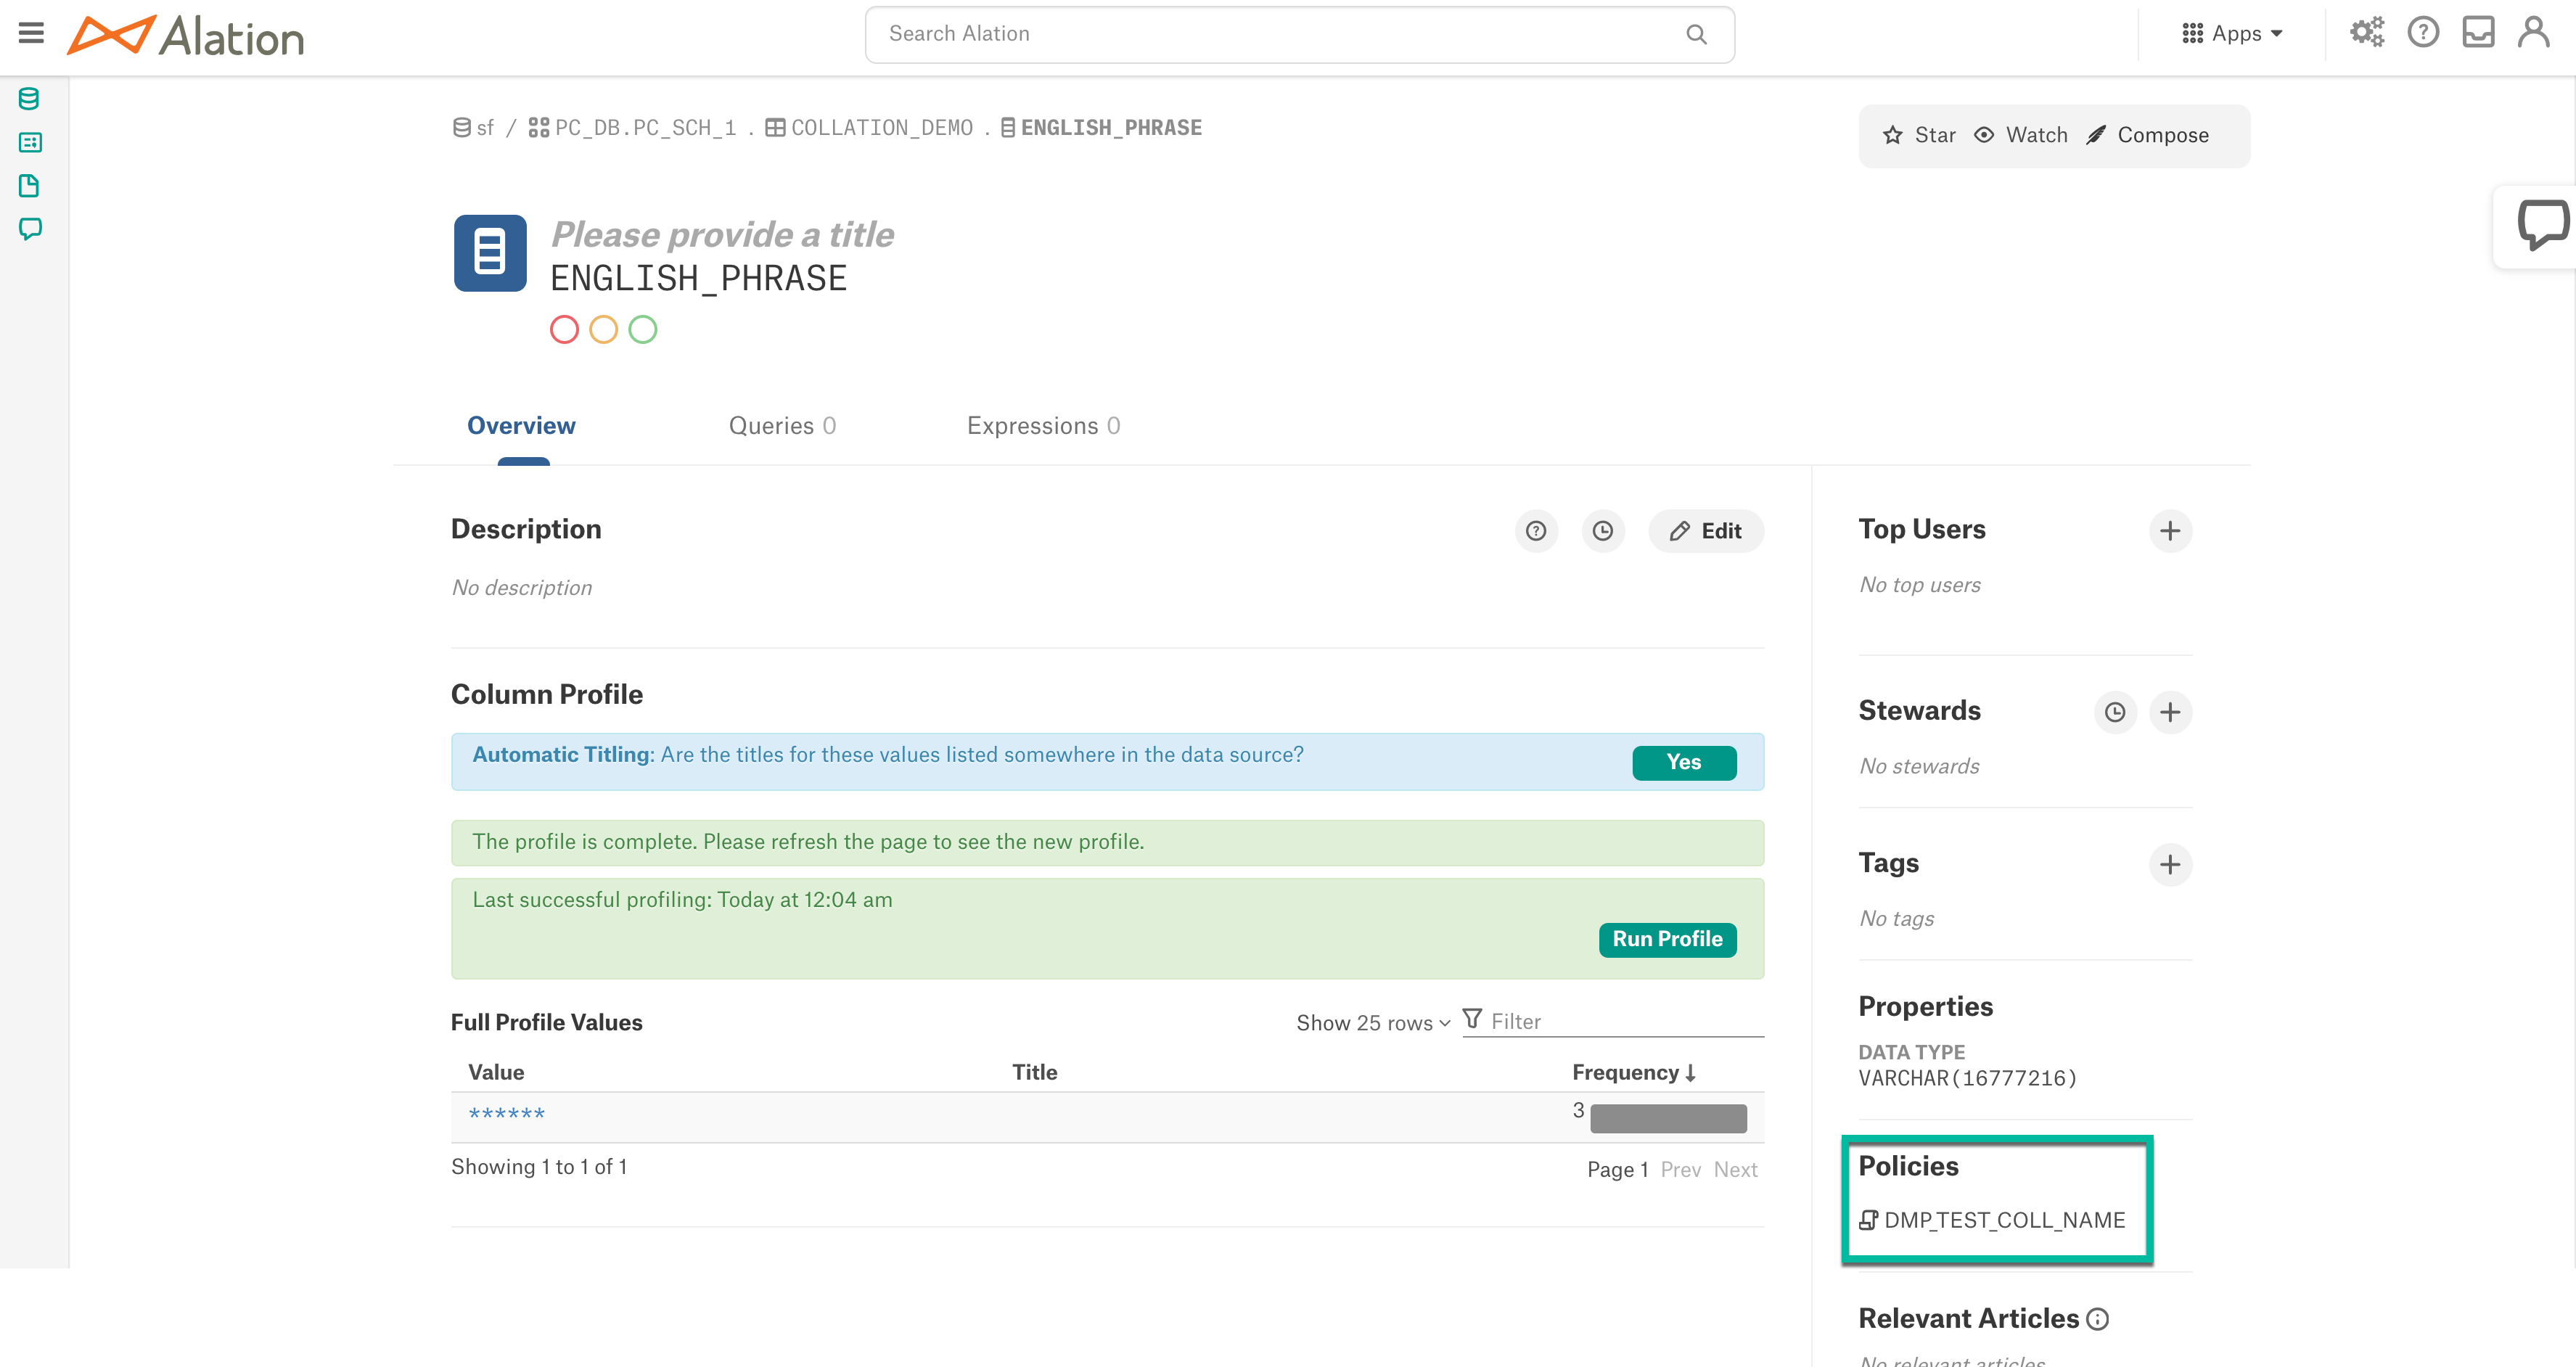
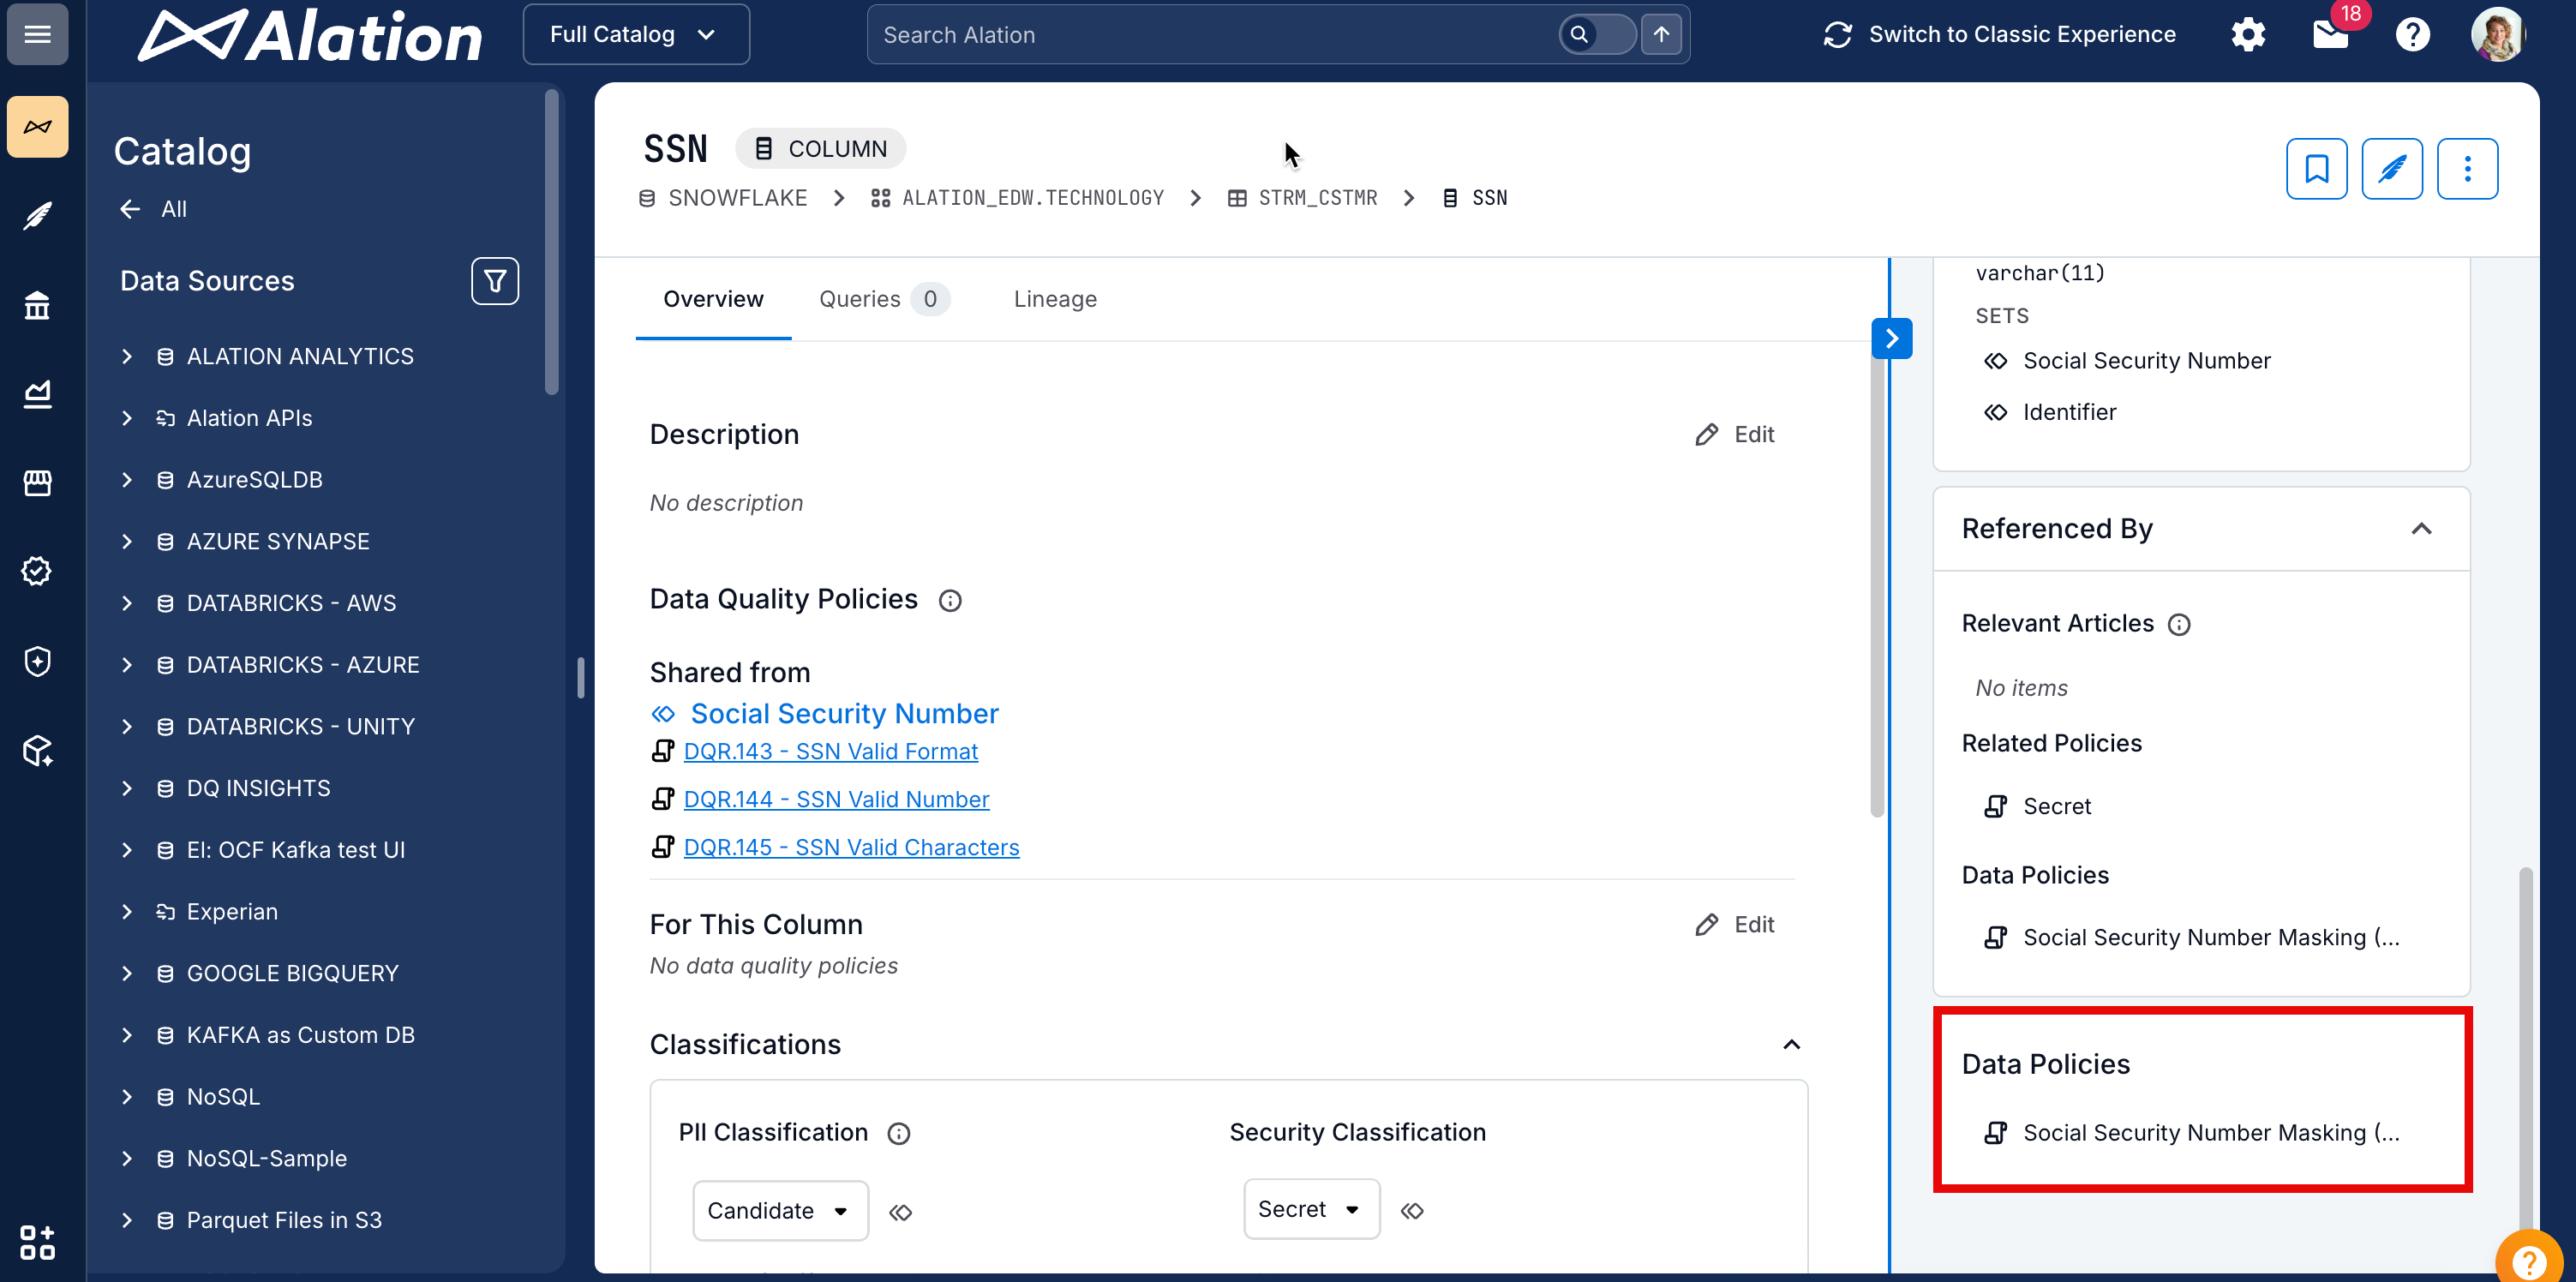
Once the column is added to a policy, the policy name will be displayed on the Catalog page of the column and a notification email of successful addition of the policy to the column will be sent to the user. The columns added in Alation syncs with Snowflake after a slight delay.
On the policy page, go to Data Managed by This Policy section and click Add Columns. The Connect to the Data Source window appears.
In Connect to the Data Source window:
In Choose a Connection dropdown, select a saved connection that is already connected or click + Add New to provide the URI manually.
In Connect as (Select User) dropdown, use a saved credential or click + Add New to provide the Snowflake service account username and password. If the data source is configured with OAuth URI, username and password is not required in this window.
Click Set Active Connection. The Add Columns to <policy_name> dialog appears.

In the Add Columns to <policy_name> dialog, click the Add Columns button and select the columns. Click Save to finish adding the columns.
Note
A column can have only one policy applied at a time.
A message will appear with the information that the columns will be updated in Alation during the next metadata synchronization. Click Close to close the dialog.
Once the column is added to a policy, the policy name will be displayed on the Catalog page of the column and a notification email of successful addition of the policy to the column will be sent to the user. The columns added in Alation syncs with Snowflake after a slight delay.
Remove Columns from a Policy
Columns can only be removed from a policy by running a query in Compose or the Snowflake UI. The Alation Catalog UI does not support removing columns from policies.
Create a New Data Policy
Create a Policy in Compose
Alation users with Snowflake accounts authorized to create policies can create them using Compose.
When a policy is created or deleted, or when objects are added to or removed from a policy through Compose, it can take up to two hours for the policy rules to be applied to the corresponding Snowflake tables or views. After this period, Metadata Extraction (MDE) must be run again for the changes to appear in Alation.
To create a policy in Compose, authenticate to your Snowflake data source using your account credentials or your OAuth credentials (if the Snowflake data source is configured to use OAuth for Compose authentication). Write a query providing the SQL rules for the policy as per the instructions provided for each policy type in Snowflake:
Example SQL rule for a Data Masking Policy:
create or replace masking policy PC_DB.PC_SCH_1.DMP_sales_manager_col_salary_1 as (salary_1 bigint) returns bigint ->
case
    when current_role() in ('OXY_ROLE') then salary_1
    else -1
end;
Example SQL rule for a Row Access Policy:
CREATE OR REPLACE ROW ACCESS POLICY PC_DB.PC_SCH_1.RAP_all_roles_region_1 AS (region_1 VARCHAR(100)) RETURNS BOOLEAN ->
   case
       when  current_role() = 'SALES_MANAGER' and region_1 = 'Asia' then true
       when current_role() = 'OXY_ROLE' and region_1 = 'Europe' then true
       else false
   end;
Users can also perform the following in Compose for a policy:
Add or remove objects
Delete the policy
Create a Policy in Snowflake UI
When a policy is created or deleted, or when objects are added to or removed from a policy through the Snowflake UI, it may take up to two hours for the policy rules to be applied to the associated Snowflake tables or views. After this period, run Metadata Extraction (MDE) again for the changes to be reflected in Alation.