Customize Search Filters
Users with the Catalog and Server Admin roles can customize the full-page Search filters so catalog users can easily access the most essential filters.
You can choose the filters to include in the Object Type filter pane and the left-side filter panel.
Alation allows you to customize the Default Filters.
Important
Starting from version 2026.1.0.0, you can create custom filters specific to a user group. For more information, see Configure Group-Based Search Filters.
You can make changes to the following default filters:
Object Type Filters
Left Side Filters
Hidden Filters
Customize Object Type Filters
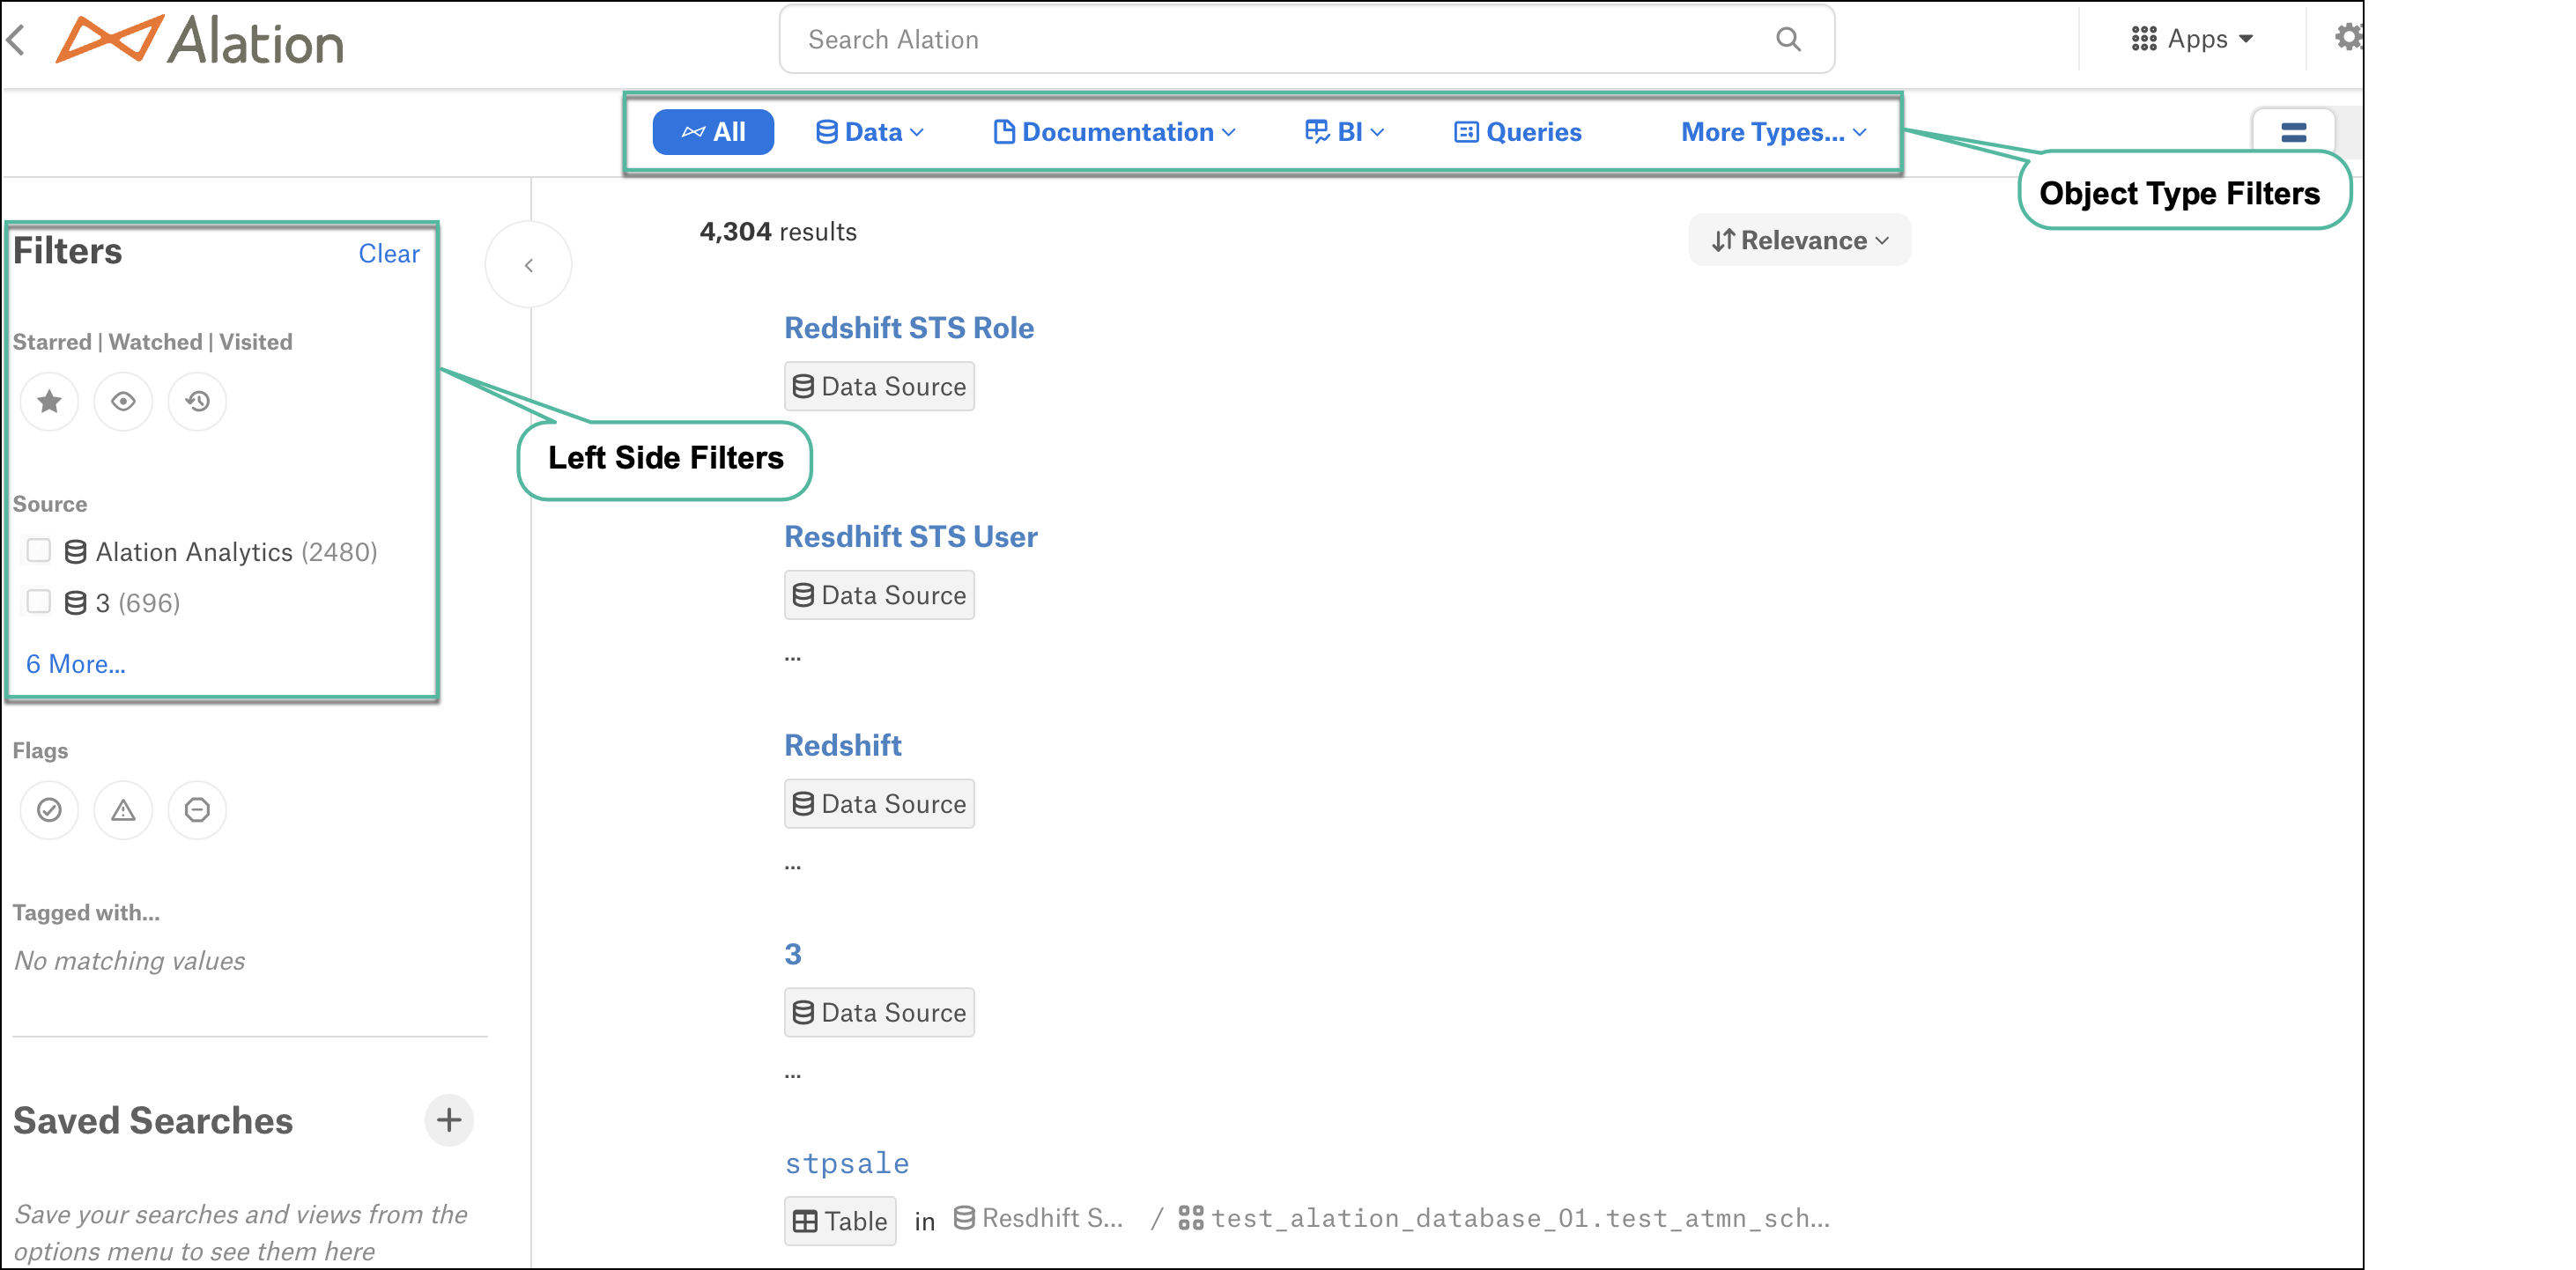
The Object Type filters are displayed above the results on the full-page Search and on top of the Browse this Domain table on catalog pages of domain objects.
By default, the following filters are displayed:
Data - Select filters to narrow your search results to specific data types. You can search within data sources, schemas, tables, columns, or result tables. Select the required options or select Select All to search among all data types.
Documentation - Select filters to search among the required documentation types. Some of the available documentation types are Glossaries, Terms, Article Groups, and Articles. Select the required options or select Select All to search among all documentation types.
BI - Select filters to search among the required BI types. The available options are BI Servers, BI Views, BI Folders, Dashboard Sheets, and BI Fields. Select the required options or select Select All to search among all documentation types.
Queries - Use this filter to search for query objects.
All other object type filters are accessible through the More Types option.
When you customize the object type filters pane, you customize it on both the full-page Search page and the Domains catalog page.
To customize the object type filters:
On the Alation home page, click the Settings gear icon in the top right corner.
Proceed depending on your role:
Catalog Admins: A dropdown menu appears. Click Customize Search Filters.
Server Admins: The Admin Settings page appears. Under the Customization section, click Search Filter Customization.
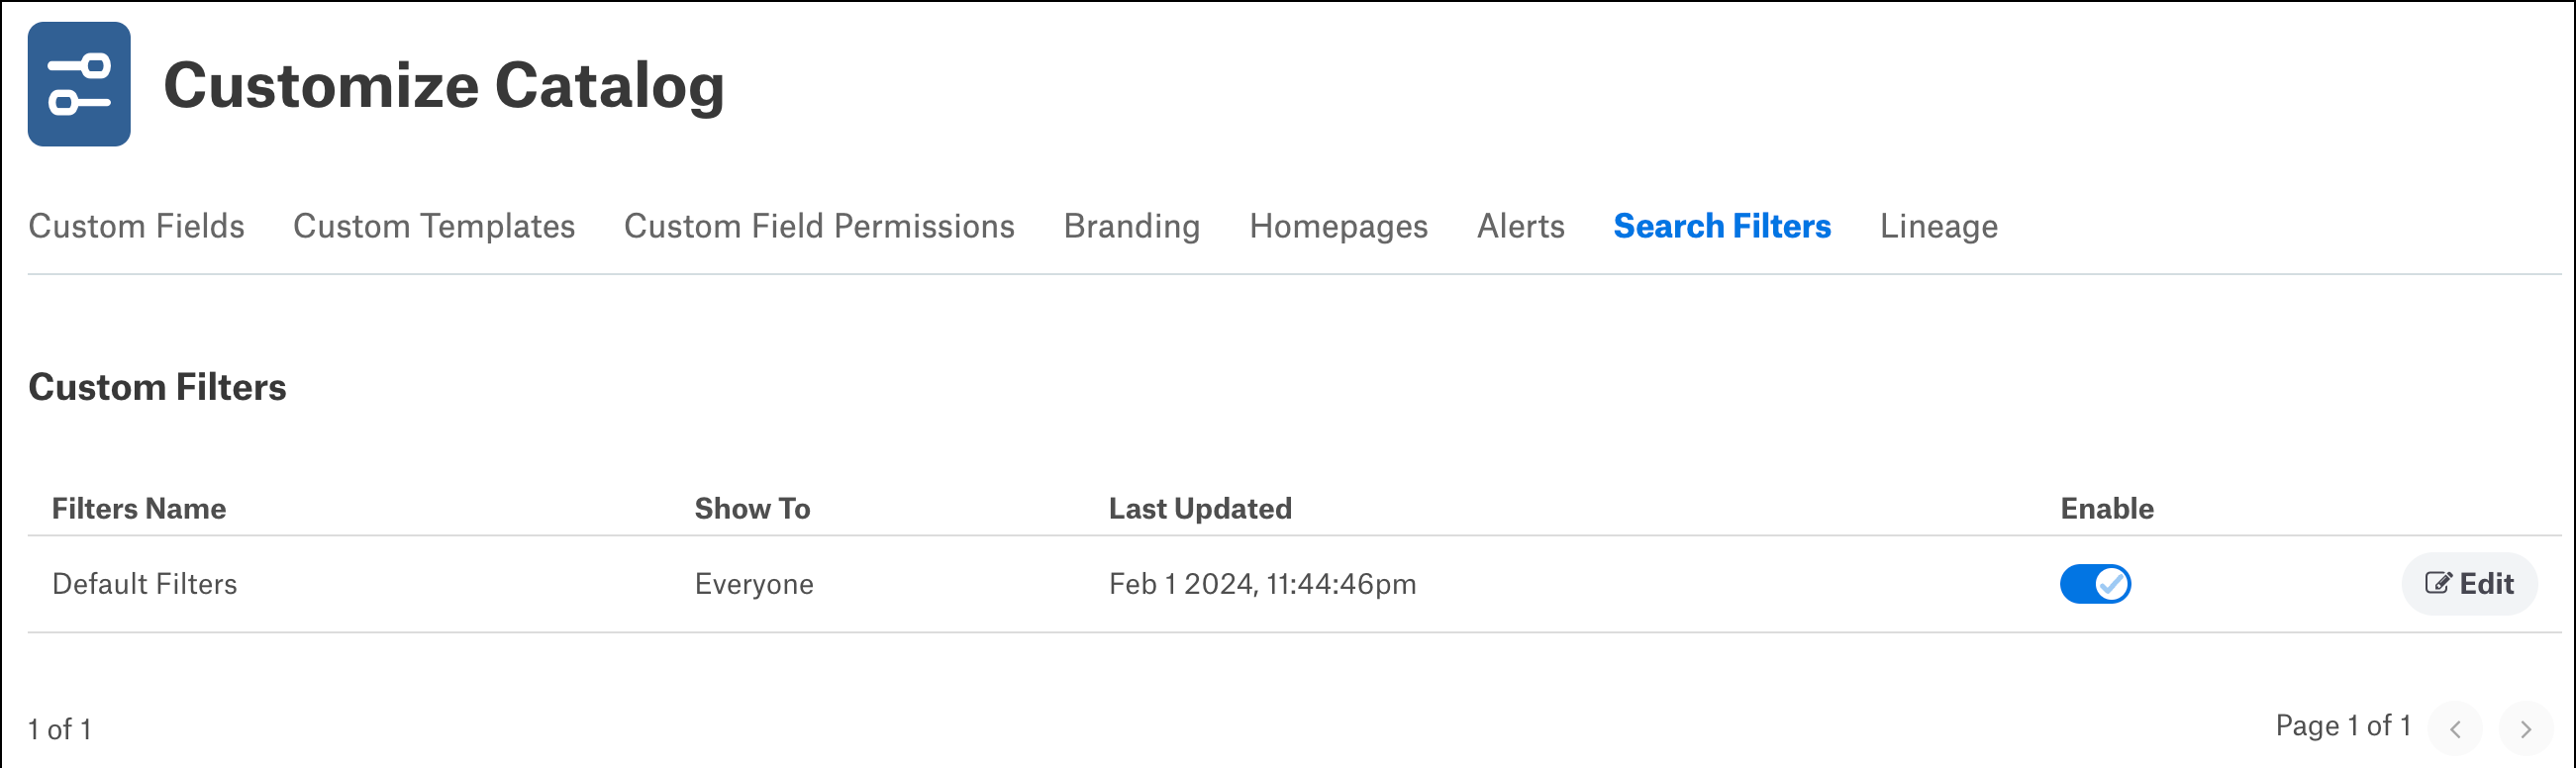
The Search Filters tab of the Customize Catalog page displaying the Custom Filters table appears.
In the Custom Filters table, click Edit
On the Default Filters page, click Object Type Filters.
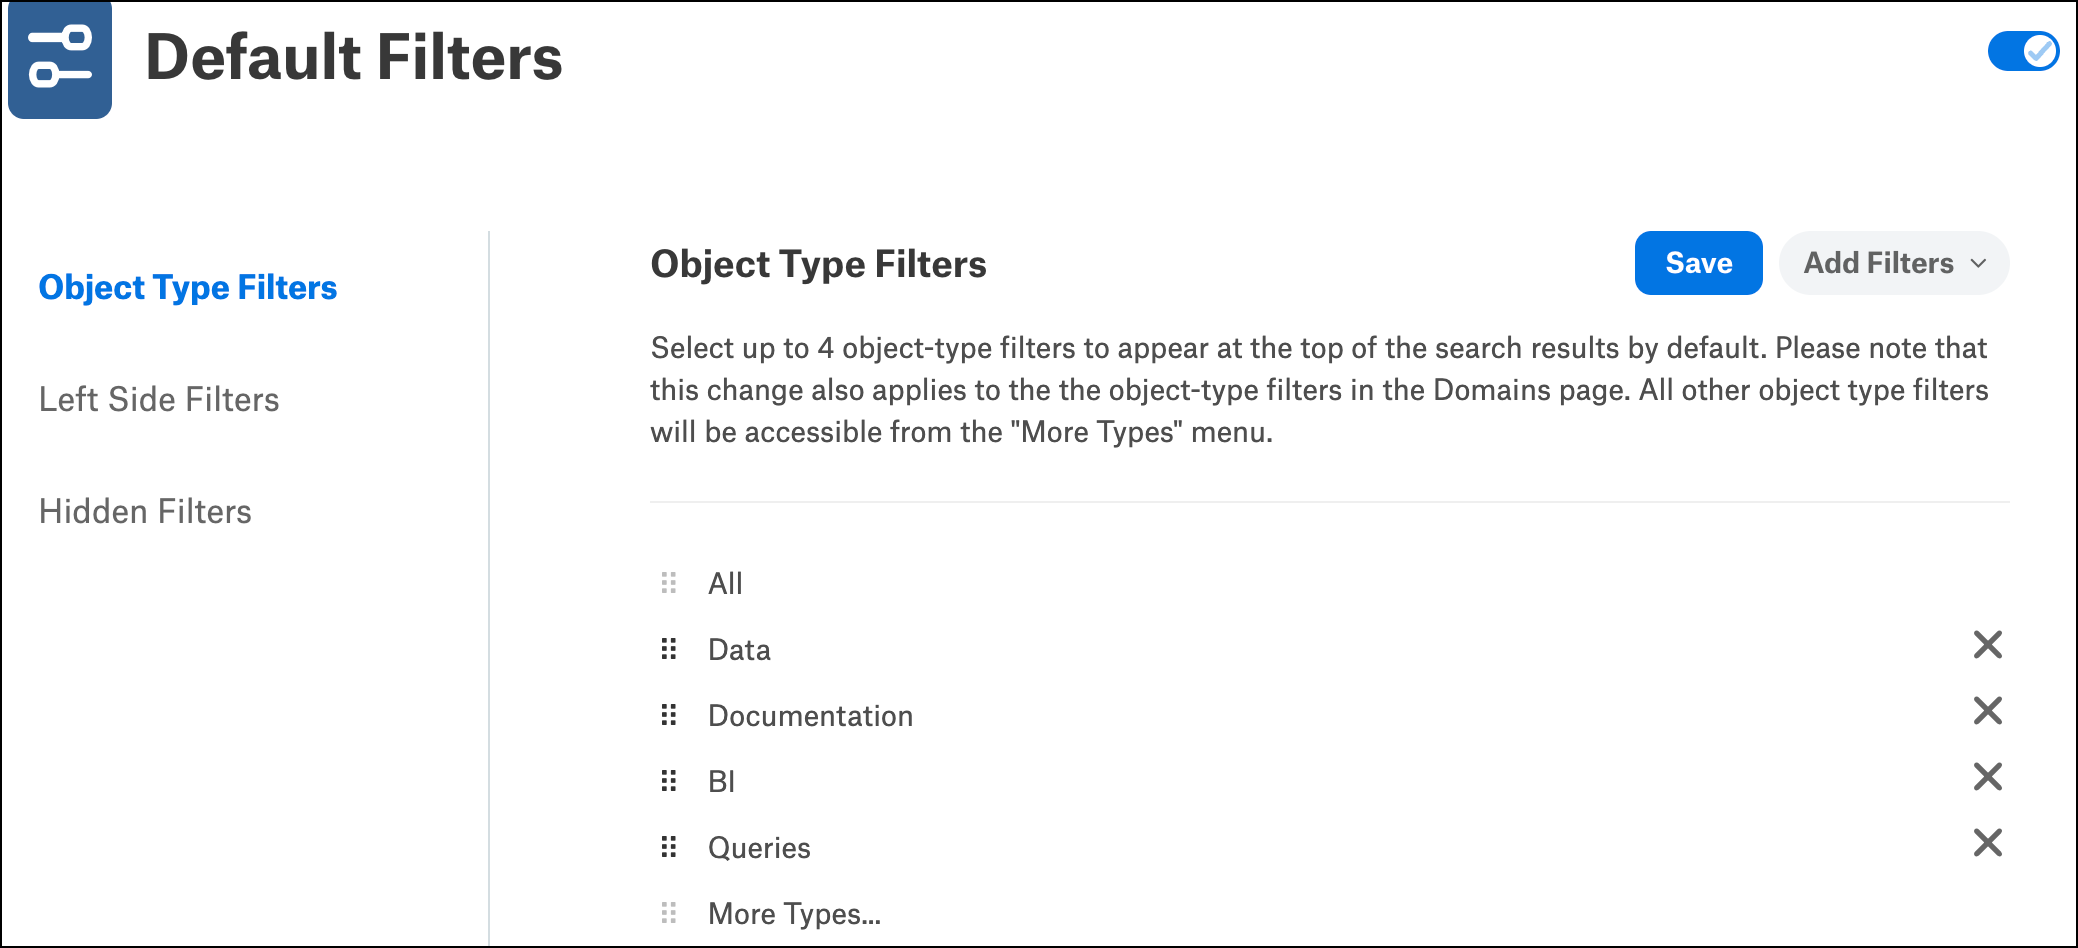
You can perform these customizations:
Reorder the list — Drag and drop the required object type to its new position in the list.
Note
The positions of the All (first) and More Types (last) elements cannot be changed.
Remove an object type — Click on the X icon next to an object type to remove it from the filter list.
Add other object types — Click Add Filters dropdown to open the complete list of available object types and select or clear the checkboxes to add or remove any object type.
Note
You can only select the parent object types, not the child object types.
You can include only up to four object types into the object type filter pane.
Click Save.
If you don’t want to apply the changes you made, you can navigate away from the page or reload the page without saving. Changes that haven’t been saved are discarded.
Navigate to the full-page Search to view your updates to the object type filter pane.
Customize Left-Side Filters
The left-side filters appear on the filter panel on the left of the search results. For example, some of the available filters are Source, Schema, Table Type, Template, and BI Source. Filters that are applicable to the selected object type are displayed when results are filtered by an object type. For example, if you choose to filter by Schema, you can search for tables and columns included within Schemas.
To customize the left-side filter panel:
On the Alation home page, click the Settings gear icon in the top right corner.
Proceed depending on your role:
Catalog Admins: A dropdown menu appears. Click Customize Search Filters.
Server Admins: The Admin Settings page appears. Under the Catalog Admin section, click Customize Search Filters.
The Search Filters tab of the Customize Catalog page displaying the Custom Filters table appears.
In the Custom Filters table, click Edit
On the Default Filters page, click Left Side Filters.
You can perform these customizations:
Reorder the list — Drag and drop the required object type to its new position in the list.
Remove an object type — Click on the X icon next to an object type to remove it from the filter list.
Add other object types — Click Add Filters dropdown to open the complete list of available object types and select or clear the checkboxes to add or remove any object type.
Note
You can include any number of filters.
Click Save.
If you don’t want to apply the changes you made, you can navigate away from the page or reload the page without saving. Changes that haven’t been saved are discarded.
Navigate to the full-page Search to view your updates to the object type filter pane.
Filter By Catalog
Applies from version 2023.3.5
For the RDBMS data sources that have catalog or database and have multipart schema names (Catalog_name.Schema_name), you can add the Catalog filter to the left-side filter panel. For example, in the multipart schema name ALATION_EDW.Retail, ALATION_EDW is the catalog name and Retail is the schema name. You can now search schemas based on the catalog name filter ALATION_EDW.
To display the Catalog filter on the left side filter panel, select and drag it to the top. This enables you to search by schema, table, and columns within a catalog.
Hide Left-Side Filters
You can hide filters that you do not want to display on the left-side filter panel. You may need to hide some filters if your catalog has a large number of custom fields, but only a few of them are useful as filters. When you choose to hide a filter, your catalog users won’t see it under the See More Filters option on the left side of the search results page.
To hide the left side filters:
On the Alation home page, click the Settings gear icon in the top right corner.
Proceed depending on your role:
Catalog Admins: A dropdown menu appears. Click Customize Search Filters.
Server Admins: The Admin Settings page appears. Under the Catalog Admin section, click Customize Search Filters.
The Search Filters tab of the Customize Catalog page displaying the Custom Filters table appears.
In the Custom Filters table, click Edit
On the Default Filters page, click Hidden Filters.
You can perform these customizations:
Reorder the list — Drag and drop the required object type to its new position in the list.
Remove an object type — Click on the X icon next to an object type to remove it from the filter list.
Add other object types — Click Add Filters dropdown to open the complete list of available object types and select or clear the checkboxes to add or remove any object type.
Note
You can include any number of filters.
Click Save.
If you don’t want to apply the changes you made, you can navigate away from the page or reload the page without saving. Changes that haven’t been saved are discarded.
Navigate to the full-page Search to view your updates to the object type filter pane.
Configure Group-Based Search Filters
Note
Applies from version 2026.1.0.0.
You can scope custom search filters to specific user groups, enabling more relevant and targeted search experiences across teams and departments. This allows you to show only the relevant set of filters on the left side filter panel on the Search page to different groups of users, reducing the time to navigate through a large set of filters.
To create a group-based search filter:
On the Alation home page, click the Settings gear icon in the top right corner.
Proceed depending on your role:
Catalog Admins: A dropdown menu appears. Click Customize Search Filters.
Server Admins: The Admin Settings page appears. Under the Customization section, click Search Filter Customization.
The Search Filters tab of the Customize Catalog page displaying the Custom Filters table appears.
Click New Custom Filter.
Optionally, in the New Custom Filter page , edit this default title (New Custom Filter) to provide a relevant name to the filter configuration.
On the New Custom Filter page, perform the following:
Customize the object type filters. Use the information in the Customize Object Type Filters section to make the required customizations.
Customize the left-side filters. Use the information in the Customize Left-Side Filters section to make the required customizations.
Hide filters that are not relevant to the selected user group. Use the information in the Hide Left-Side Filters section to make the required customizations.
Assign the applicable groups to the filter. See Assign Applicable Groups
Click Save.
If you don’t want to apply the changes you made, you can navigate away from the page or reload the page without saving. Changes that haven’t been saved are discarded.
Note
You can include any number of custom filters.
Turn on the Enable Filter Setting toggle to activate the filter for the selected user group.
Note
You can have only one active filter for each user group. If a user belongs to multiple groups with active filters, visible filters are combined and hidden filters are applied conservatively.
You can edit a group-based filter by clicking the Edit button in the Custom Filters table and making the required changes.
You can also delete a group-based filter.
To delete a group-based filter:
Click the Edit button in the Custom Filters table for the required filter.
On the filter details page, click on the three dots next to the Enable Filter Setting toggle.
Select Delete.
Use a group-based custom filter as a template to create another group-based filter. To do that, click on the three dots next to the Enable Filter Setting toggle and select Duplicate. This will create a copy of the existing filter with the same configurations, which you can then edit and assign to another user group.
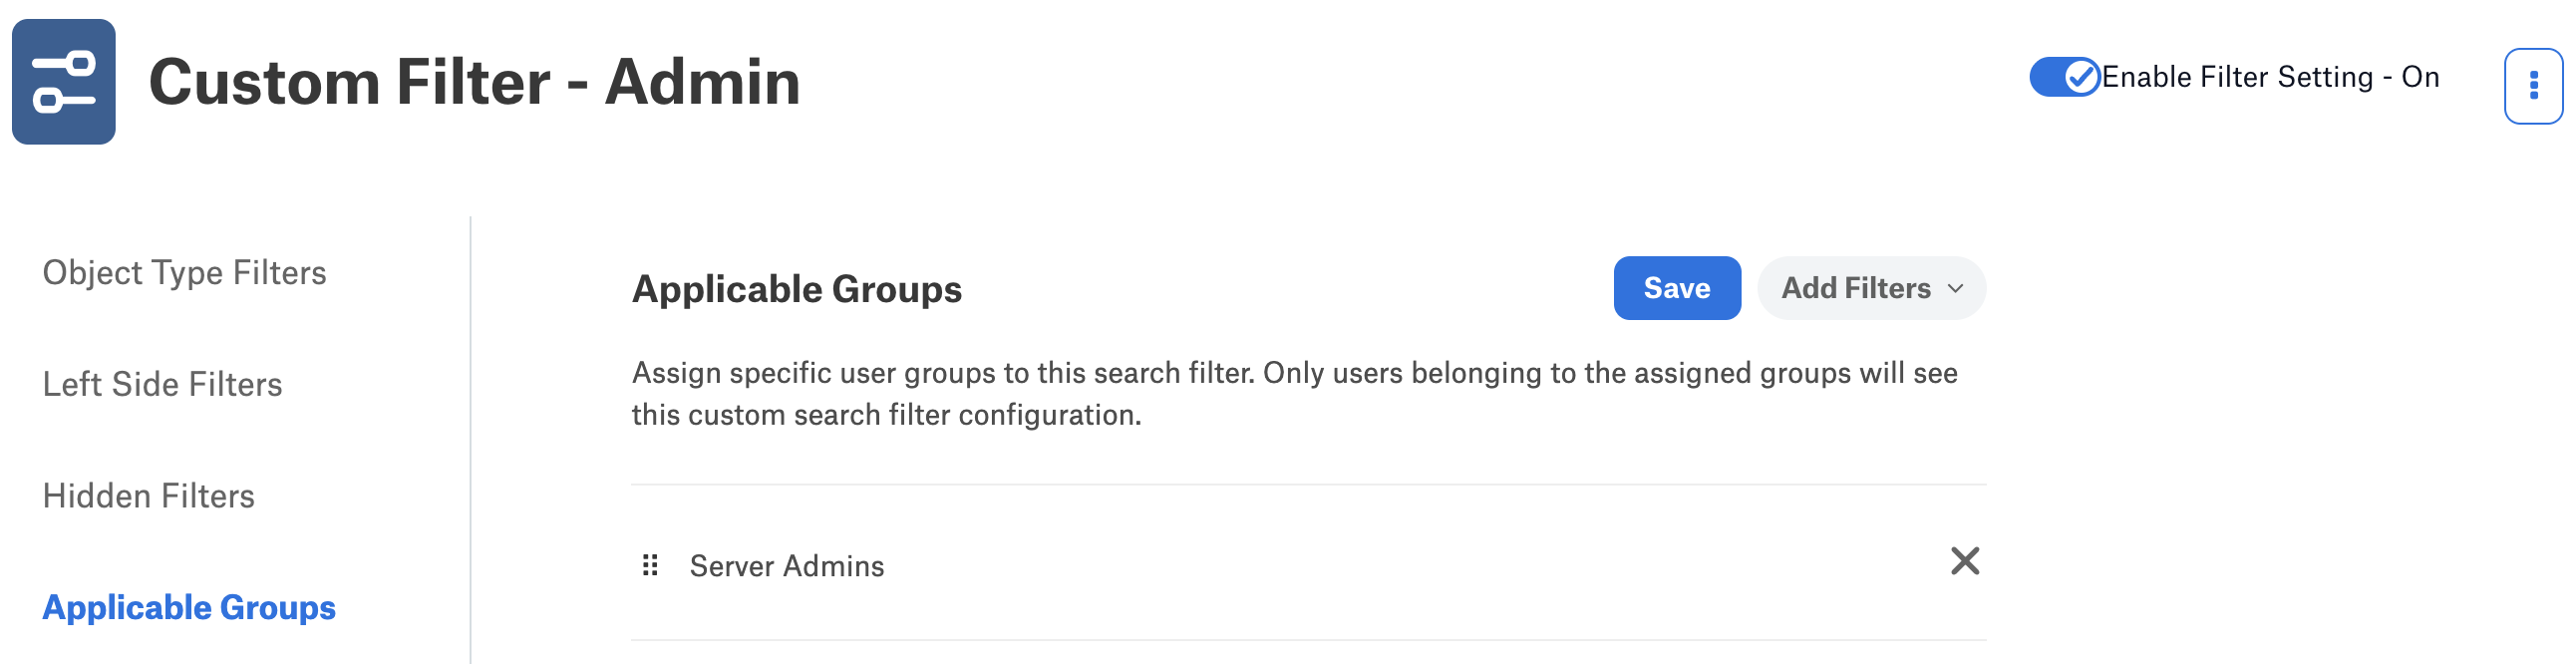
Assign Applicable Groups
This setting controls which users will see this specific filter configuration. Users see only the filters relevant to their groups in the full-search left panel, while users without an assigned group fall back to the Default Filters settings (which cannot be deleted). Each group can be assigned to only one filter setting; if a user belongs to multiple groups, visible filters are combined and hidden filters are applied conservatively.
To assign applicable groups to the custom filter:
On the New Custom Filter page, select Applicable Groups from the left navigation.
Click Add Filters to search for and select required user groups (for example, Server Admins, Catalog Admins, Viewer) to which you want to apply this custom filter.
Click Save.
If you don’t want to apply the changes you made, you can navigate away from the page or reload the page without saving. Changes that haven’t been saved are discarded.