Integrate with Azure Key Vault Using a Managed Identity
Alation Cloud Service Applies to Alation Cloud Service instances of Alation
Available on the Deluxe, Enterprise, and Enterprise+ plans only
Applies from version 2025.1.2
Overview
Alation now supports integration with Azure Key Vault (AKV) using managed identities through the Alation Agent’s Authentication Server. This feature allows an Alation Agent installed on an Azure Virtual Machine to authenticate with AKV using either a system-assigned or user-assigned managed identity, configured directly in the Azure portal. This enables users to have a secure and streamlined credential management within their own infrastructure eliminating the need to store client secrets in Alation.
Prerequisites
You must be on Alation Cloud Service version 2025.1.2 or later.
You must have Alation Agent version 1.8.10.5154 or later installed on an Azure VM. For more information, see Agent Release Notes.
You must have Authentication Service add-on version 5.14.0.2322 or later installed on the Alation Agent. For more information, see Authentication Service Add-on.
You must have the Server Admin role to set up the integration in Alation.
You must have access to the Azure Key Vault management console and permissions to configure vault policies and authentication methods.
Set Up Integration with Azure Key Vault Using a Managed Identity
To set up the integration with Azure Key Vault using a managed identity for a data source, perform the following initial configurations:
Create a virtual machine on Azure portal where you will install Alation Agent if you have not created one. For more information, see Create Virtual Machine.
Choose one of the following methods for managed identity:
If you are integrating using a user-assigned managed identity, follow the steps for user-assigned managed identity.
If you are integrating using a system-managed managed identity, follow the steps for enabling system-assigned managed identity.
Grant the managed identity access to Azure Key Vault. The method depends on the authorization model your vault uses:
For vaults using Access Policies (existing vaults): Create an access policy to grant the managed identity access to Azure Key Vault. When selecting the principal, choose the managed identity you created in the prior step. For more information, see Assign Access Policy.
For vaults using Azure RBAC (default for new vaults created after February 2026): Assign RBAC roles to the managed identity. See Assign RBAC Roles for Azure Key Vault below for instructions.
Note
Azure RBAC and Access Policies are mutually exclusive: a vault uses one or the other. Existing vaults using Access Policies continue to work unchanged. New vaults created after February 2026 default to Azure RBAC. For more information, see Azure RBAC for Key Vault data plane operations.
If you are integrating using a user-assigned managed identity, associate the managed identity with the virtual machine that has the Alation Agent installed on it. For more information, see Assign a User-assigned Managed Identity.
Assign RBAC Roles for Azure Key Vault
Starting February 2026 (API version 2026-02-01), newly created Azure Key Vaults default to Azure Role-Based Access Control (RBAC) for authorization. If your vault uses Azure RBAC, assign the appropriate roles to your service principal or managed identity using the following steps. For more information, see Azure RBAC for Key Vault data plane operations.
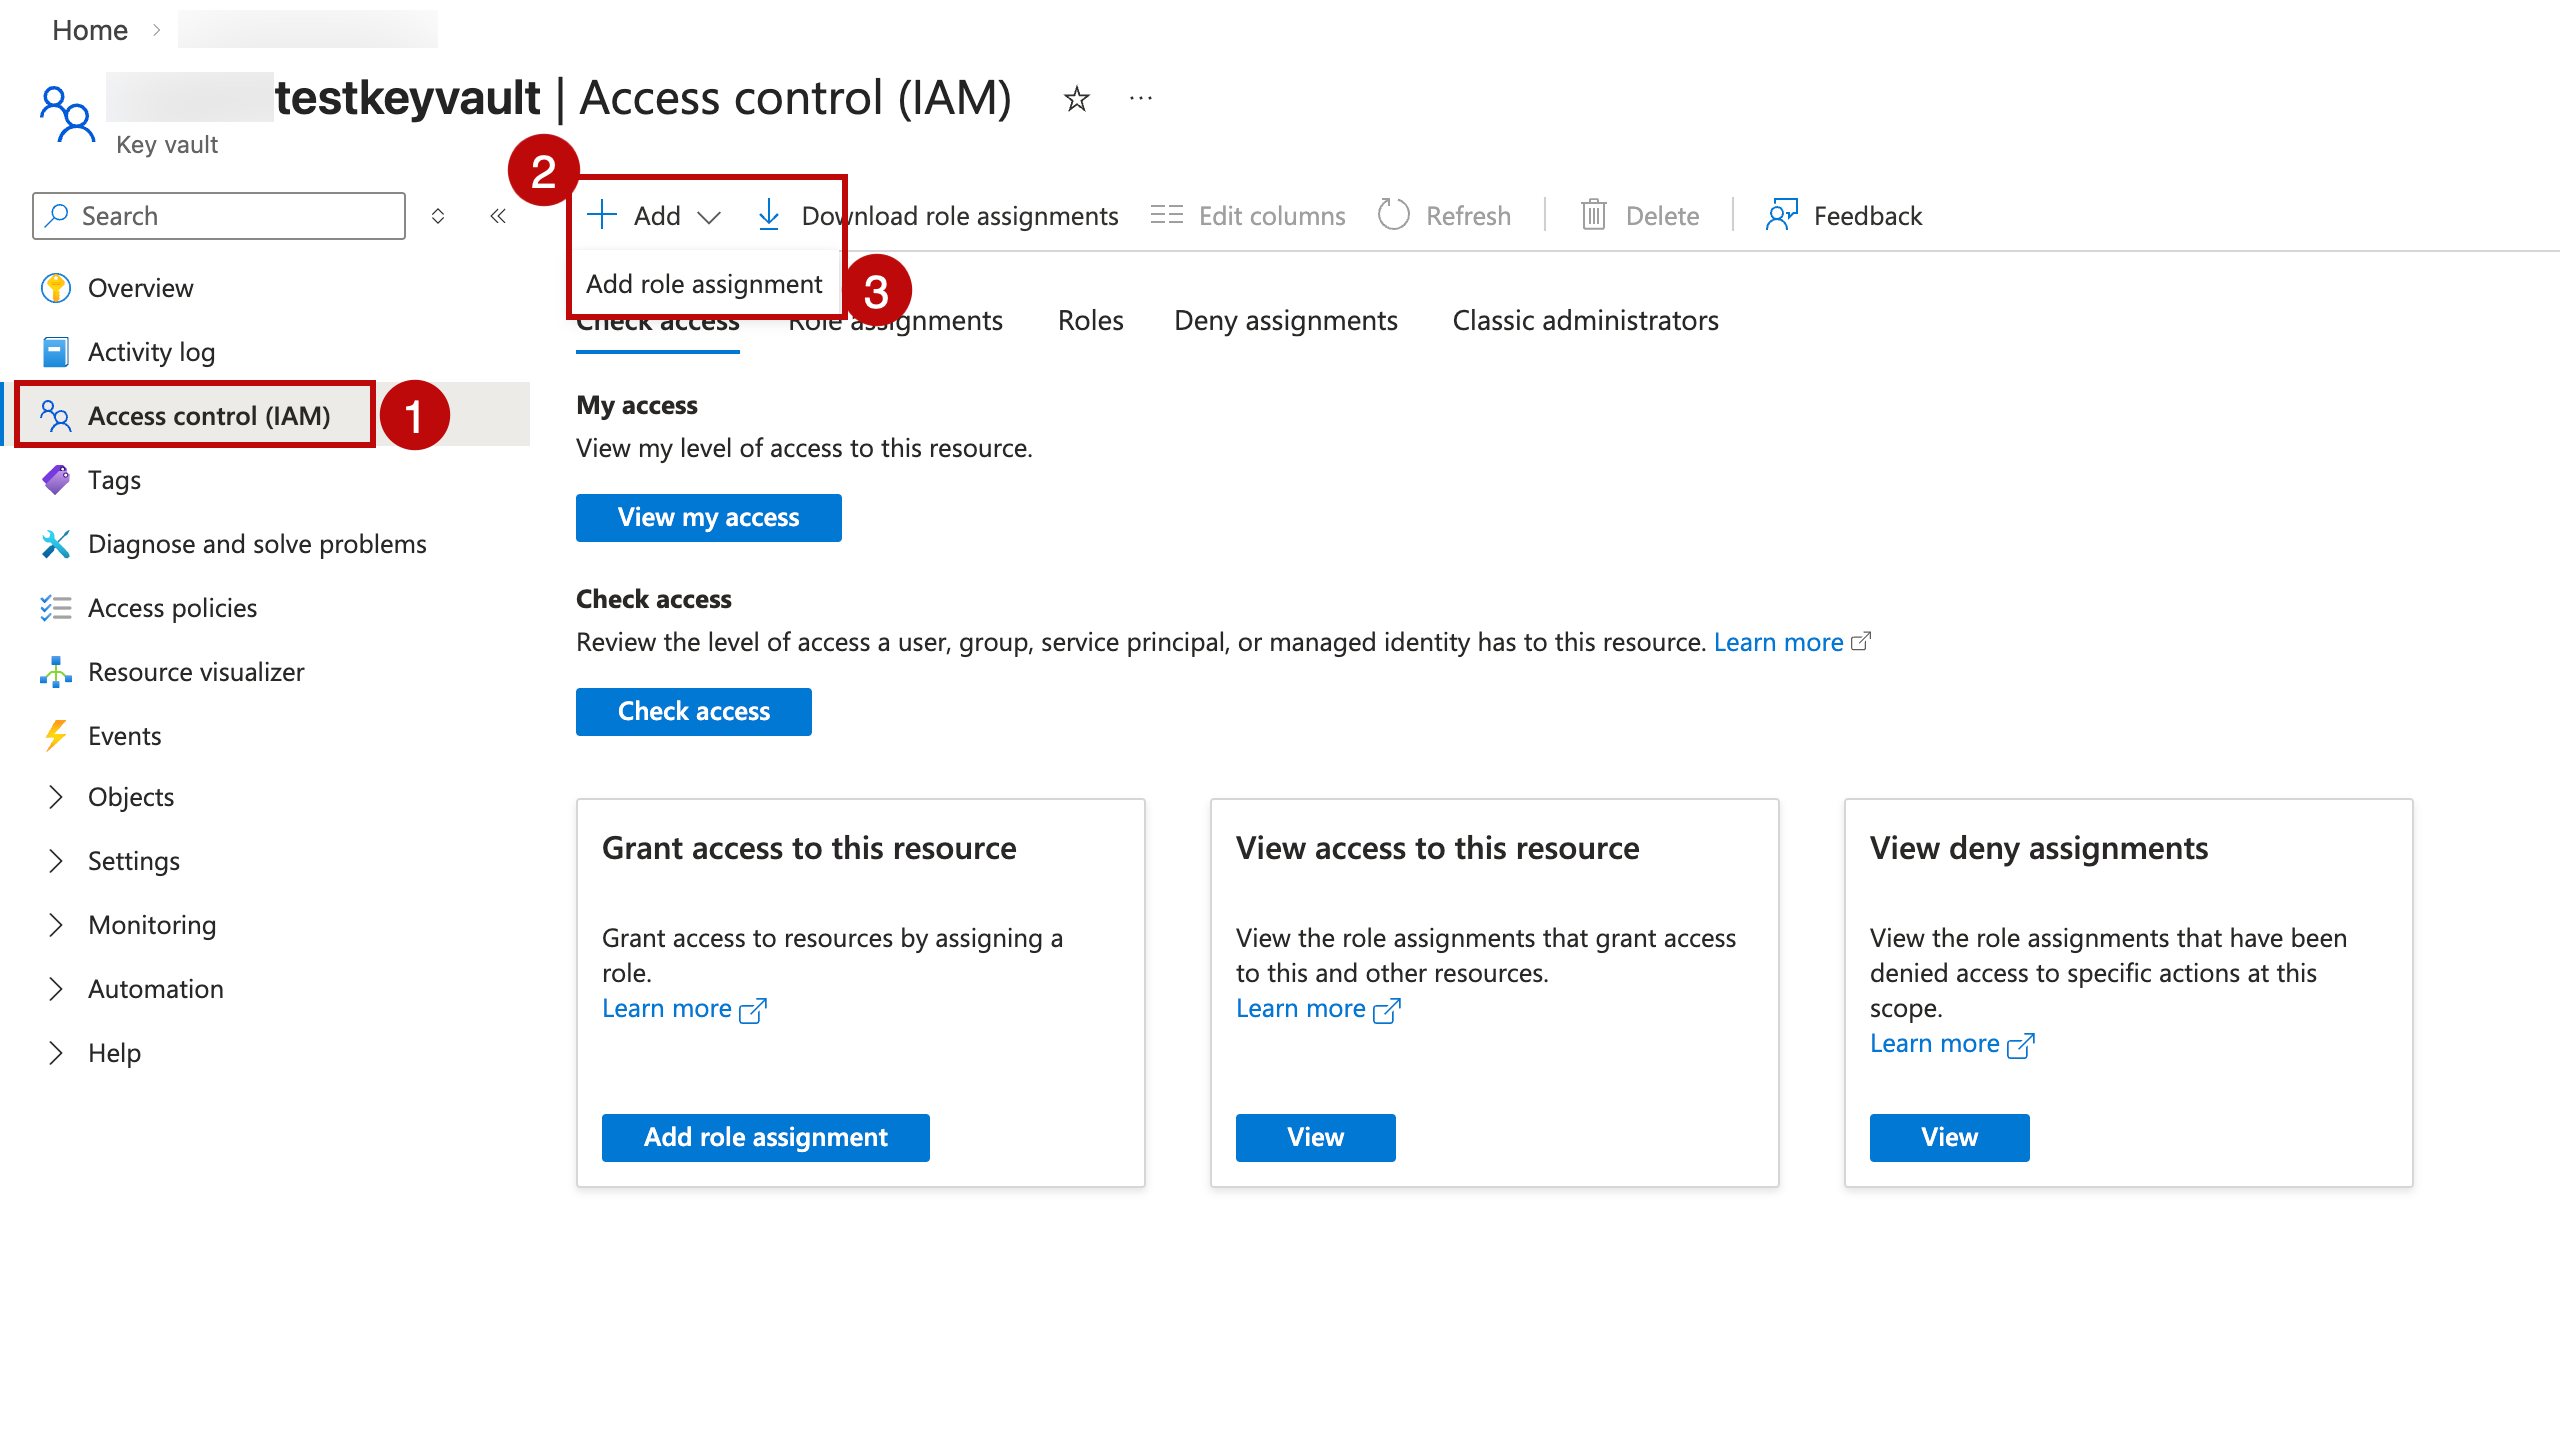
Navigate to your Key Vault in the Azure portal.
Click Access control (IAM) in the left menu.
Click + Add and select Add role assignment.
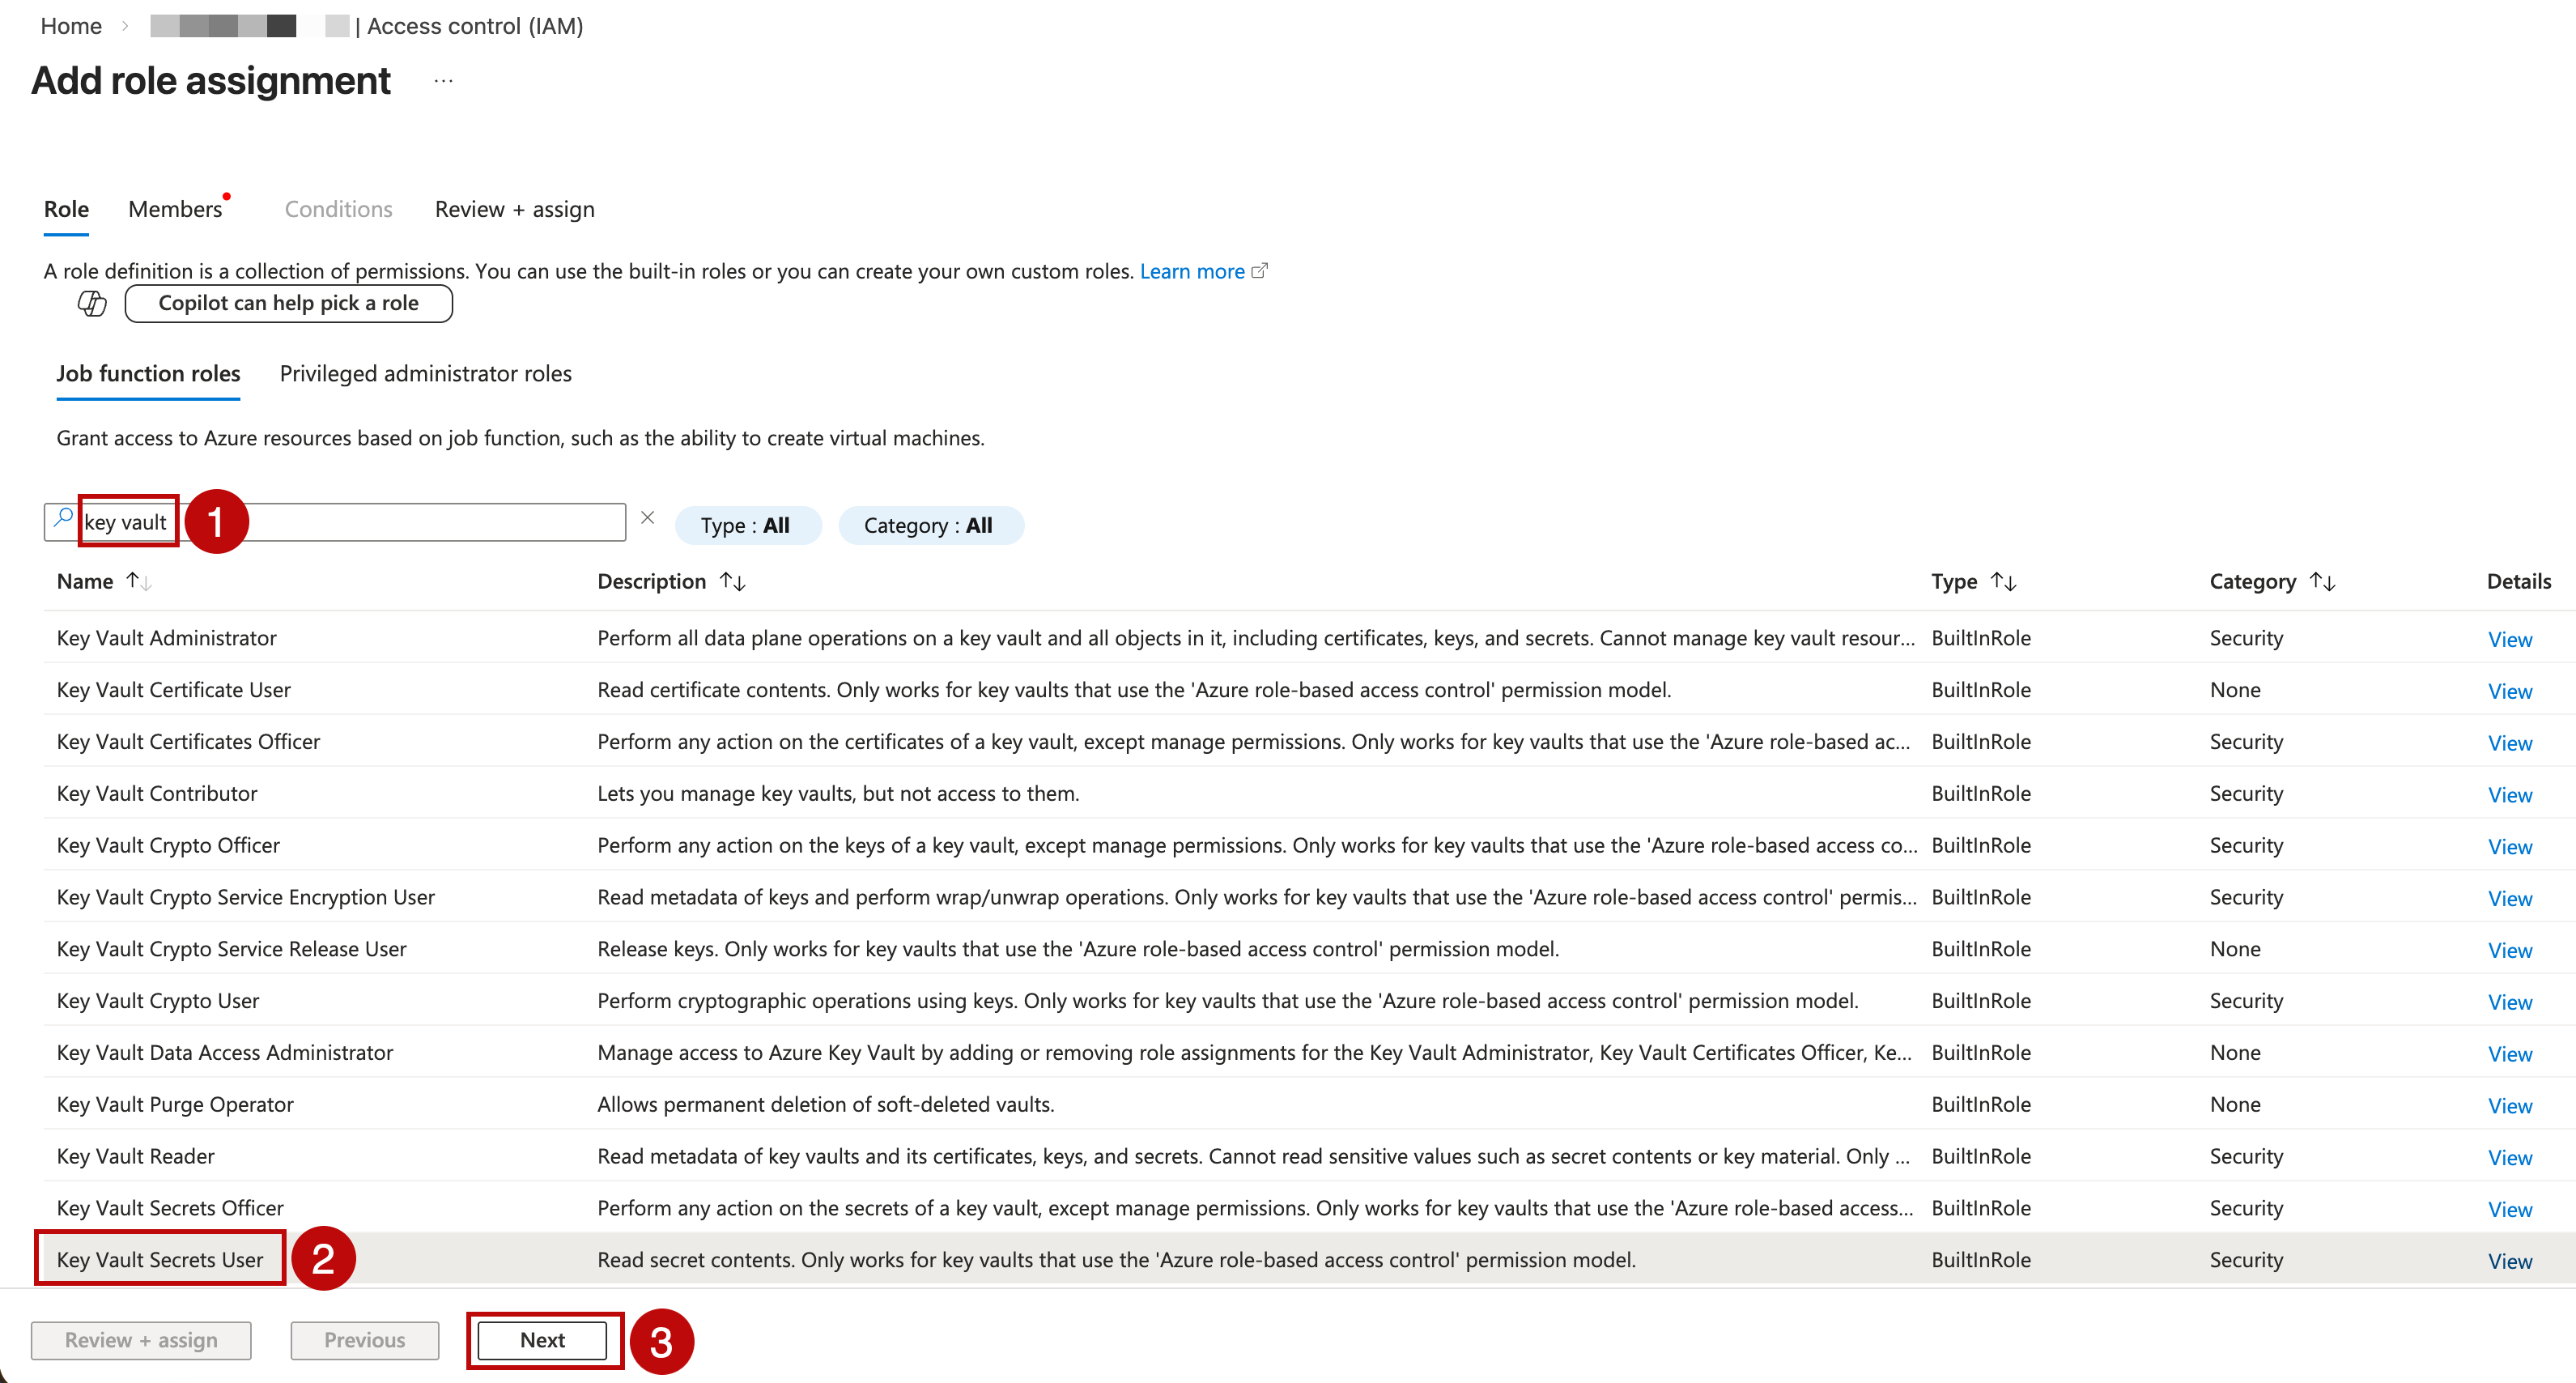
On the Role tab, select the built-in roles required for your use case:
For
GetandListpermissions on secrets, select Key Vault Secrets User.For
GetandListpermissions on keys (for cryptographic operations), select Key Vault Crypto User.
Note
You can also create custom roles with specific permissions. For more information, see Create custom roles.
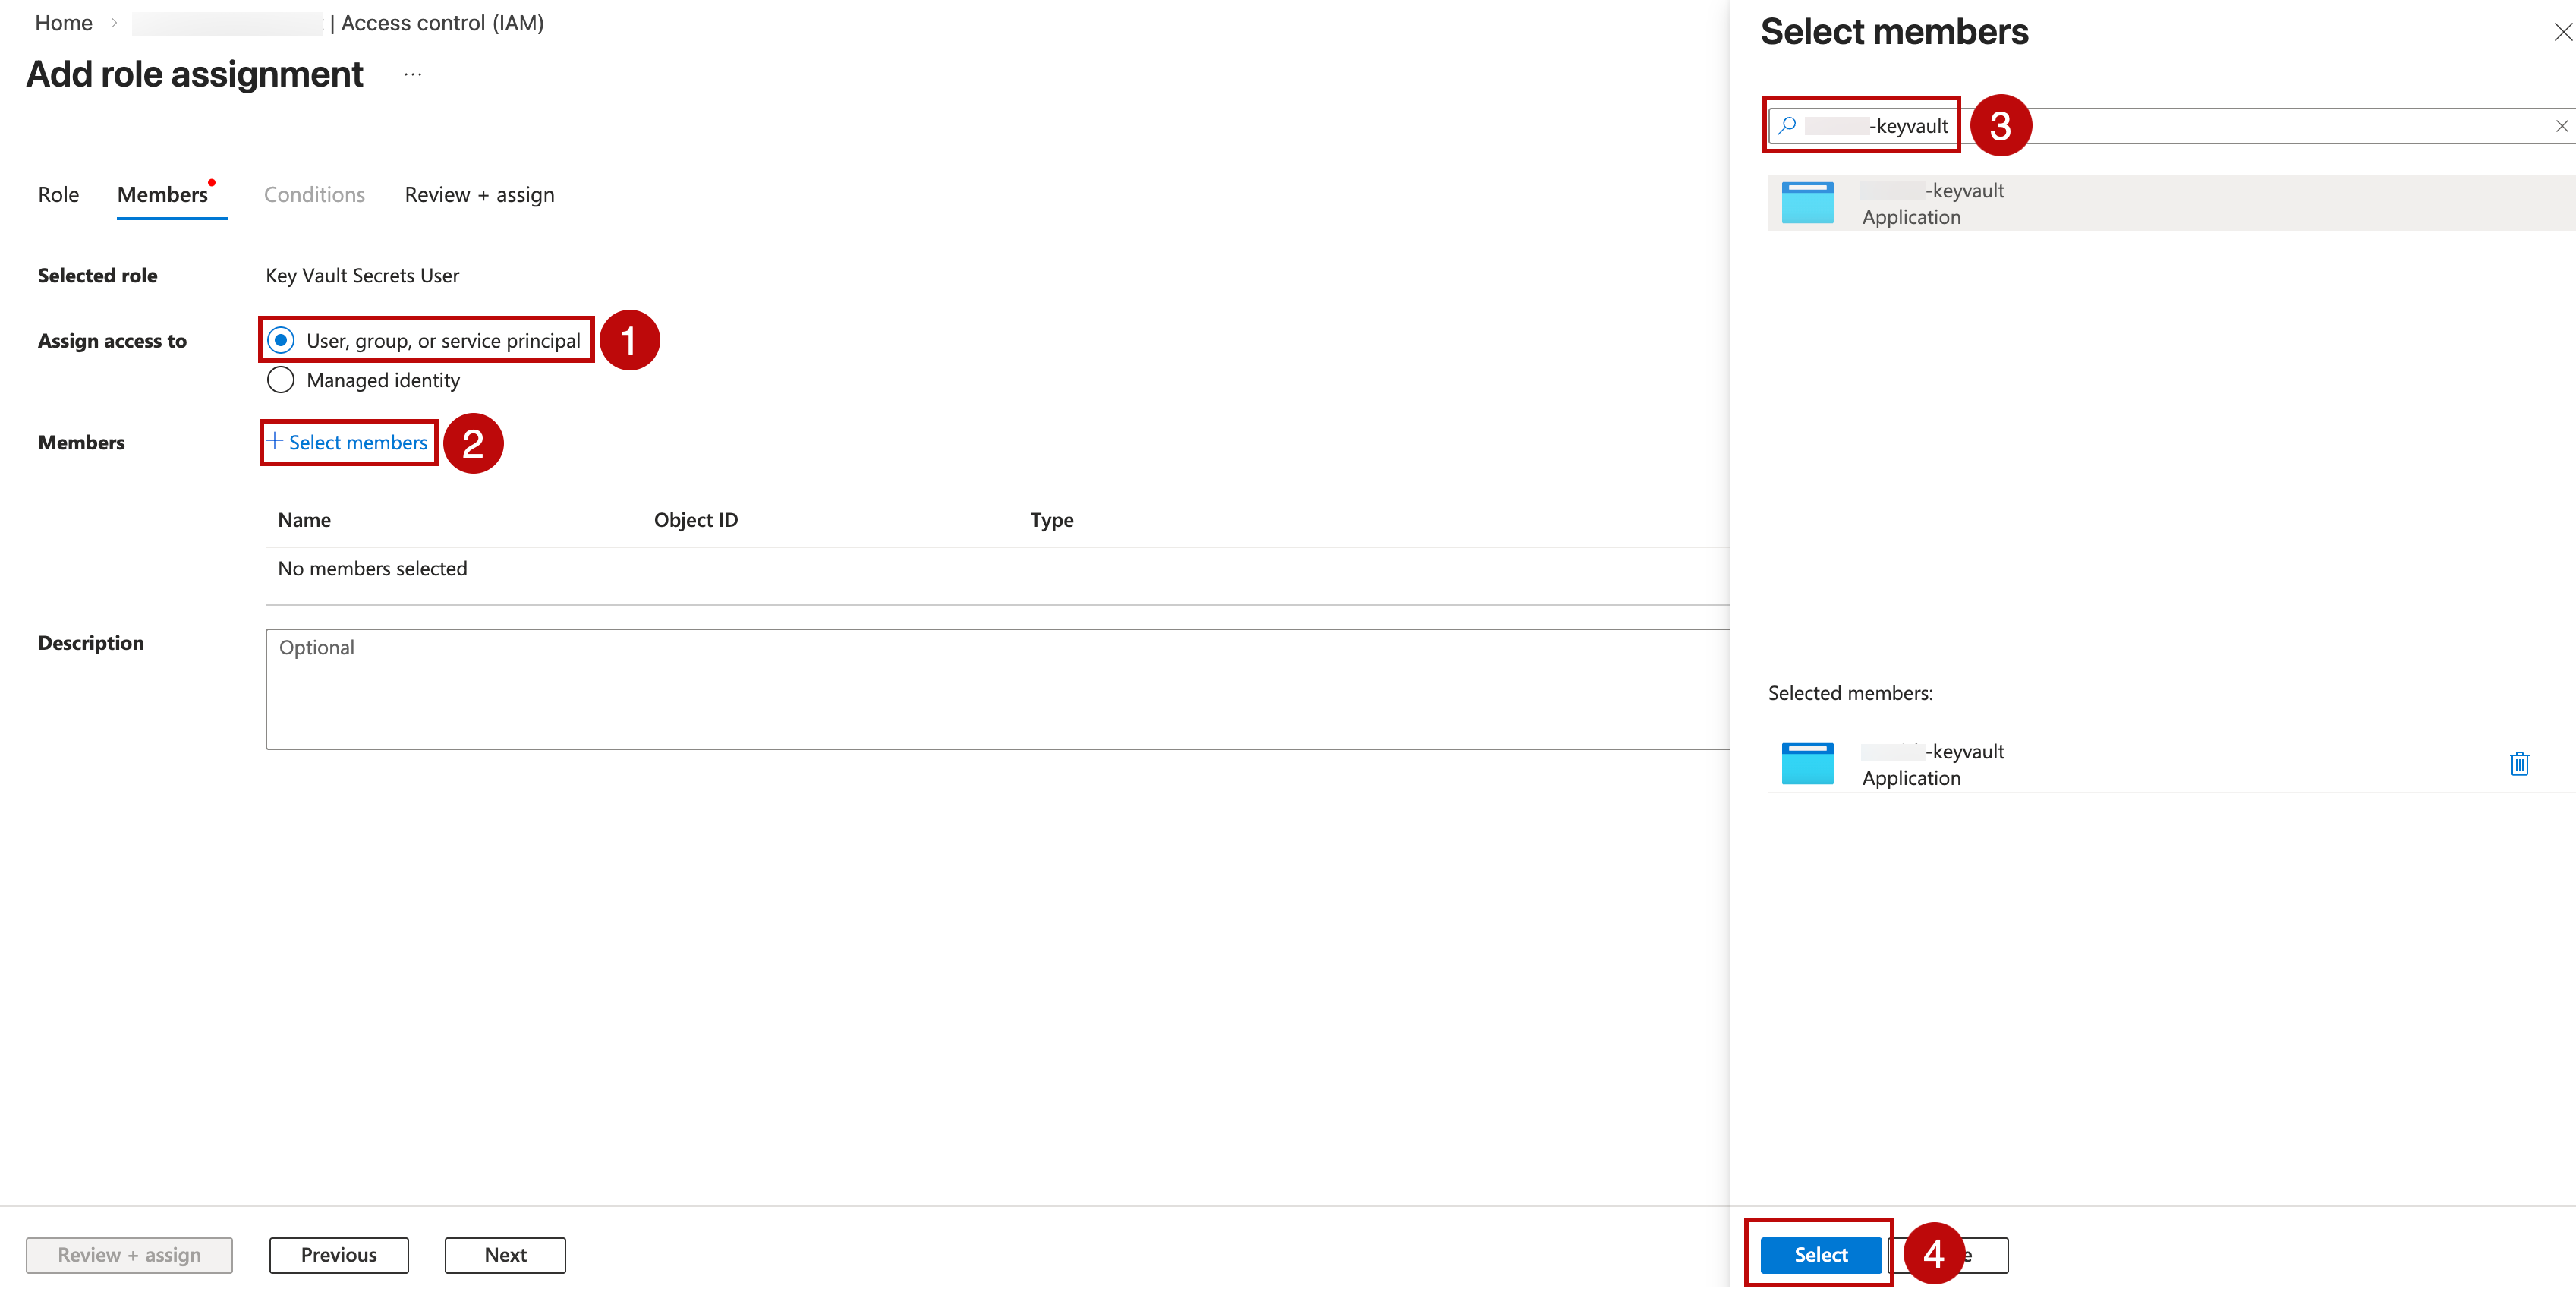
On the Members tab, select the identity type that matches your authentication method:
For client secret credentials authentication:
Select User, group, or service principal.
Click + Select members.
Search by App Registration name or client ID.
Select the service principal. Click Select.
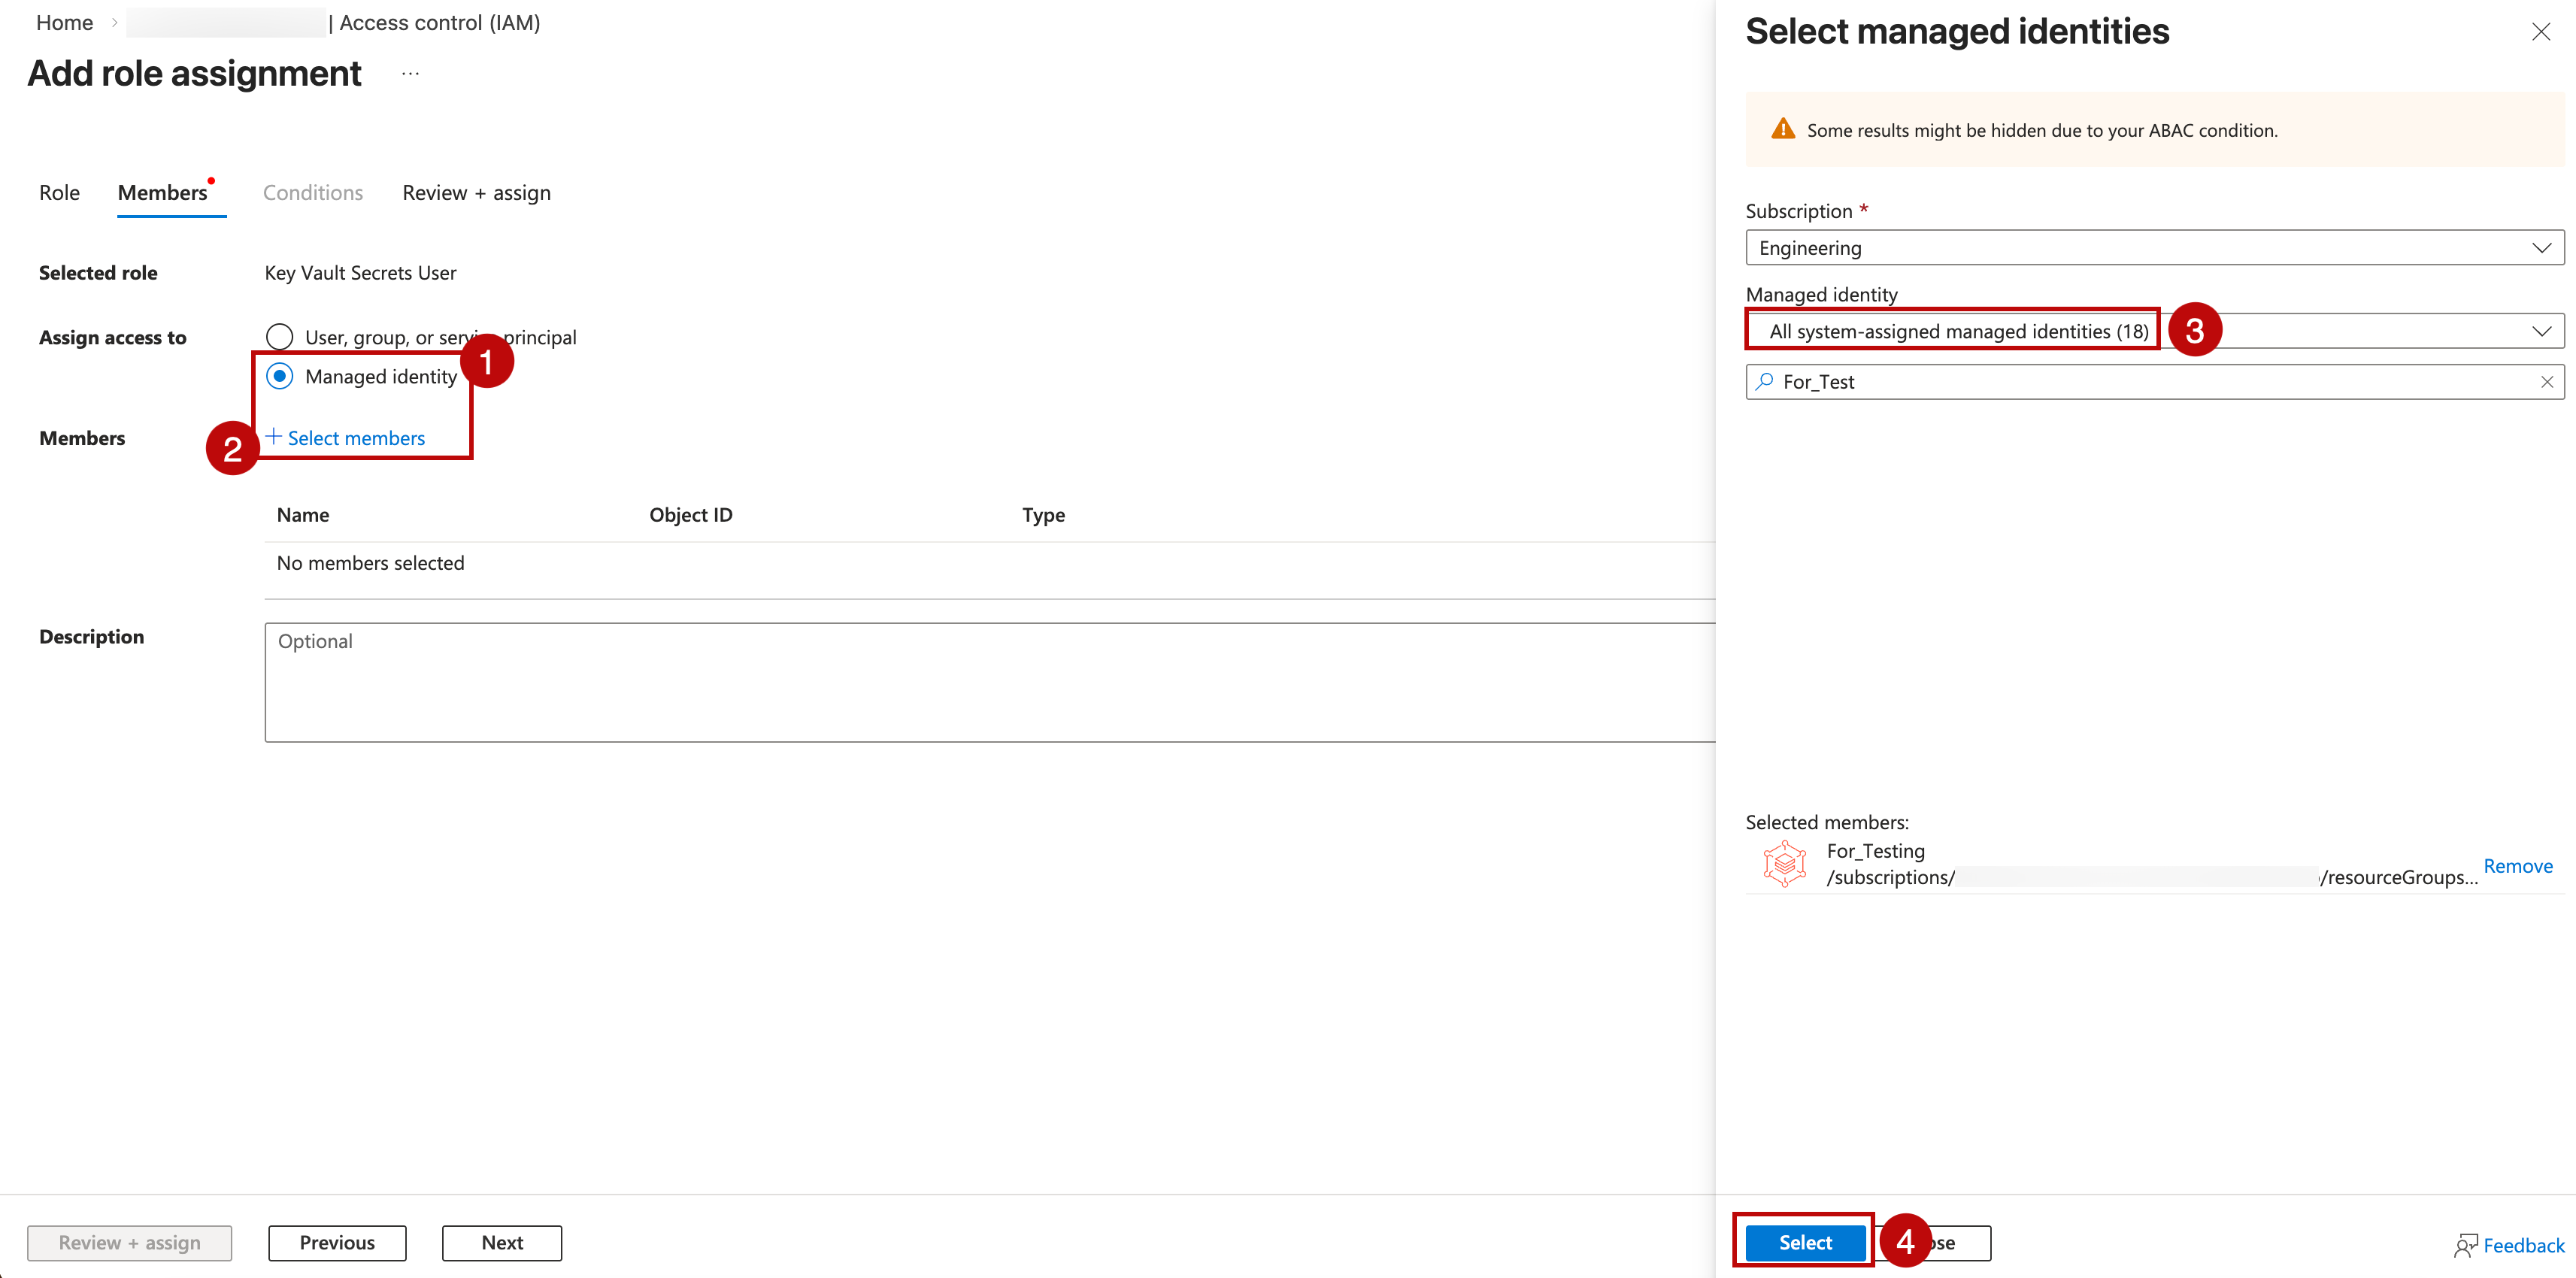
For user-assigned managed identity authentication:
Select Managed identity.
Click + Select members.
In the Managed identity dropdown, choose User-assigned managed identity.
Select the subscription and the managed identity matching your client ID. Click Select.
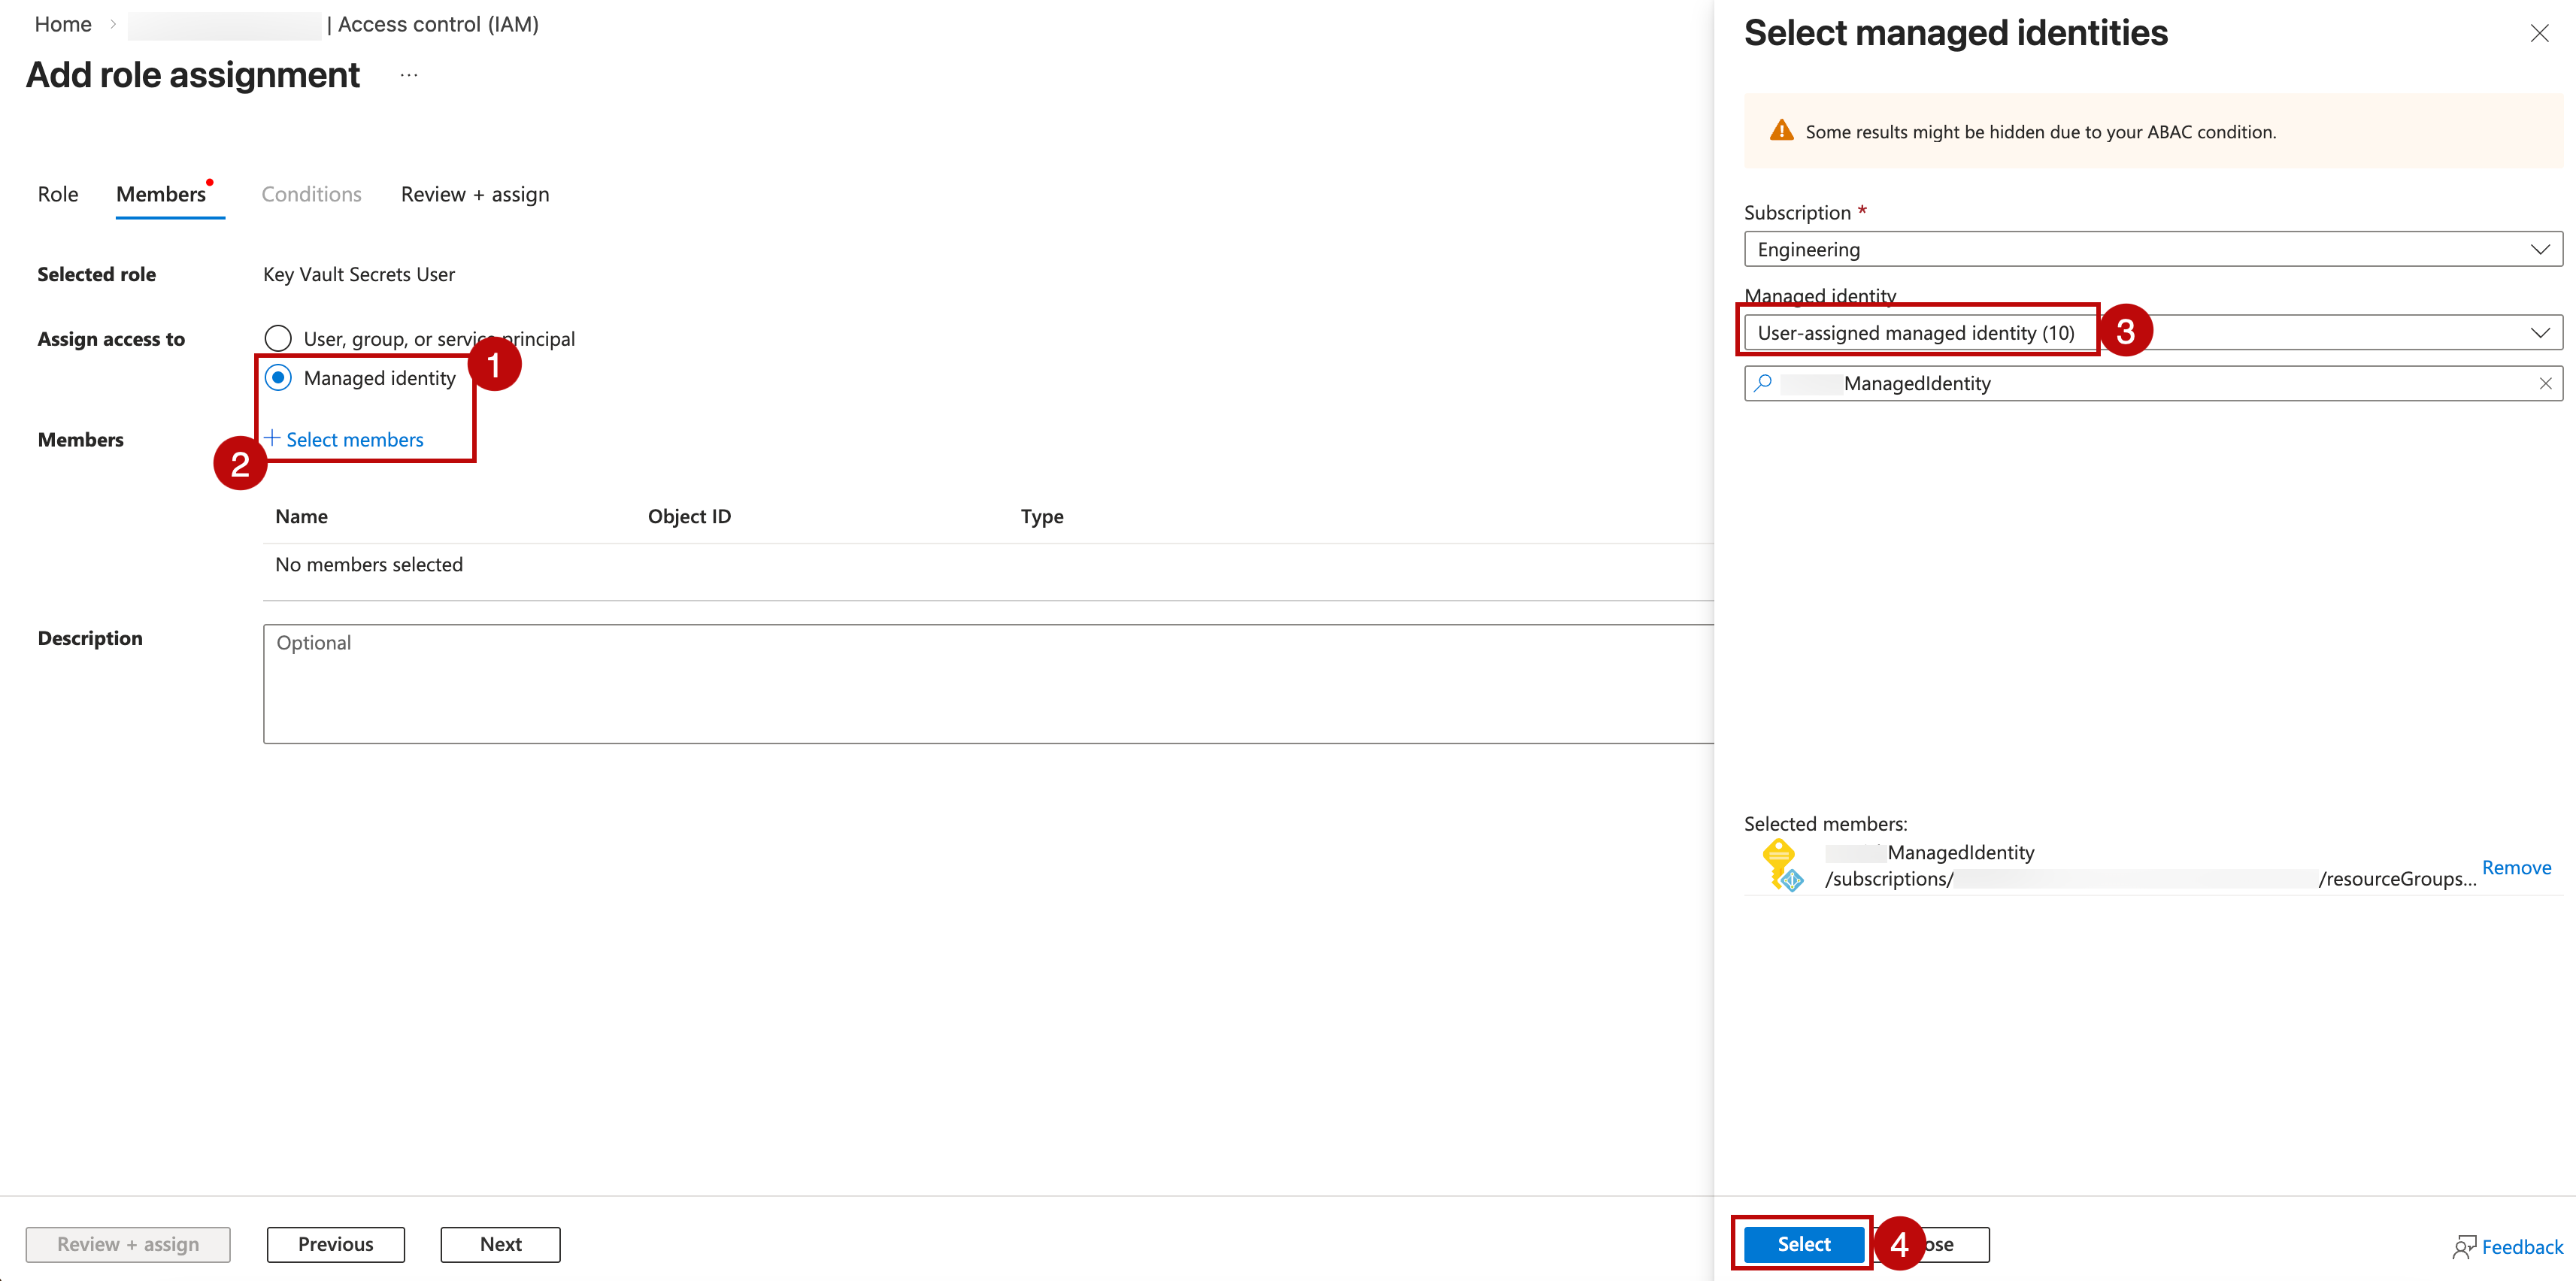
For system-assigned managed identity authentication:
Select Managed identity.
Click + Select members.
In the Managed identity dropdown, choose the resource type (for example, Virtual machine).
Select the subscription and the Alation host resource. Click Select.
Click Review + assign to review the role assignment, then click Review + assign again to confirm.
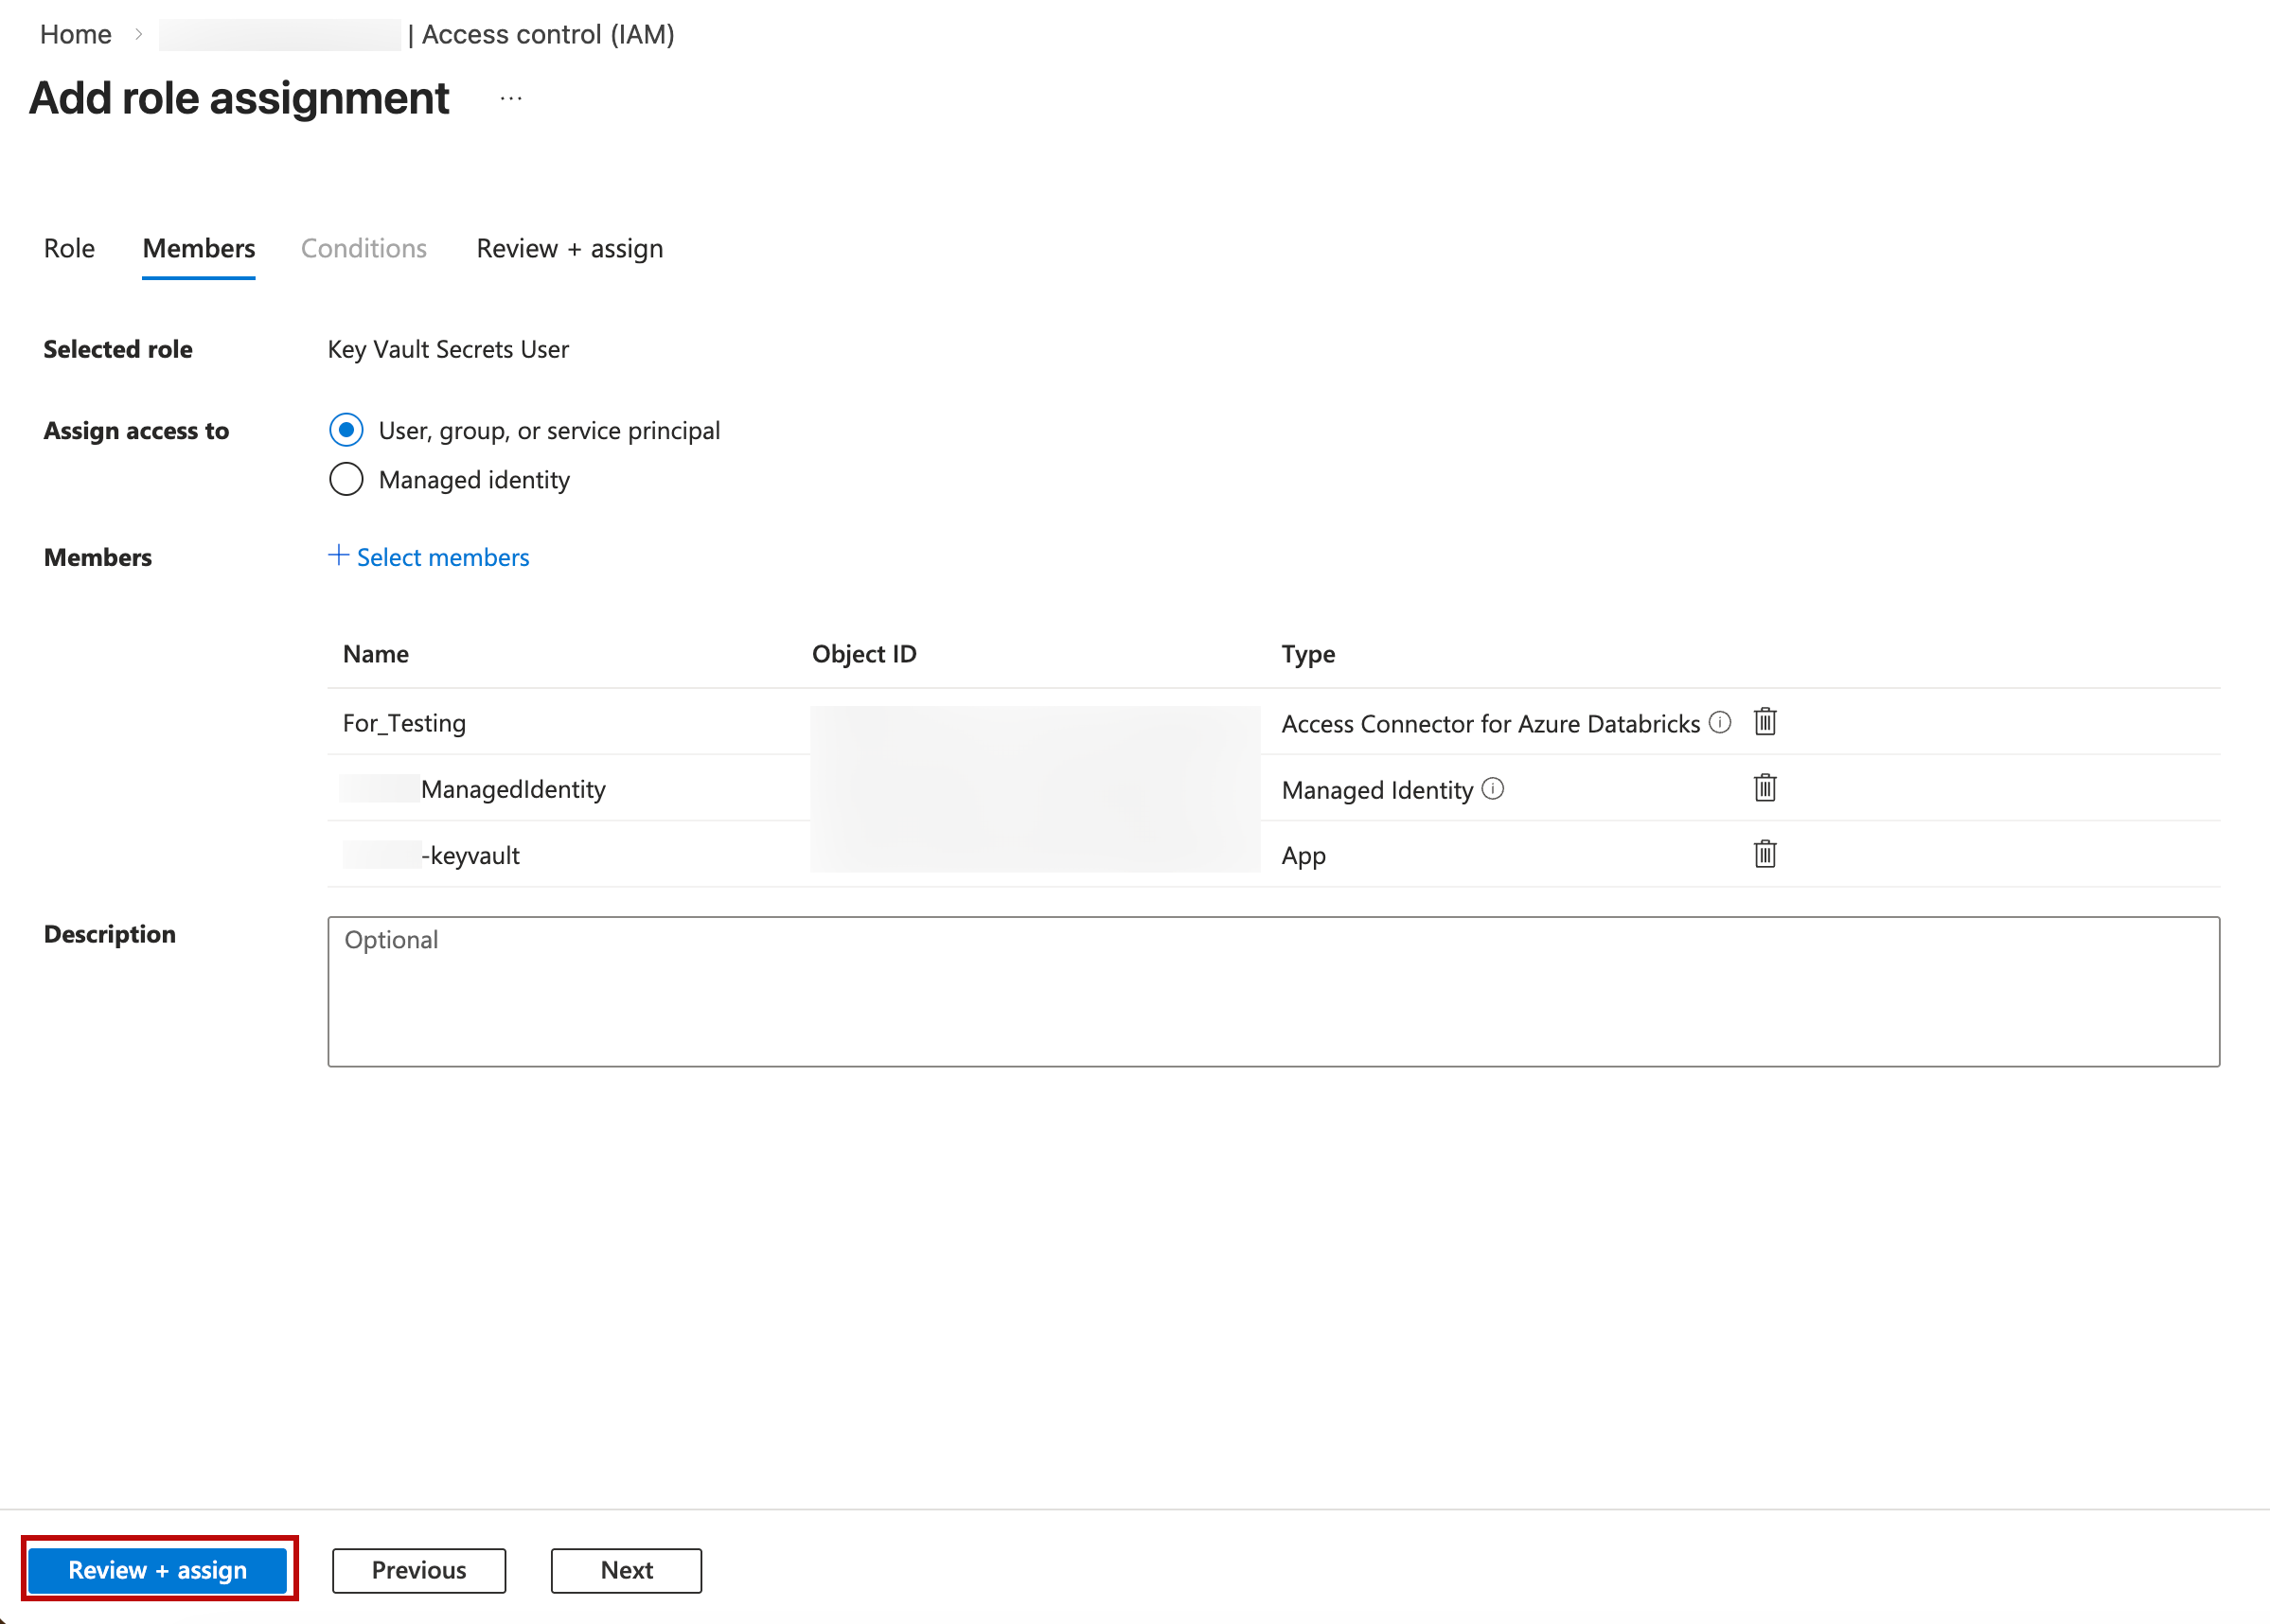
To verify, navigate to Access control (IAM) > Role assignments and confirm your identity appears with the correct role.
Authentication Method |
Assign Role To |
|---|---|
Client Secret Credentials |
Service Principal matching your client ID |
User-Assigned Managed Identity |
Managed Identity matching your client ID |
System-Assigned Managed Identity |
Managed Identity of your Alation host |
Configure Integration with Azure Key Vault Using a Managed Identity for an OCF Data Source
To integrate your data source with Azure Key Vault, make sure you have the following required information from Azure portal:
Key vault URL
Names of the key vault secrets that store your desired settings. These can include JDBC URIs, usernames and passwords, and BI or ELT connector information.
Application (client) ID of the user-assigned managed identity.
Follow the steps below to configure your data source to read the service account username and password for metadata extraction (MDE), query log ingestion (QLI), and sampling and profiling from Azure Key Vault:
Log into Alation as a Server Admin and click the Settings gear icon.
Under Server Admin, click Authentication.
In See Configuration for: Select the agent ID.
To the right of Authentication Configuration Methods for External Systems, click Add Configuration and select
Azure Keyvaultvalue.In the Authentication Configuration for External Systems page, set the following values:
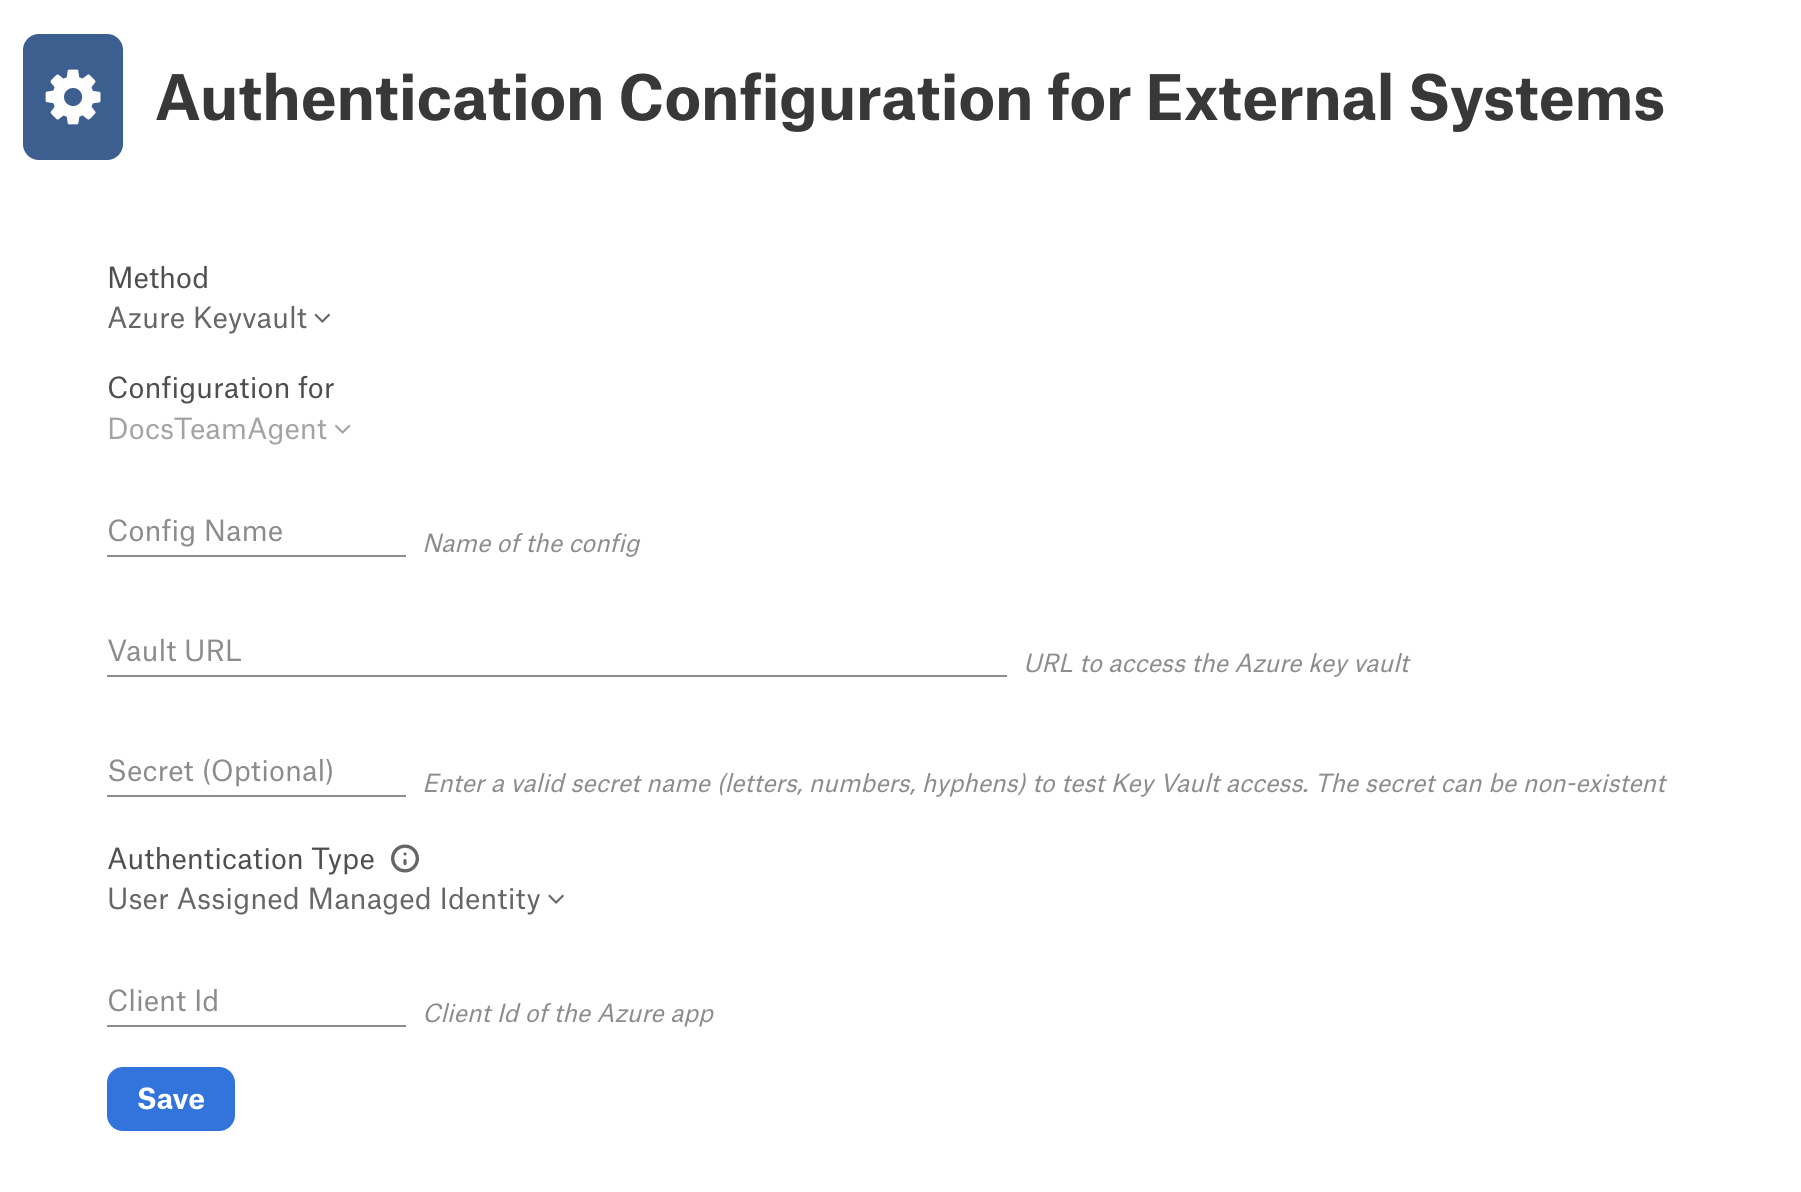
In Config Name, provide a unique name for the configuration. Your system may have a list of Reserved Config Names. Make sure your name does not conflict with any of these.
In Vault URL, enter the URL to access Azure Key Vault.
In Authentication Type, select one of the following depending on your configuration:
Client Secret Credential: (Default) This is only applicable if you have client credentials stored in Alation Cloud Service and are not configuring using a managed identity.
User Assigned Managed Identity: Select this option if you are configuring authentication for Azure Key Vault using a user-assigned managed identity.
Client ID: Enter the client ID of the user-assigned managed identity.
System Assigned Managed Identity: Select this option if you are configuring authentication for Azure Key Vault using a system-assigned managed identity.
Note
For more information on configuration options, see Azure Key Vault.
Click Save to save the configuration.
Configure Authentication with Azure Key Vault for a Data Source
Use the steps in this section to configure your data source to read the service account credentials from Azure Key Vault. You need the Data Source Admin level of the data source access or the Server Admin role to configure settings of a data source.
Log in to Alation and go to the settings page of the OCF data source for which you’re setting up authentication with Azure Key Vault.
Open the General Settings tab of the settings page and click the vault option for each setting you want to configure using Azure Key Vault.
Click Select a configuration and select the appropriate Azure Key Vault configuration.
Enter the name of the Azure Key Vault secret that stores the desired setting.
Repeat as needed for additional settings.
Click Save. These identifiers will be used to look up the actual username and password stored in Azure Key Vault.
Now, when a Data Source Admin performs MDE, QLI, sampling, and profiling, Alation will read the appropriate credentials from the Azure Key Vault.
Delete a Key Vault Configuration
To delete an authentication configuration:
Log into Alation as a Server Admin and click the Settings gear icon.
Under Server Admin, click Authentication.
Under Authentication Configuration Methods for External Systems, find the configuration you want to delete, and then click Delete at the right of the configuration.
A confirmation dialog appears informing you that the delete operation is irreversible, and advising you to ensure the configuration is not in use on your system. Click Delete to complete the deletion.