Manage Data Products
Alation Cloud Service Applies to Alation Cloud Service instances of Alation
As a Data Product Admin, you are responsible for the accuracy, usefulness, and reusability of your data products.
This topic explains how to manage data products throughout their lifecycle, including updating their content and details, controlling access, monitoring usage, and listing them on the Marketplace.
Important
To manage data products, you must either be their owner or have the Data Product Admin permissions assigned within the Data Products App. See Configure Access in the Data Product App for information about what users can manage data products.
In this topic:
Access the Manage My Data Products Page
The Manage My Data Products page is the starting point for managing your data products, including creating them, viewing their configuration, and editing them. See Access the Data Products App for information on how to access the Data Products App in Alation.
Manage My Data Products lists all data products for which you are a Data Product Admin or have been explicitly granted access.
To access data product management actions:
On the Manage My Data Products page, from the Data Products table, locate the data product you want to manage.
In the rightmost column, click the three-dot icon to open the available actions, and select from the following options:
Manage Data Product: Opens the data product settings page. See Open the Data Product Settings.
Copy: Copies the URL of the data product to your clipboard.
Suggest Improvements: Opens the AI-suggested improvements for the data product configuration. For details, see Suggest Improvements.
Delete Data Product: Deletes the data product. See Delete a Data Product.
Note
To manage permissions, evaluations, or chat feedback for a data product, open the data product settings and navigate to the corresponding tab. See Open the Data Product Settings.
Add a New Data Product
For details on creating a new data product, refer to:
Get Started with Creating Data Products: Create a basic data product using the Data Products wizard.
Create Data Products in Advanced Mode: Create a data product using an advanced editor.
Create Data Products Using YAML: Create a data product specification using YAML.
Note
You can use the Data Products Builder Copilot to help you create a data product in advanced mode.
Open the Data Product Settings
The data product settings page gives you access to all configuration options for a data product, organized into tabs. You can open it from the Manage My Data Products page in two ways:
In the left-side navigation, click the Data Products App icon to expand the menu.
Click My Data Products.
Open the settings in one of the following ways:
In the Data Products table, click the name of the data product.
In the rightmost column of the table, click the three-dot icon, then select Manage Data Product.
Overview Tab
The Overview tab displays a summary of your data product, including its details, contact information, compliance status, version, and data contract configuration. The tab also shows evaluation results if you have run any, and provides shortcuts to key configuration areas.
From the Overview tab, you can initiate AI-suggested improvements to the product configuration using the Improve Accuracy option. See Suggest Improvements for details on suggesting improvements.
Content Tab
The Content tab is organized into sub-tabs. Use these sub-tabs to manage the data assets, metadata, and other properties that make up the content of your data product.
Tables
The core of a data product is the dataset that the data product consumers use to explore and analyze their area of interest. When you create data products in Alation, you add data assets directly from the catalog. This means the data product automatically inherits existing metadata, such as table and column descriptions, from the catalog.
Use the Tables sub-tab to add or remove tables from your data product. You can also generate AI-suggested descriptions for tables from this sub-tab.
To add tables and columns:
Click + New Table.
In the Quick Search dialog, search for and select a table.
The Select Columns dialog opens. Choose all columns or only the specific columns you want to include.
You can sort columns by Popularity to help with selection.
Select Generate descriptions when missing to use AI to generate descriptions for columns that don’t already have them. These descriptions are visible to data product consumers.
Click Add table and columns. Alation adds the selected tables and columns to the data product and generates descriptions where requested.
To add more tables, click + New Table again and repeat the steps.
Metrics
Use the Metrics sub-tab to add metrics metadata to your data product. You can also generate metrics automatically.
You can enrich the context of a data product by adding metric metadata. Metrics help define how values are calculated on the data product’s dataset and provide additional context that improves the quality and accuracy of Chat responses.
Metric metadata consists of SQL expressions that define how specific values are calculated. For example, if your data product is used to calculate key business metrics, you can add the corresponding SQL expressions as metric metadata so Chat can interpret and respond to questions more accurately.
Important
You can add metric metadata only after you’ve added datasets (tables and columns) to the data product. Adding datasets is a prerequisite for defining metrics.
Add metrics in one of two ways:
Add Metrics Manually
To add metrics manually, you must have a SQL query or a valid SQL expression that defines the calculation.
On the Metrics tab, click + New metric. The New Metrics dialog opens.
Paste the SQL query or enter the SQL expression in the SQL text area.
Click Validate SQL.
Alation parses the SQL and checks whether it’s valid:
If the SQL is invalid, validation fails, and you can’t proceed. The New Metrics dialog displays error messages and line numbers to help you correct the issue.
Fix any errors and click Validate SQL again.
When the SQL is valid, click Extract Metrics. The extracted metric is added to the Metrics table in the data product.
Generate Metrics Using AI
To generate metrics automatically using AI:
On the Metrics tab, click Generate metrics.
Alation analyzes the catalog context for the data product, including published queries for the included tables, and generates a suggested set of metric expressions. Once the generation process completes, the list of metrics is displayed in the Review dialog.
Review the generated metrics, errors, and warnings carefully. Remove any metrics that are irrelevant or incorrect.
Click Save in the dialog to add the selected metrics to the Metrics table.
BI-Sourced Metrics
When you create a data product from a BI report, the Content tab generates BI-sourced metrics alongside SQL-based metrics.
BI metrics are field definitions from BI sources, such as calculated fields, that are downstream of the data product’s RDBMS tables.
SQL-based metrics and BI-sourced metrics appear together in a single list.
Metric descriptions follow a two-source approach. If the BI source includes a description, such as a LookML field description in Looker, Alation uses it as-is. If no description exists in the source, Alation generates one using AI. Verify that source-pulled descriptions are accurate and relevant for your data product.
Joins
Use the Joins sub-tab to add join definitions to your data product. See Add Joins to Data Products for steps.
Info
Use the Info sub-tab to view and update the general details of your data product, including its name, summary, description, contact information, and example questions. You can update this information at any time. AI-assisted features are available to help you generate descriptions and business context.
Delivery Systems
Use the Delivery Systems sub-tab to configure the workflows that consumers follow to request access to the data product. See Add Delivery Systems for steps.
Catalog Fields
Use the Catalog Fields sub-tab to add catalog fields to your data product.
Important
Before you can add catalog fields, a Marketplace Admin must make the relevant catalog fields available at the Marketplace level.
See Associate Catalog Fields with Data Products for more information.
Data Contract Tab
Use the Data Contract tab to configure data contract settings for your data product, including schema checks. Find more information on adding a data contract in Configure the Data Contract.
Evaluations Tab
Use the Evaluations tab to configure and run evaluations for the chat feature of your data product. This tab is only relevant if you have enabled chat and want to test the accuracy of AI-generated responses.
The Evaluations tab applies only to Data Products with Chat enabled. For details, see Evaluate Data Product Chat.
Feedback Tab
Use the Feedback tab to review feedback that users submit when interacting with the Chat feature of your data product.
The Feedback tab applies only to data products with chat enabled. For details, see Manage Chat Feedback.
Insights Tab
Use the Insights tab to monitor how users interact with your data product. The tab displays usage statistics for a selected time period.
The following metrics are available:
Unique visitors: The number of unique Alation users who opened the data product page.
Product page views: The total number of views the product page received.
Bookmarks: The number of users who bookmarked the data product.
Messages: The total number of chat messages sent. This metric is only available if chat is enabled for the data product.
Below the summary metrics, a table lists the top 10 users by activity, including their username, title, key actions, page views, last access date, and number of messages sent.
To filter the table to exclude Data Product Admins and maintainers, deselect the checkbox to the right of the table title. The table then shows only users who accessed the data product through the Marketplace without admin access.
To change the time period displayed:
On the Insights tab, select the Time Range dropdown in the upper right.
Select a time period: 7 days, 30 days, or 90 days.
The dashboard updates to show data for the selected period.
Permissions Tab
Use the Permissions tab to control who can access your data product. You can make the product public or private, grant access to specific users or groups, and assign roles to users who have access.
Manage a Data Product’s Permissions
To assign data product permissions to users or groups:
Under Product Privacy, select Public or Private to set an appropriate privacy level:
Public: Everyone can view the data product. Only the creator and those with explicit permissions can edit.
Private: Only the creator and those with explicit permissions can view or edit the product. Once listed in the Marketplace, anyone who can view the Marketplace can view the product.
Next to Product Roles, click Add User/Group and find and select users or groups to add them to the Product Roles table.
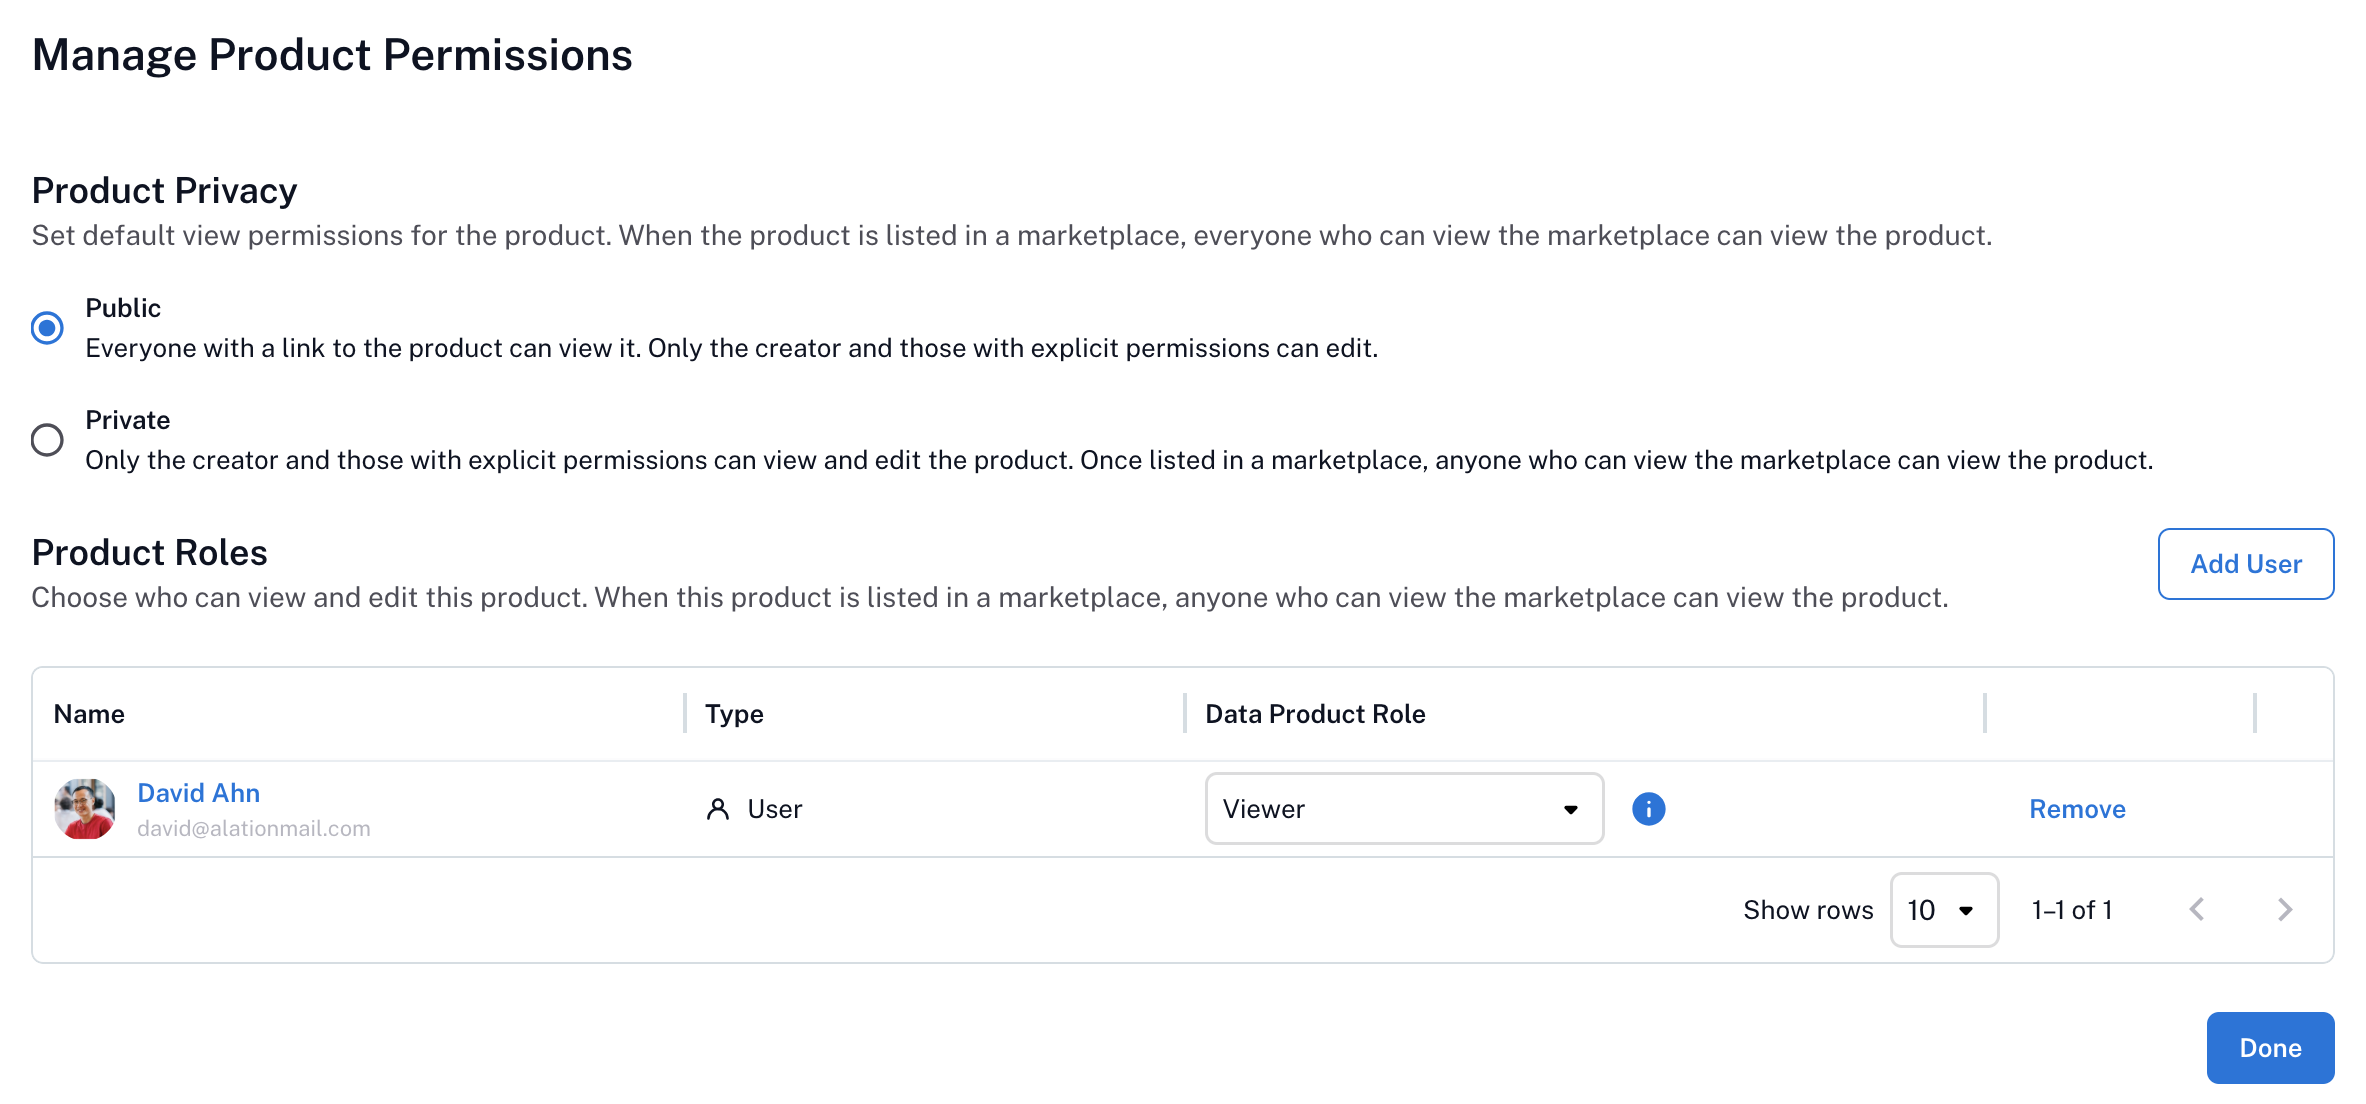
In the Data Product Role column of the table, choose the appropriate role: Admin or Viewer.
Preview the Data Consumer View
To see how your data product appears to consumers on the Marketplace, click View Data Product in the upper right of the settings page. This opens the consumer view of the product, which is the same view that most users see when they access the product from the Marketplace.
Additional Actions
The settings page includes an additional menu in the upper right. Click the three-dot icon in the upper right corner of the settings page and select one of:
Copy link: Copies the URL of the data product to your clipboard.
Configure chat: Opens the chat configuration settings for the data product. See Configure Chat with Data Product for details on configuring the Data Product Chat.
Download Data Product Definition: Downloads the YAML specification of the data product.
List on Marketplace / Unlist from Marketplace: Submits a listing or unlisting request for approval by the designated Marketplace approvers.
From this menu, you can also Delete Data Product.
Download Data Product Definition
You can download the data product YAML specification to get a copy on your local machine:
In the left navigation, select the Data Products App.
From the App’s menu, select My Data Products.
From the list of data products in the Data Products table, find the data product you want to work with. Click the data product name to open its catalog page.
Click the three-dot menu icon in the upper right of the page to open the data product options.
Select Download Data Product to download the corresponding YAML file.
List on Marketplace
Once your data product is ready for consumers, you can submit a request to list it on the Marketplace. See Manage the Marketplace Listing Workflow for information on how Marketplace Admins approve or deny listing requests.
In the left navigation, select the Data Products App.
From the App’s menu, select My Data Products.
From the list of data products in the Data Products table, find the data product you want to work with. Click the data product name to open its catalog page.
Click the three-dot menu icon in the upper right of the page to open the data product options.
Select List Data Product in Marketplace to submit a listing request to the Marketplace Admins.
Unlist from Marketplace
You can unlist a data product in two ways, depending on your role in the Data Products App.
From the Data Product
As a Data Product Admin for a specific product, you can unlist the data product from its catalog page:
In the left navigation, select the Data Products App.
From the App’s menu, select My Data Products.
In the Data Products table, find the data product you want to work with. Click the data product’s name to open its catalog page.
Click the three-dot menu icon in the upper right of the page to open the action menu.
Select Unlist Data Product in Marketplace to submit an unlisting request to the Marketplace Admins.
From Manage Marketplace
As the Marketplace Maintainer or Marketplace Admin, you can unlist a data product from the Manage Marketplace page:
In the left navigation, select the Data Products App.
From the App’s menu, select Manage Marketplace.
In the Data Products table, find the data product you want to work with.
For this data product, click Unlist in the rightmost column to submit an unlisting request to the Marketplace Admins.
Delete Data Product
Warning
Deleting a data product removes it from the system permanently. This action cannot be undone.
In the left navigation, select the Data Products App.
From the App’s menu, select My Data Products.
From the Data Products table, locate the data product you want to delete.
In the rightmost column, click the three-dot menu icon.
Select Delete Data Product.