Create and Manage a Data Product
Alation Cloud Service Applies to Alation Cloud Service instances of Alation
Creating and maintaining a data product involves taking responsibility for its accuracy, usefulness, and reusability. This topic explains how to create and manage a data product throughout its lifecycle.
To start using data products through Alation UI, contact Alation Support. Alation Support will enable the alation.feature_flags.DEV_enable_data_products feature flag upon request.
Create a Data Product
To create a data product, you will define it through a YAML file. You can write the YAML manually or use Alation’s UI to construct it. Once you’ve created the YAML file, you must upload it to Alation if using APIs.
YAML Field Reference
Each data product YAML file must include fields specified in the specification at: https://<base_URL>/static/swagger/specs/data_products/product_schema.yaml.
Here are some of the common fields:
Field |
Required |
Description |
|---|---|---|
|
Yes |
Unique identifier for the product. Ensure that the product ID is unique
across all data products in the marketplace. It should not contain any
spaces or special characters other except |
|
Yes |
Semantic version string Example: 1.0.0 |
|
Yes |
Contact email of the product owner for support or questions |
|
Yes |
Human-readable name of the product owner |
|
Yes |
Display name for the product |
|
Optional |
List of systems where the data is accessible. A delivery system is a system that provides access to the data product. It includes the type of delivery system, the URI to access it, and any additional instructions for requesting access. |
|
Optional |
One or more tabular datasets included in the product. A record set is a tabular dataset of rows and columns of structured data that can be stored in any system, such as a database, API, spreadsheet, or file. It includes a schema, optional sample data, and access instructions so others can understand and use it. |
You may also add custom properties anywhere in the YAML using the x- prefix. For example, x-department or x-security-tier.
Here’s an example of a YAML file for a data product:
product:
    productId: finance:arr_sales_churn
    version: 1.0.0
    contactEmail: [email protected]
    contactName: Jane Doe
    x-customProperty:
        description: >
        This is a custom property for demonstration purposes.
        You can add your own properties that aren't defined in the scehma.
        The only requirement is that the name must start with "x-".
        It can be of any type, such as string, number, boolean, etc.
    en:
        name: ARR, Sales, and Churn
        shortDescription: Tracks ARR, new sales, renewals, and churn monthly
        description: |
        This data product provides visibility into financial metrics such as
        Annual Recurring Revenue (ARR), new sales, renewals, and churn. It is
        designed to help finance, sales, and executive teams monitor growth and
        retention performance across customer segments and time periods. Data is
        updated monthly and includes current and historical trends.
        logoUrl: https://example.com/logos/arr-sales-churn.png
    deliverySystems:
        snowflake:
        type: SQL
        uri: snowflake://acme.analytics/FINANCE/ARR_METRICS
        accessRequestInstruction:
            type: manual
            instruction: Request access via Snowflake role FINANCE_ANALYST or contact [email protected]
            request: https://company.com/access-request-form
    recordSets:
        arr_metrics_monthly:
        name: Monthly ARR Metrics
        description: >
            Each row represents monthly ARR metrics, including new sales, expansions,
            renewals, and churn, by customer segment.
        schema:
            - name: month
            description: The month the metric applies to.
            type: date
            - name: segment
            description: Customer segment (e.g., Enterprise, SMB).
            type: string
            - name: new_sales_arr
            description: ARR from new customer sales in the month.
            type: number
            - name: expansion_arr
            description: ARR from existing customer expansions.
            type: number
            - name: renewal_arr
            description: ARR retained from renewals.
            type: number
            - name: churn_arr
            description: ARR lost due to customer churn.
            type: number
            - name: net_new_arr
            description: Net ARR change (sales + expansion + renewal - churn).
            type: number
        sample:
            type: mock
            data: |
            month,segment,new_sales_arr,expansion_arr,renewal_arr,churn_arr,net_new_arr
            2024-01-01,Enterprise,120000,30000,100000,20000,230000
            2024-01-01,SMB,50000,10000,40000,10000,90000
        dataAccess:
            - type: SQL
            qualifiedName:
                database: FINANCE
                schema: ARR_METRICS
                table: MONTHLY
            documentationUrl: https://company.com/docs/arr-metrics

        customer_churn_details:
        name: Customer Churn Details
        description: >
            Each row represents a customer that churned in a given month,
            including associated ARR, churn reason, and segment. Useful for
            analyzing churn patterns at the customer level.
        schema:
            - name: customer_id
            description: Unique customer identifier.
            type: string
            - name: customer_name
            description: The name of the customer.
            type: string
            - name: churn_month
            description: The month the customer churned.
            type: date
            - name: churn_arr
            description: ARR lost from this customer churn.
            type: number
            - name: churn_reason
            description: Reason for churn as captured by sales/support.
            type: string
            - name: segment
            description: Customer segment (e.g., Enterprise, SMB).
            type: string
        sample:
            type: mock
            data: |
            customer_id,customer_name,churn_month,churn_arr,churn_reason,segment
            CUST123,Acme Corp,2024-01-01,50000,Budget cut,Enterprise
            CUST456,Startify Inc,2024-01-01,10000,Switched to competitor,SMB
        dataAccess:
            - type: SQL
            qualifiedName:
                database: FINANCE
                schema: ARR_METRICS
                table: CUSTOMER_CHURN
            documentationUrl: https://company.com/docs/customer-churn
Create a Product Spec YAML File Manually
Open a text editor of your choice (example, Visual Studio Code or Sublime Text).
Start a new file and name it with a .yaml extension.
Refer to the specification you can find at
https://<base_URL>/static/swagger/specs/data_products/product_schema.yaml(example:https://myalationcatalog.com/static/swagger/specs/data_products/product_schema.yaml) to develop the .yaml file content.Save the file.
Create a Product Spec YAML File in Alation
Go to the Data Product App > Manage Marketplace page.
Click Add or Edit Data Product.
Click the Create in Editor button.
Enter the required metadata. For details, see YAML Field Reference.
Preview the product page to review your metadata.
Note
You can use the Data Products Builder Copilot to help you create a sample data product that you can enhance to fit your requirements.
Click Save or download the YAML file to get a copy of the spec file from the Data Product Options (three-dot menu in the top right) on the Preview tab.
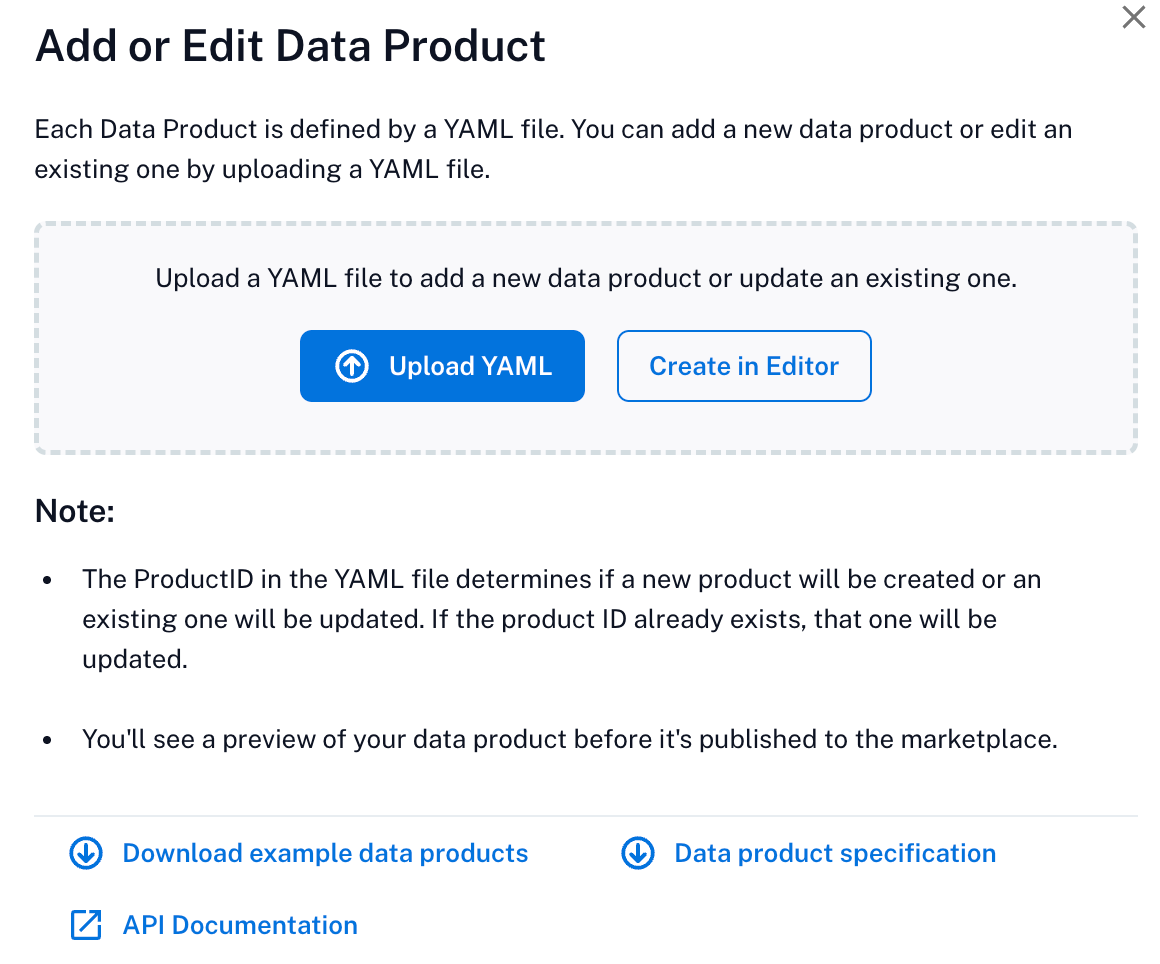
Upload the YAML File
Go to the Data Product > Manage Marketplace page.
Click Add or Edit Data Product.
Click on the Upload YAML button.
Browse to your YAML file and select it.
Click Upload.
Update a Data Product
To update a data product, you can modify the YAML file using the Alation UI:
Go to the Data Product > Manage My Data Product page.
From the list of products under the Data Products table, locate the one to update.
Scroll to the extreme right of the table and click Edit.
Edit the YAML file and preview the changes.
Click Save.
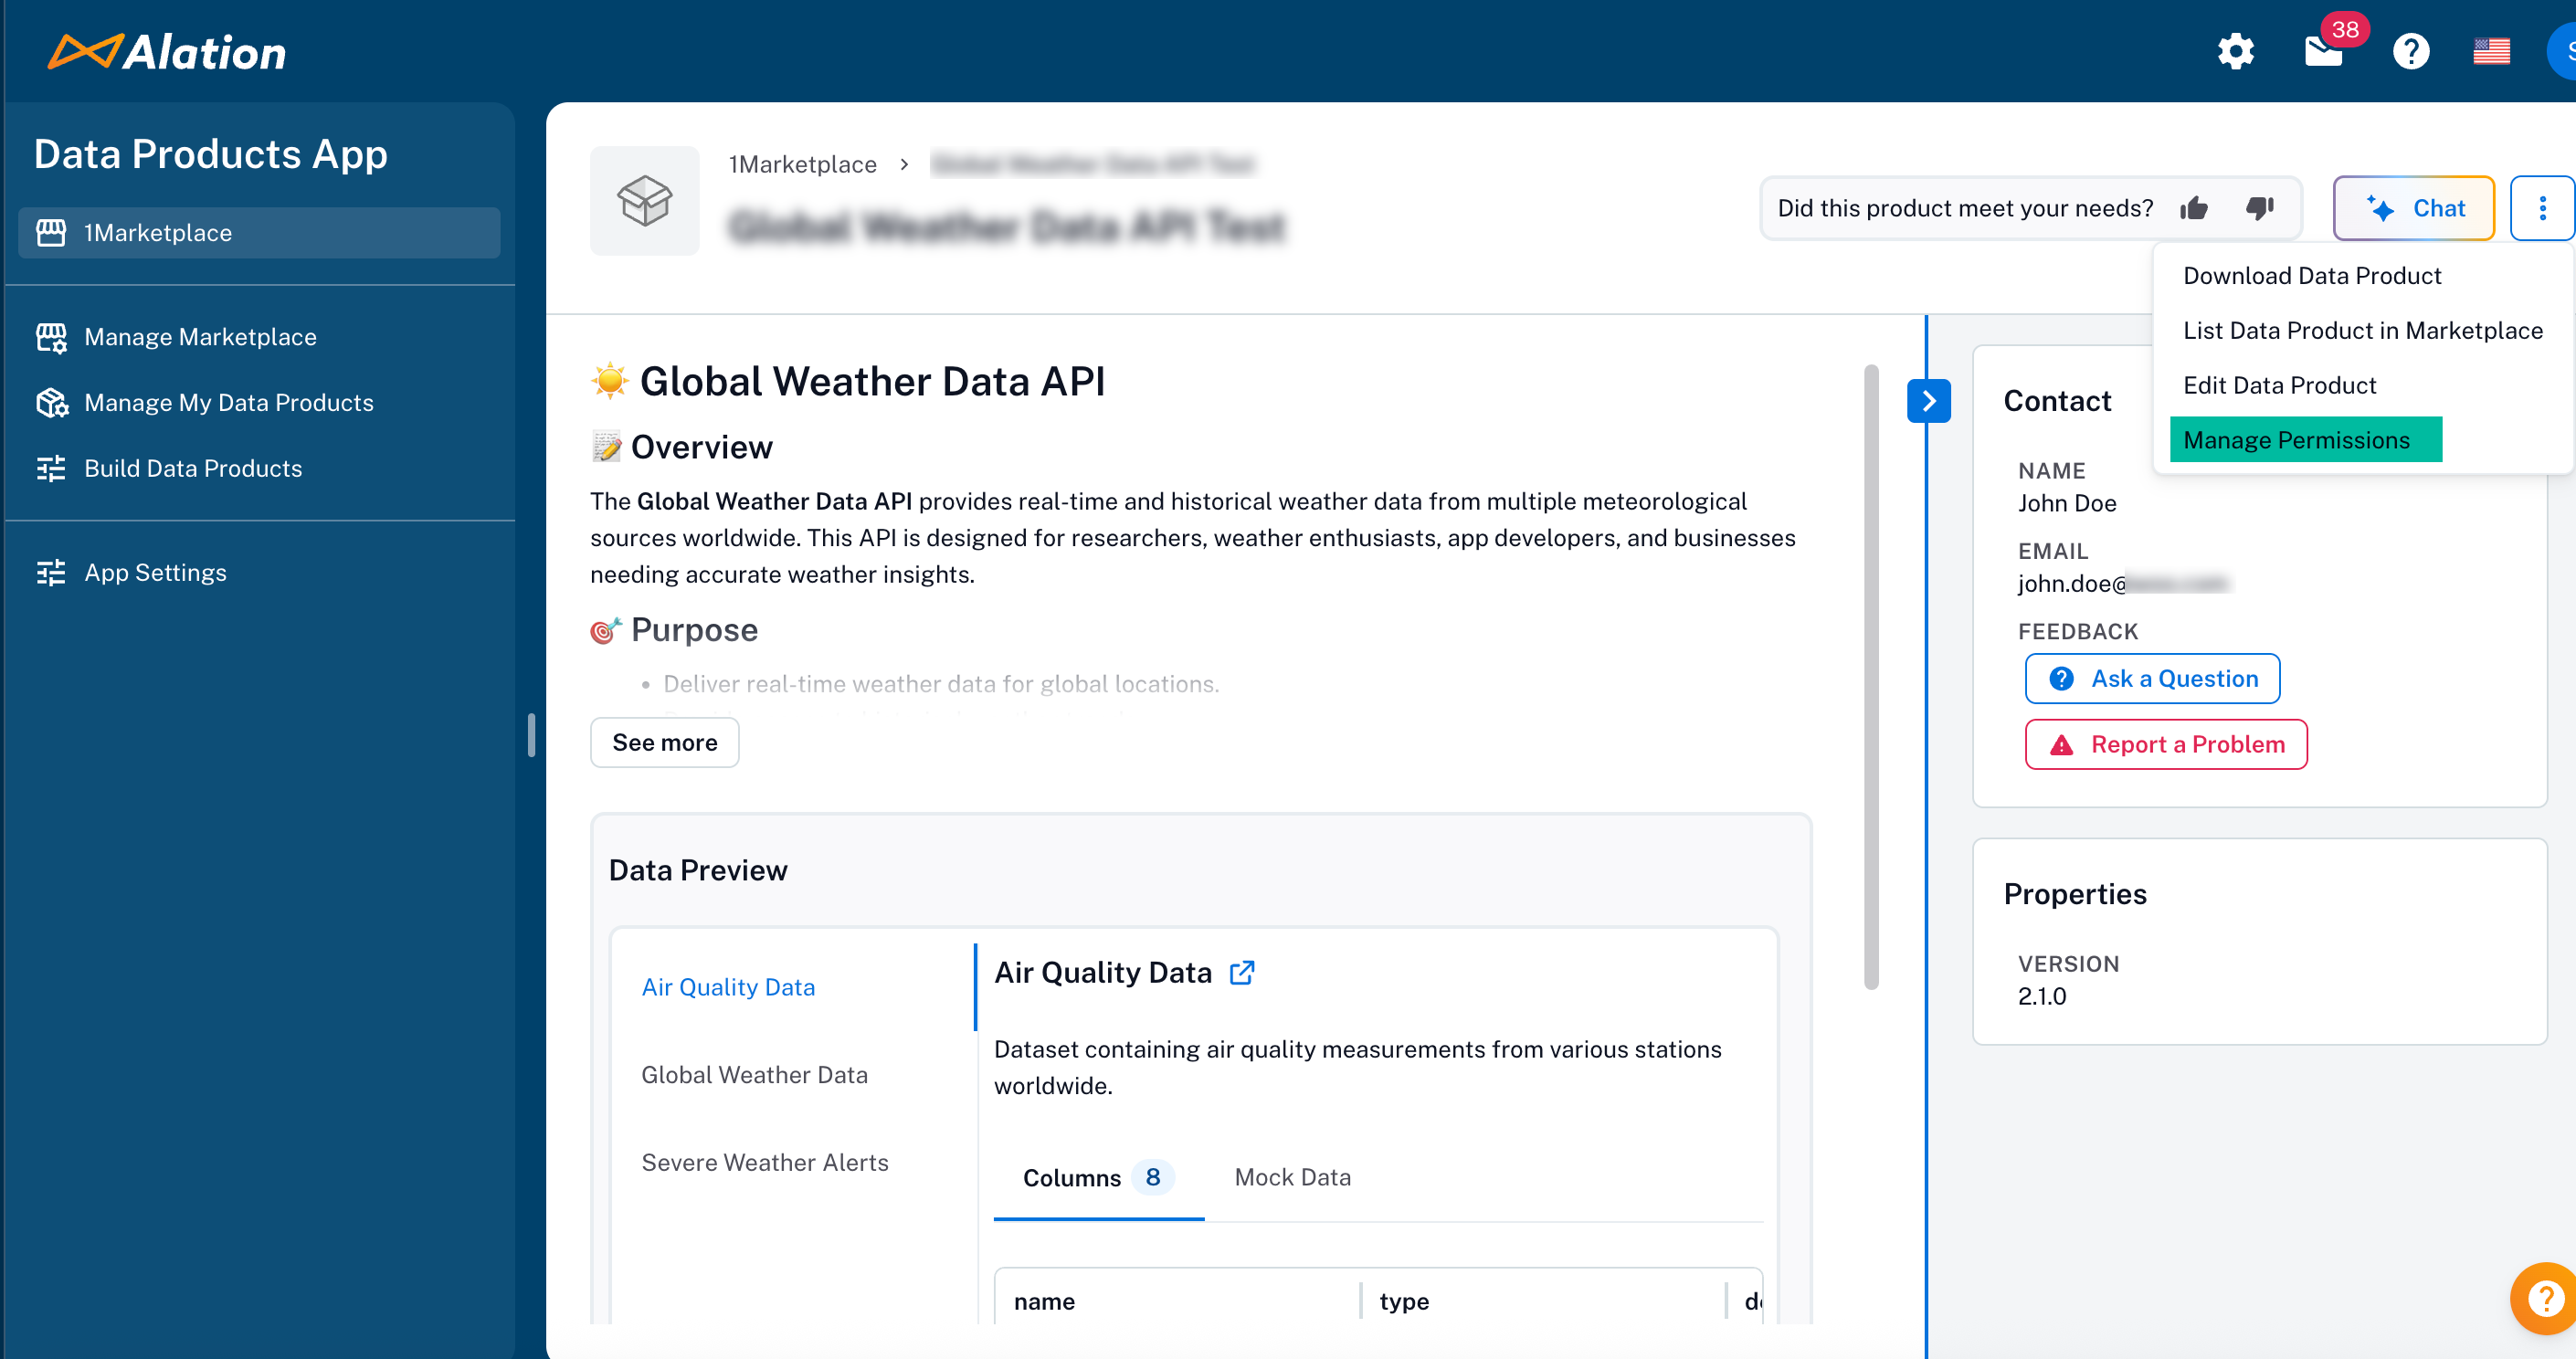
Download a Data Product
Navigate to the product’s detail page.
Click Data Product Options (the three-dot menu in the top right).
Select Download Data Product to download the YAML file.
Assign Product Roles
To assign roles to users or groups for a data product.
Manage Who Can View or Edit Data Product
Open the product page.
Click Data Product Options (the three-dot menu in the top right).
Select Manage Permissions.
Use the table to add users or groups.
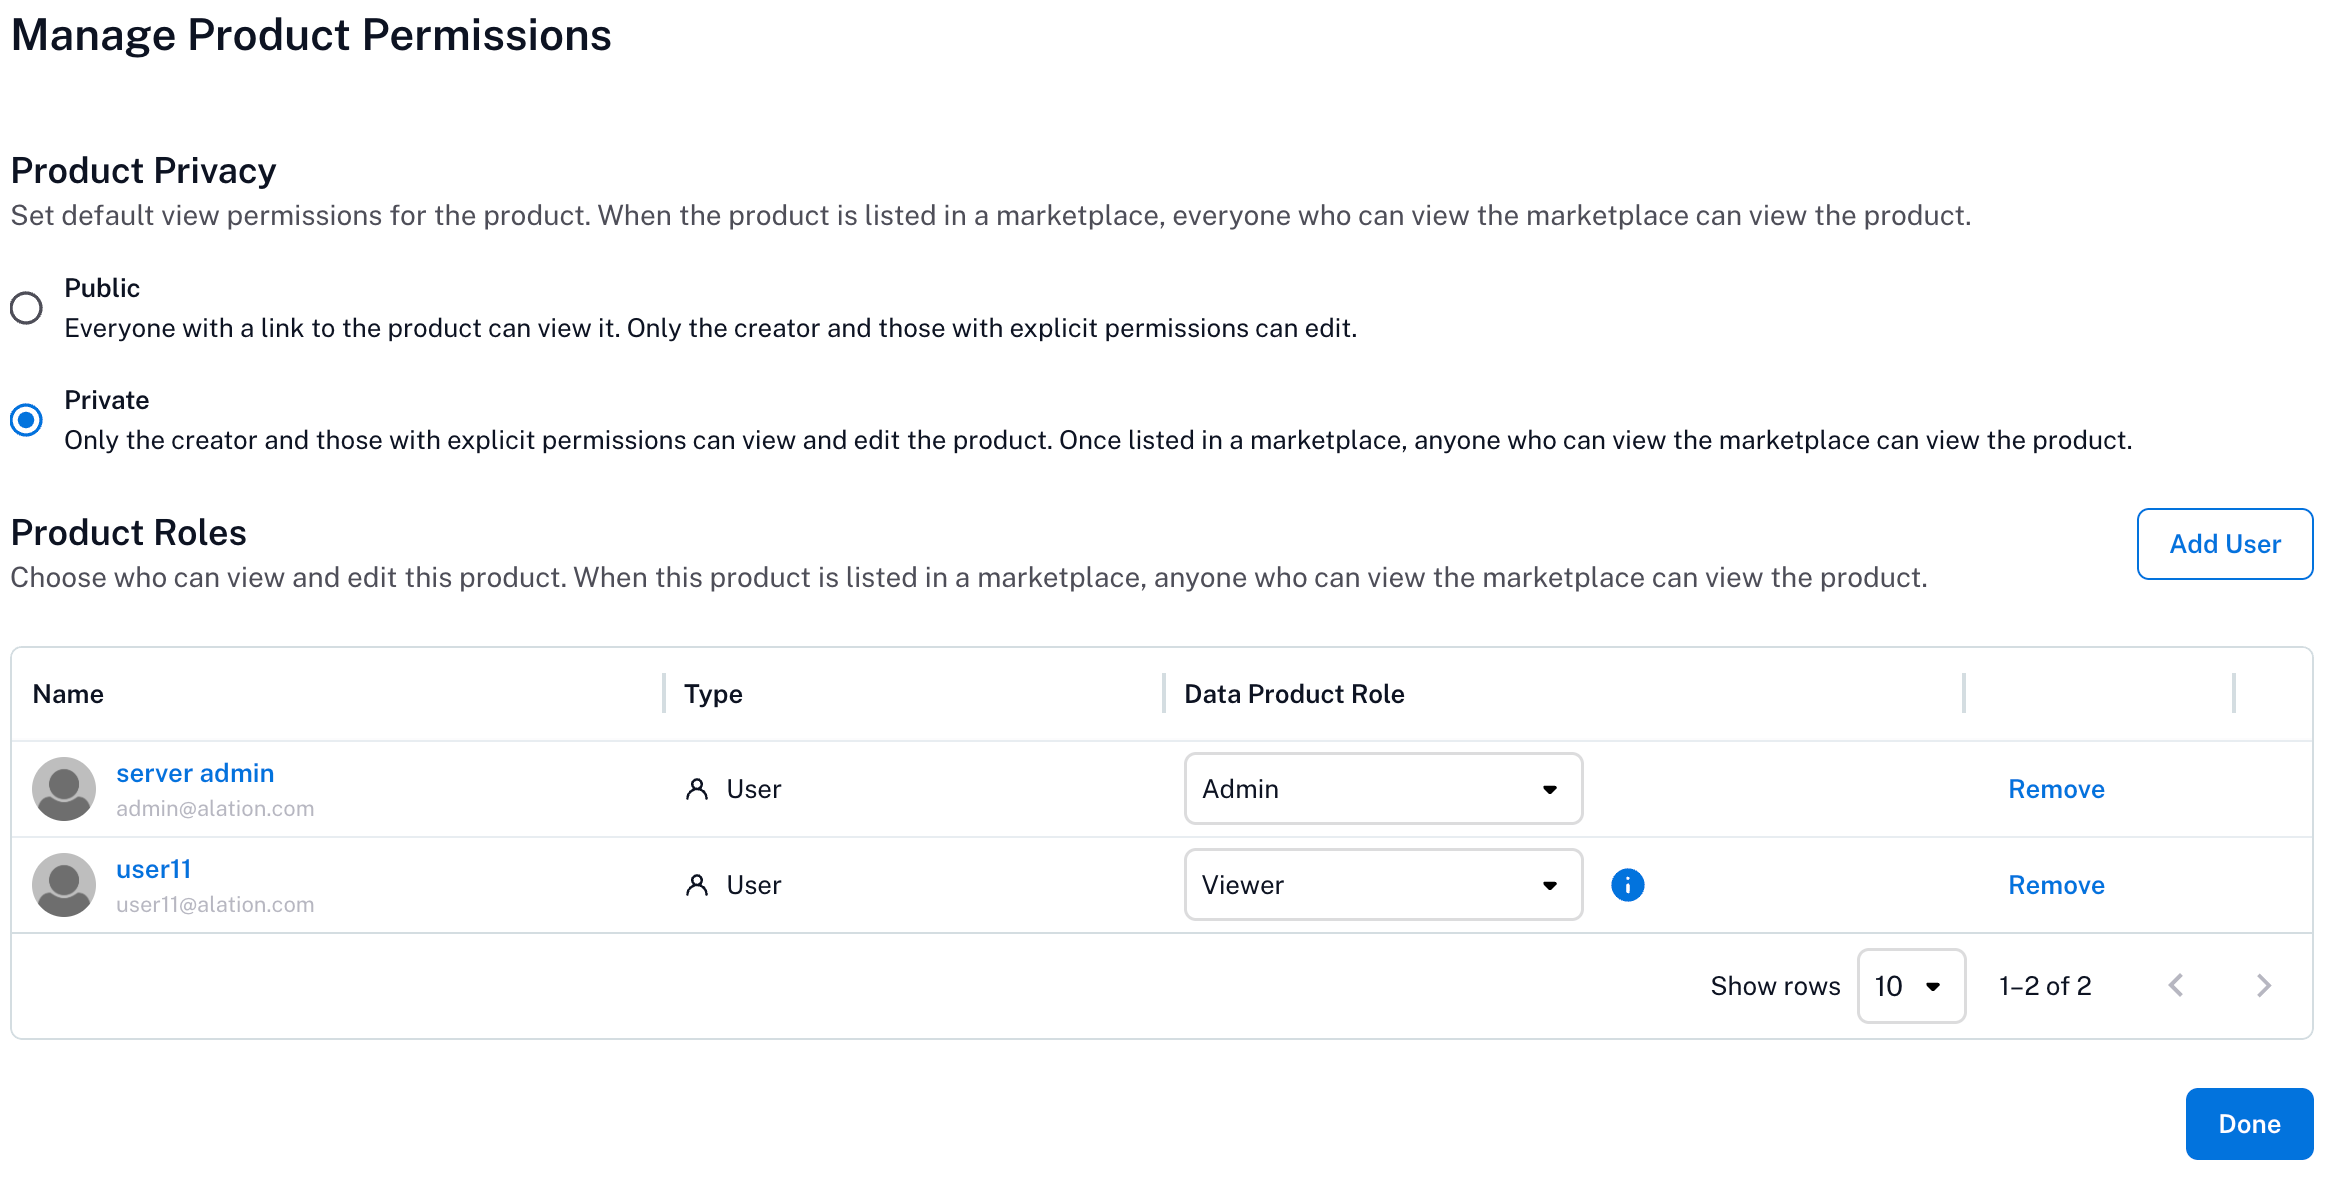
Choose the appropriate role: Admin or Viewer.
Click Save.
Only users with the Admin role can edit the product or assign roles.
Delete a Data Product
Go to the Data Product App > Manage My Data Products page.
From the list of products under the Data Products table, locate the one to delete.
On the extreme right of the table, click the three dots.
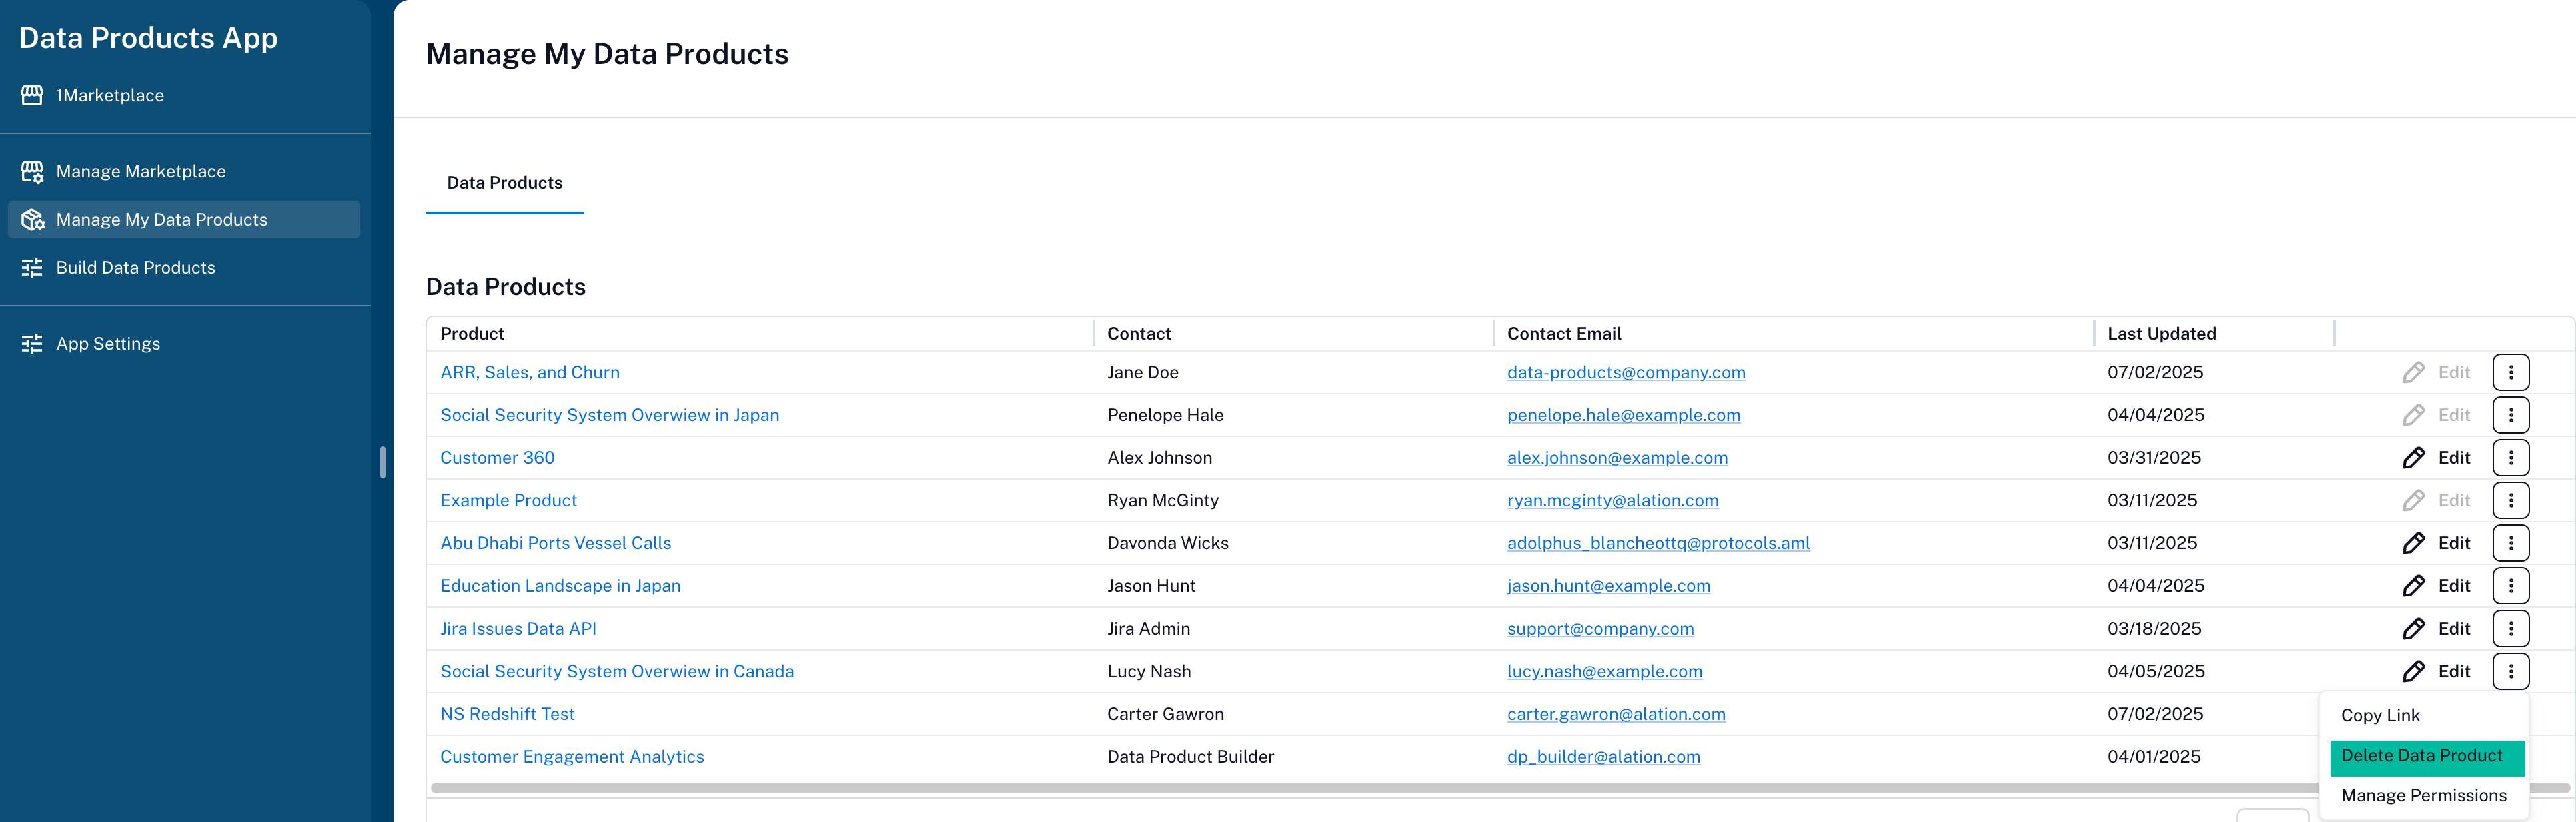
Select Delete Data Product.