Set Up SAML and SCIM Integration in Microsoft Entra ID
Alation Cloud Service Applies to Alation Cloud Service instances of Alation
Customer Managed Applies to customer-managed instances of Alation
Applies from version 2021.4
This topic explains how to configure SAML applications in Microsoft Entra ID. Use it along with the steps in Configure Authentication with SAML from Admin Settings and Enable SCIM Integration for User and Group Management.
To set up an authentication application in Entra ID, follow these steps:
Create an App for SAML Authentication
This section explains how to create an enterprise application in Entra ID for use with SAML authentication and SCIM provisioning in Alation.
Note
If you are already using SAML single sign-on (SSO) with Entra ID and wish to add user and group provisioning over SCIM, you can edit your existing SAML application and add Provisioning.
Your existing application must allow SCIM provisioning. Some types of Entra ID applications may not support editing the Provisioning settings. If that is your case, you can create a new Entra ID application to use for SCIM sync with Alation and configure Provisioning only. Your existing SAML application will be used for SAML authentication, while the second application will be used for user and group management with SCIM. On how to configure Provisioning, see Configure SCIM Provisioning below.
There are two ways to create an application in Entra ID: create a new app from scratch or use the preconfigured Alation Data Catalog app from the Entra ID Gallery.
Important
The preconfigured Alation Data Catalog app doesn’t currently support automatic SCIM provisioning.
If you are setting up both SAML SSO and SCIM provisioning, create a SAML SSO app from scratch.
If you are setting up SAML SSO only, you can use either the preconfigured app or create one from scratch.
To create an application for SAML SSO from scratch:
Log in to the Azure portal.
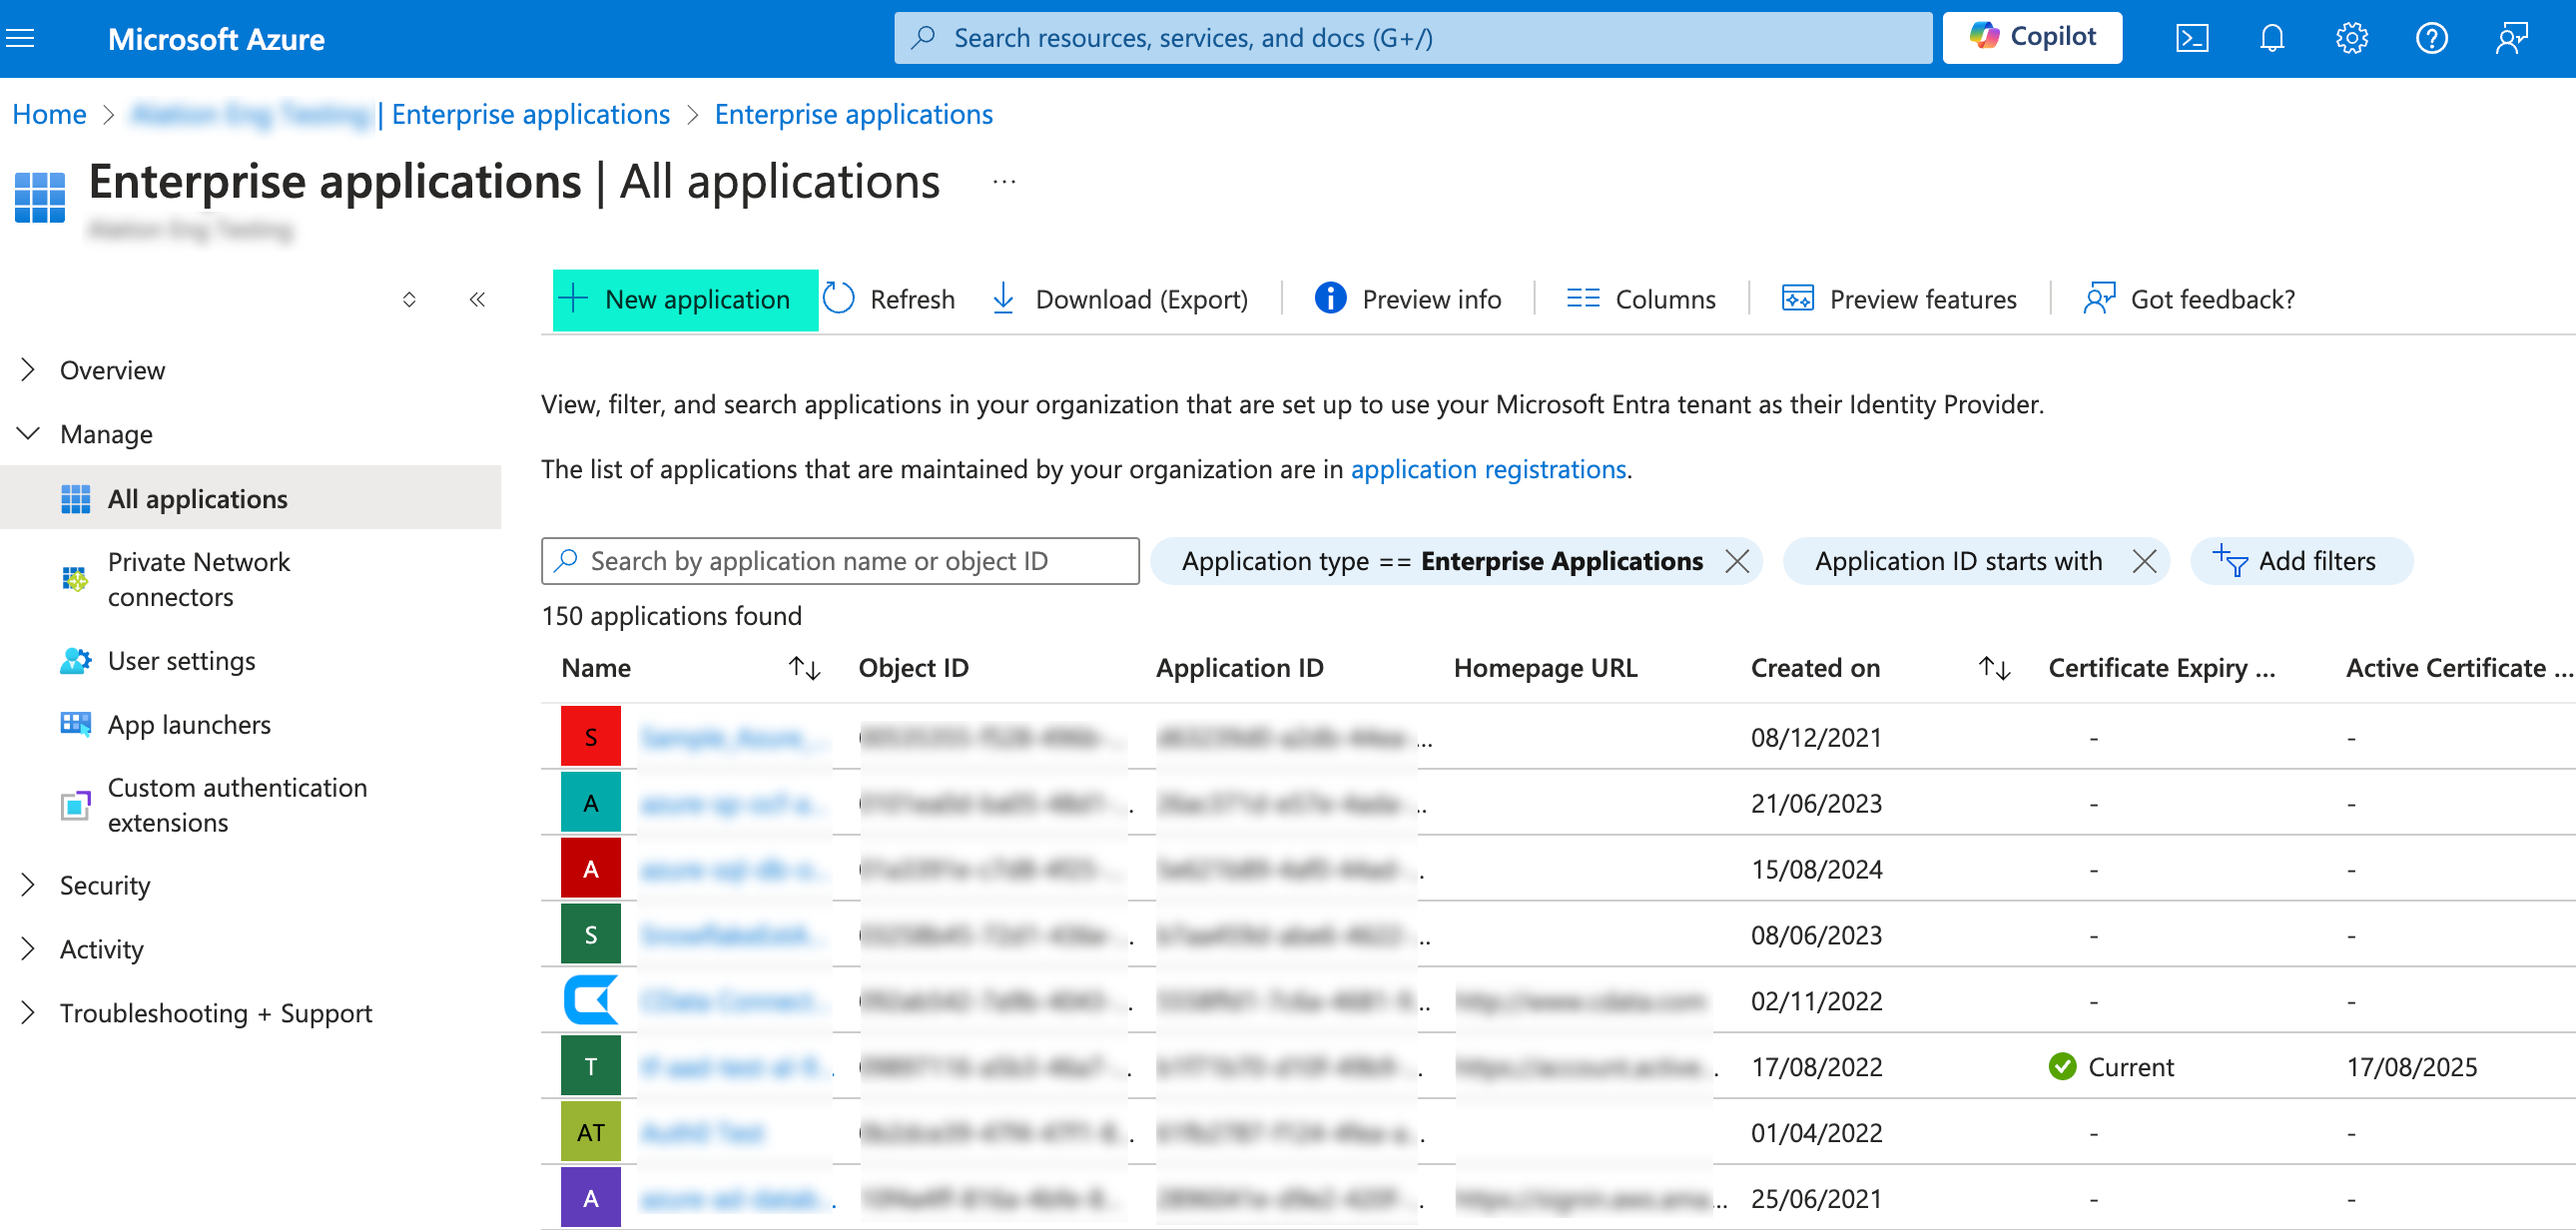
Navigate to Enterprise applications.
Click New application.
This takes you to the Browse Microsoft Entra Gallery screen. Click Create your own application to create a non-gallery application.
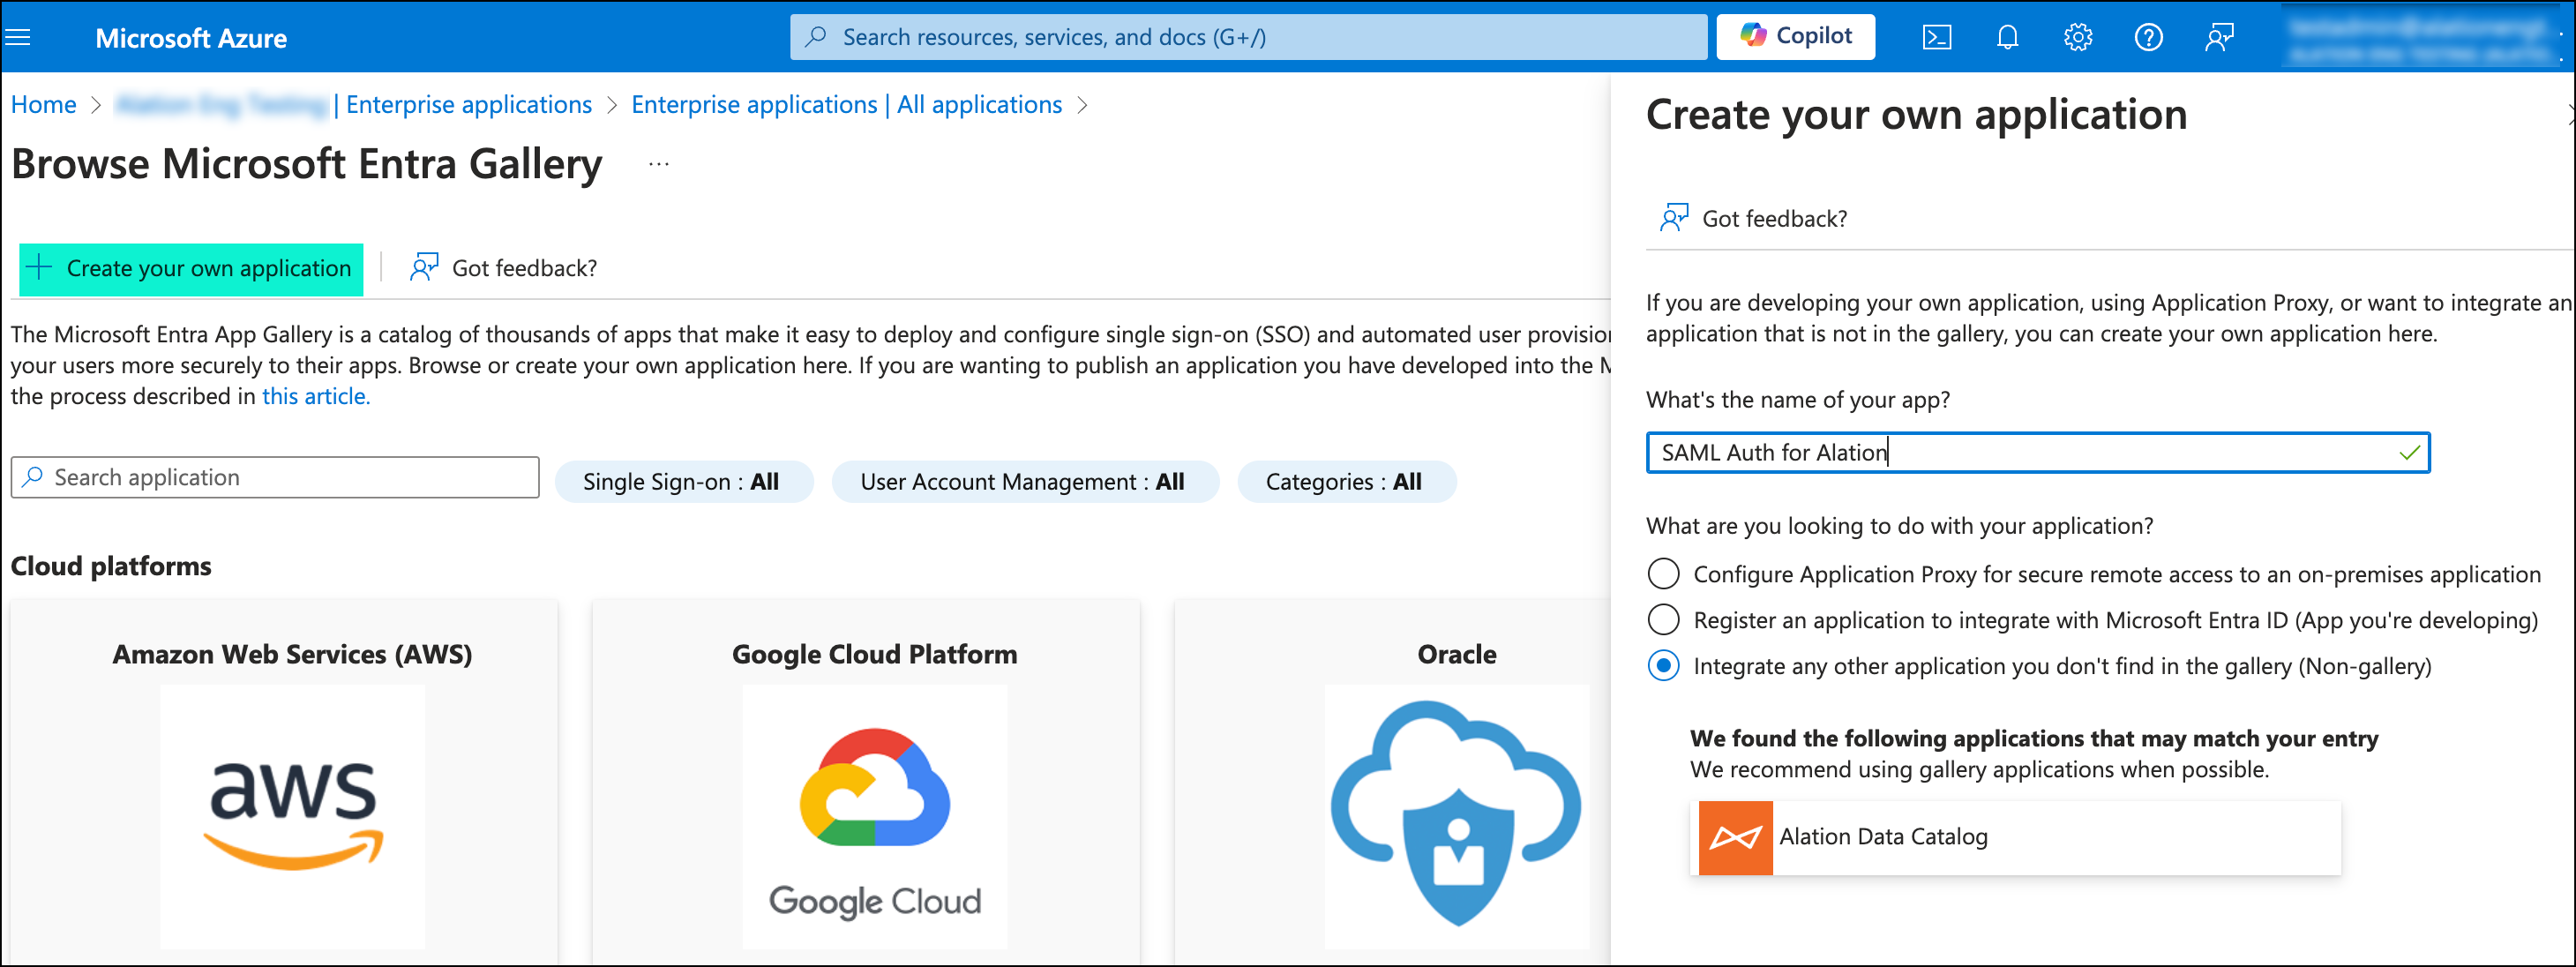
Provide a name for the app.
Leave selected the property Integrate any other application you don’t find in the gallery.
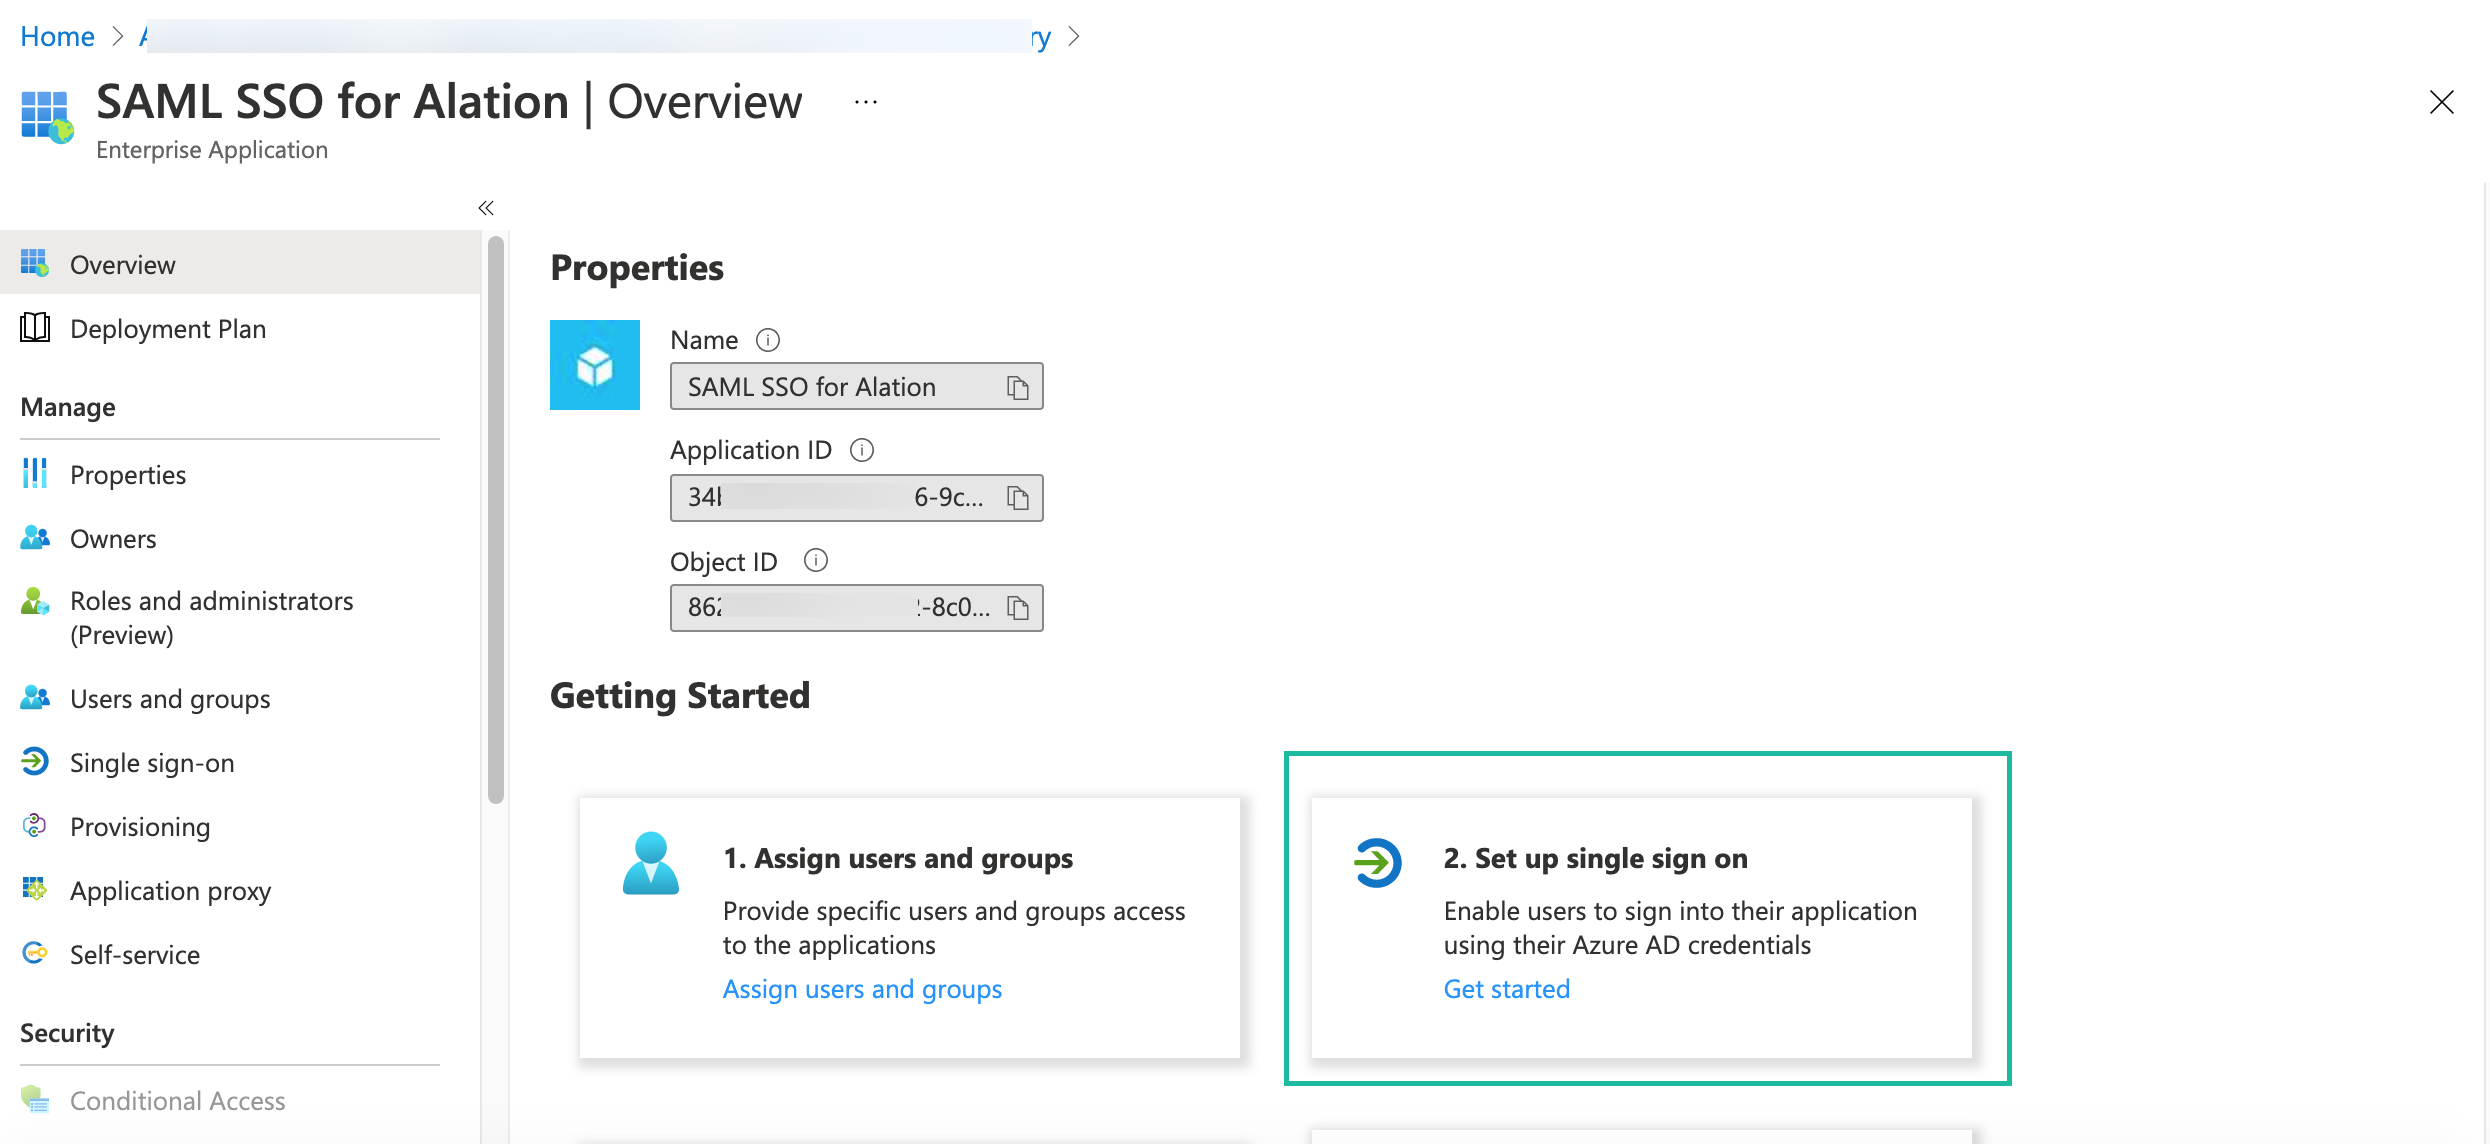
Click Create. This action takes you to the properties page of your new app.
Click on the Get started link in the Set up single sign on block.
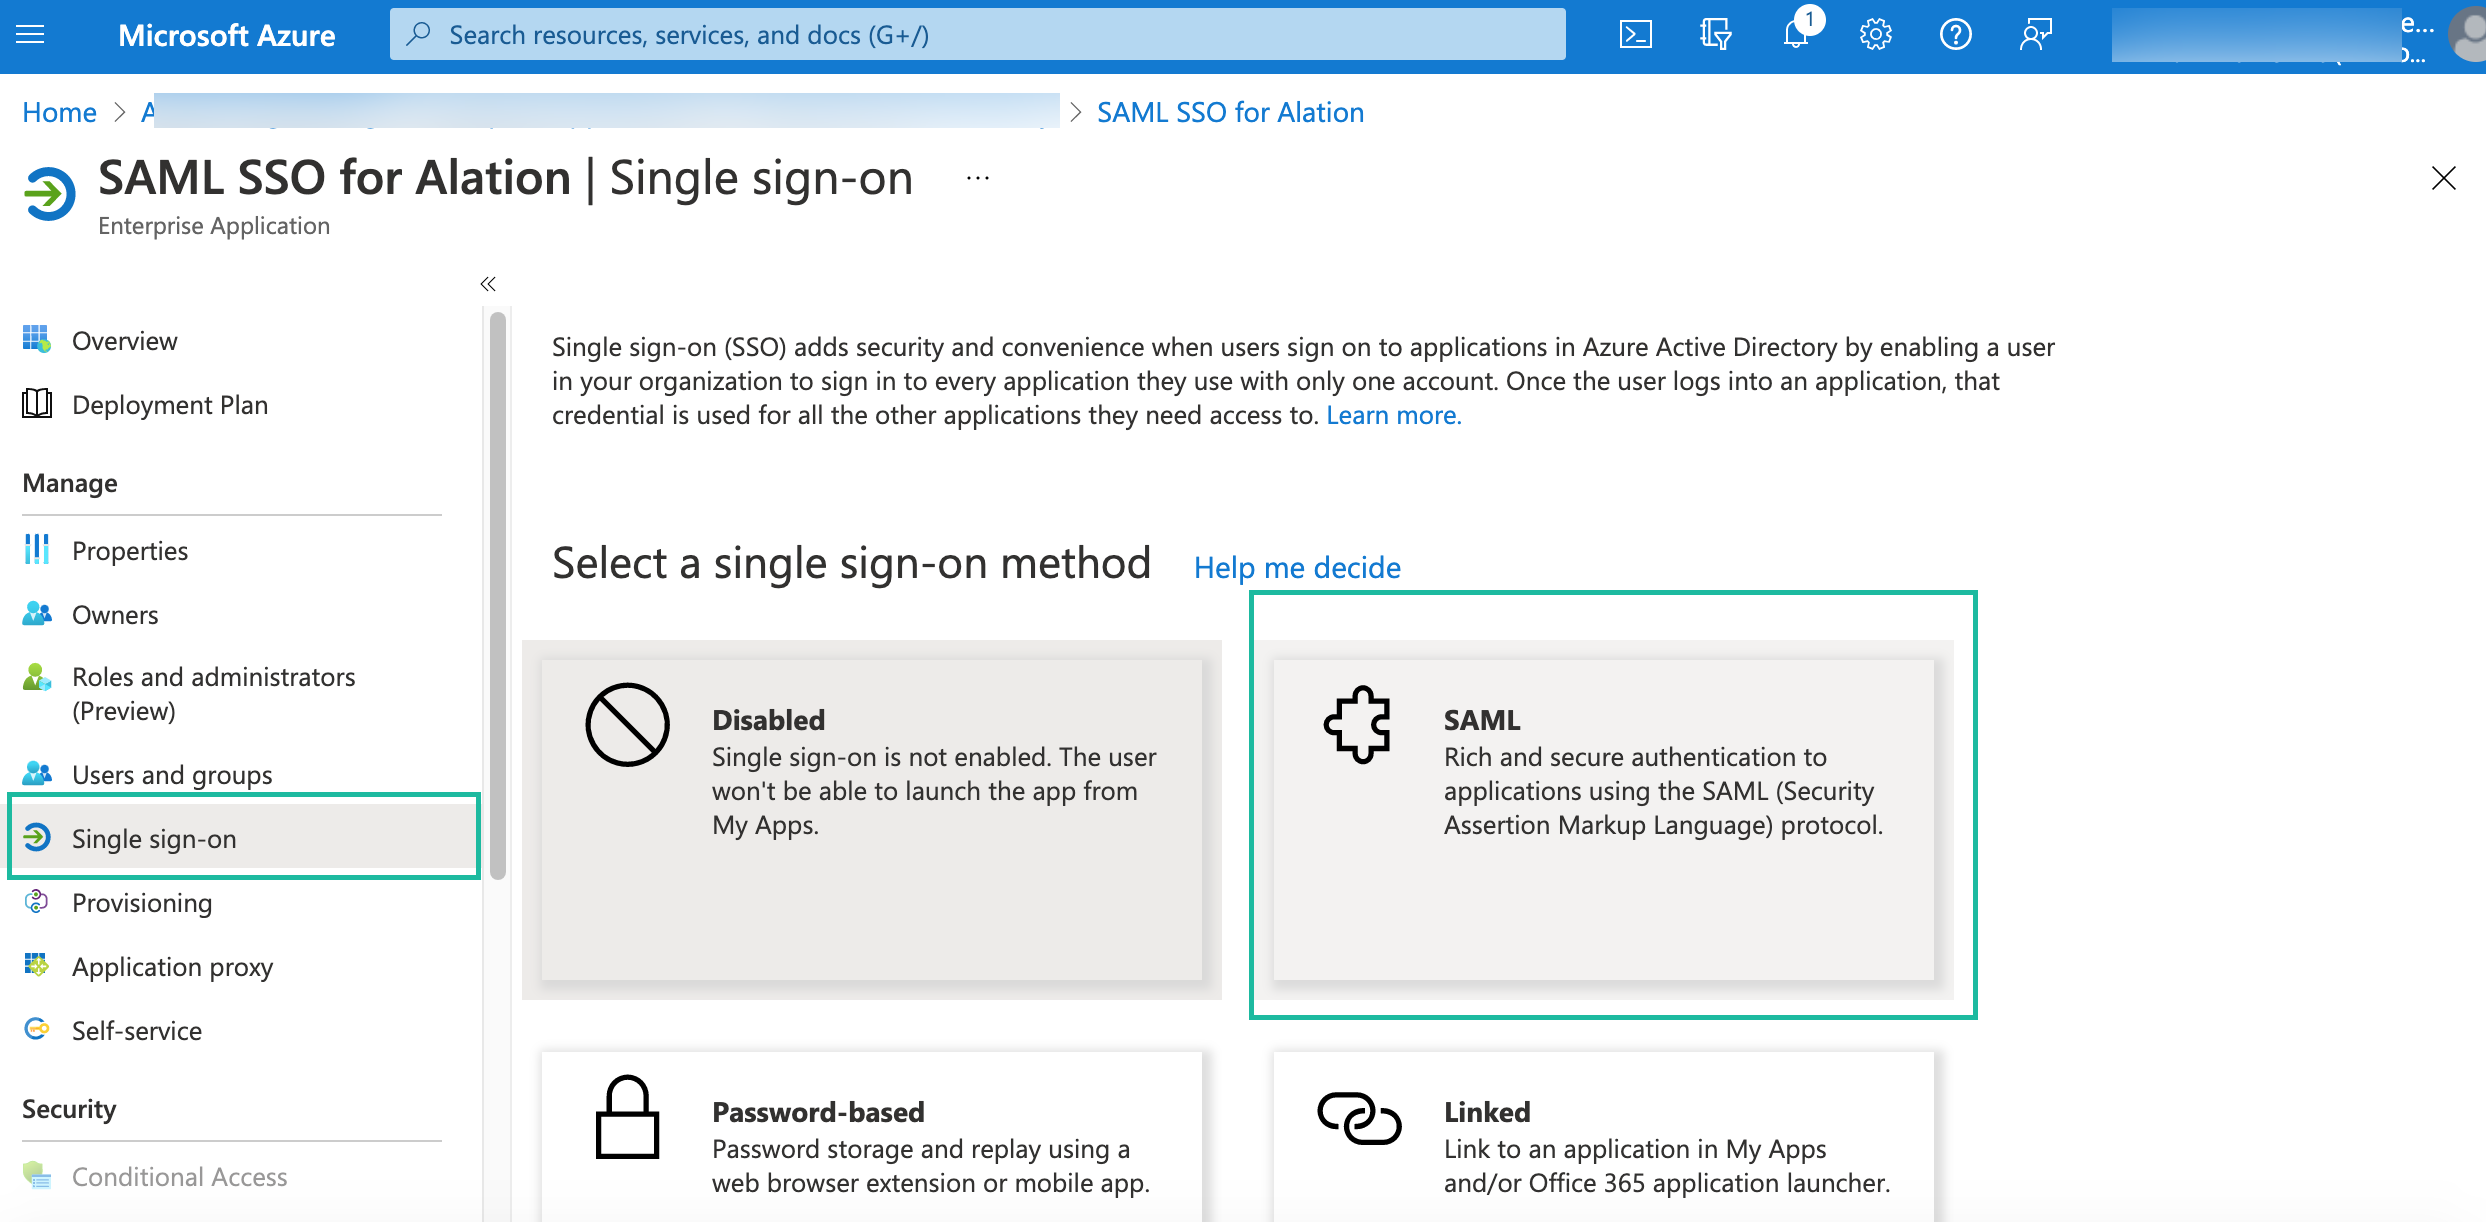
On the Single sign-on page that opens, select SAML.
On the next screen, click Edit in the Basic SAML Configuration block.

For Basic SAML Configuration, provide the values given below, substituting
<base_URL>with your Alation URL (for example:mycatalog.alation-test.com):Identifier (Entity ID) =
https://alation.com/Reply URL (Assertion Consumer Service URL) =
https://<base_URL>/saml2/acs/Sign on URL =
https://<base_URL>/
Save your changes.
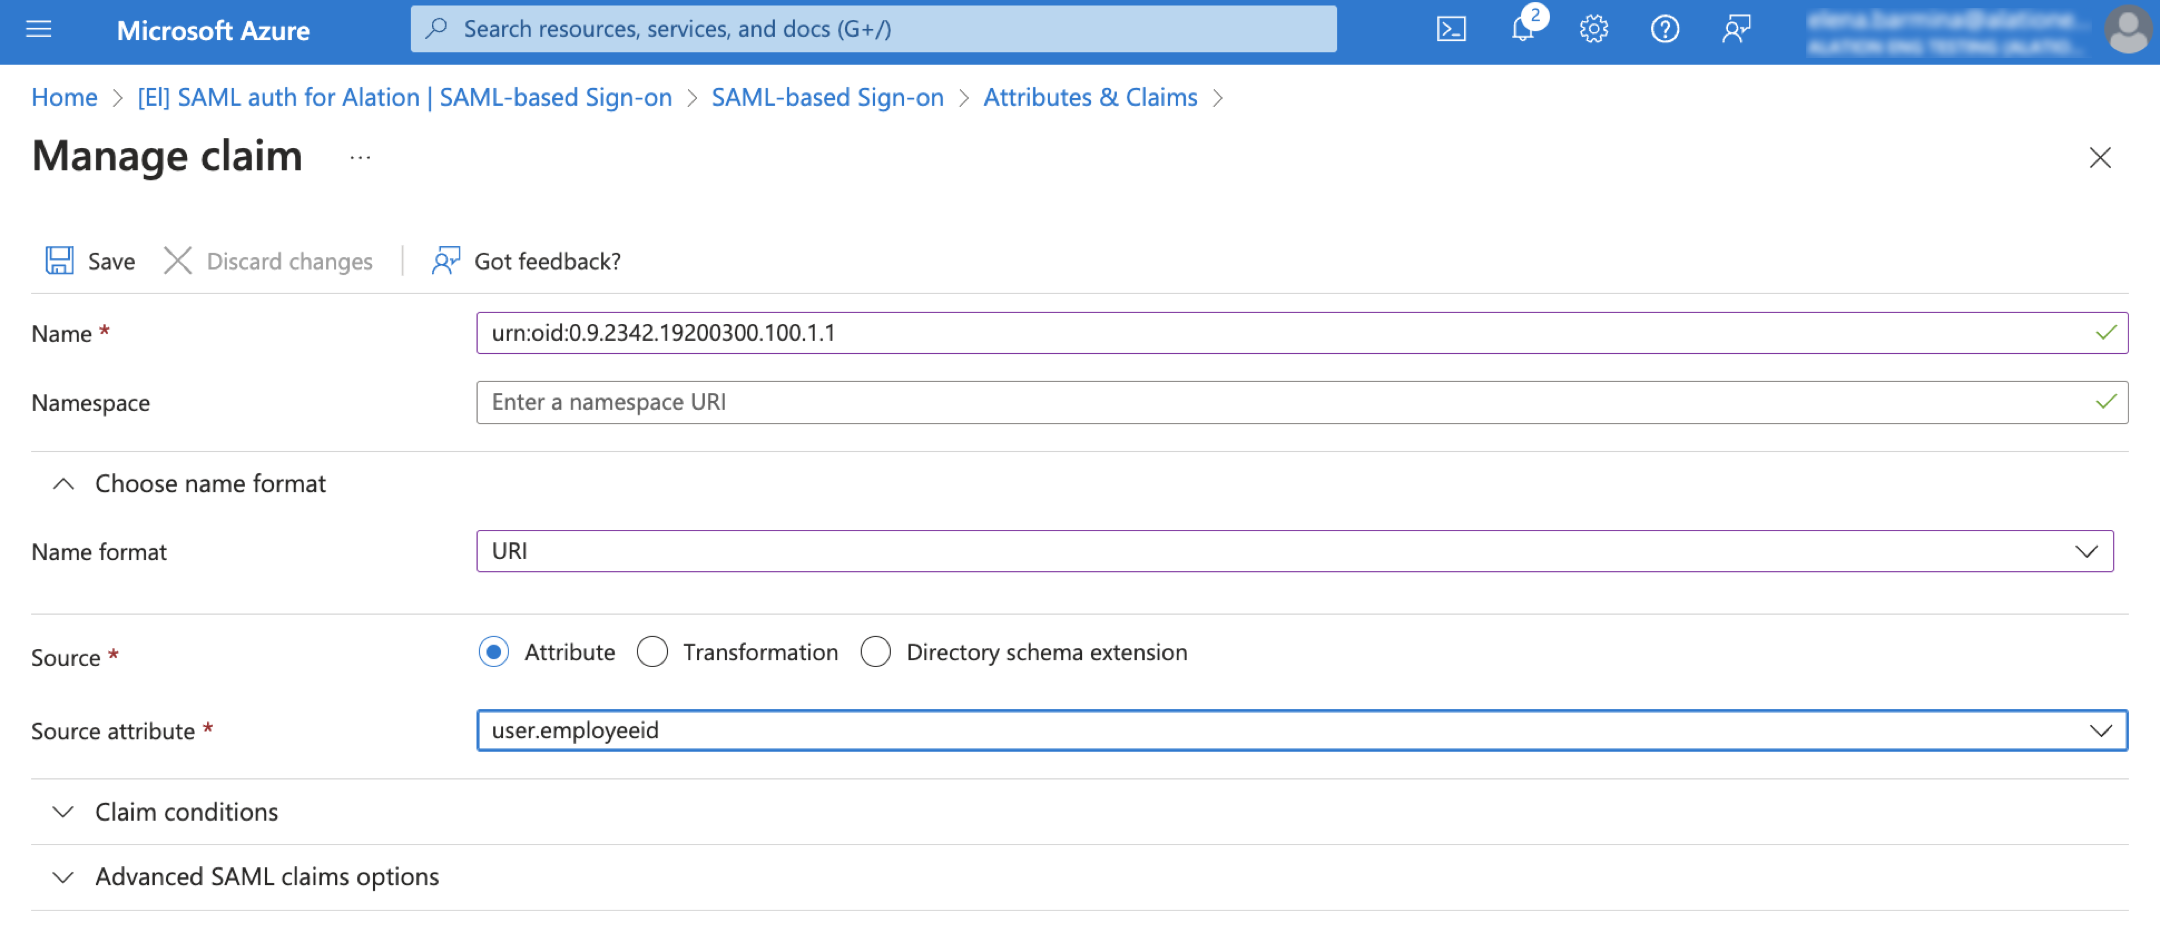
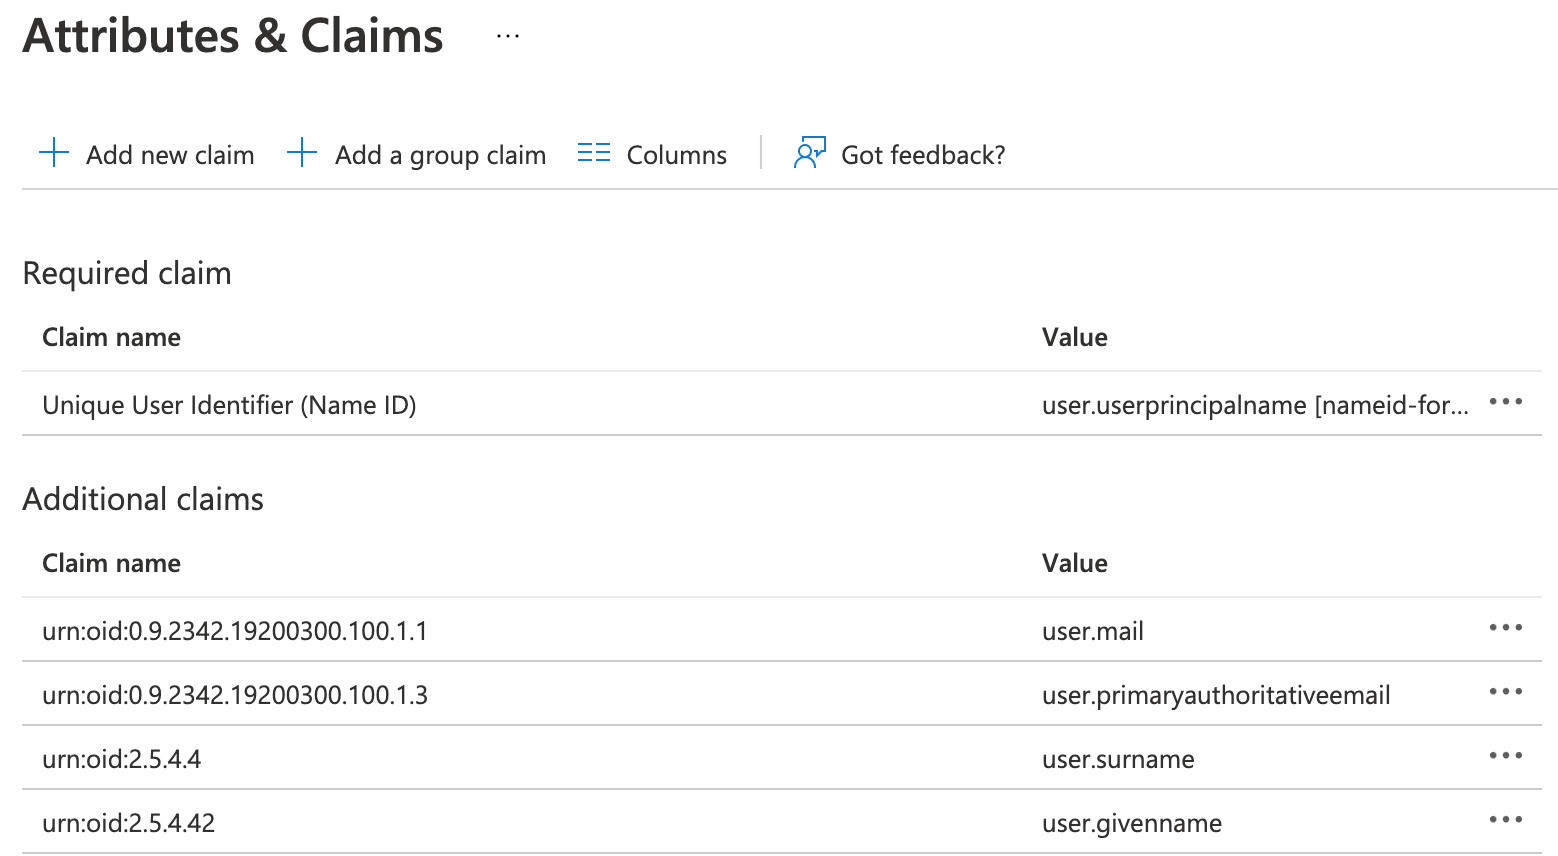
Click Edit in the Attributes & Claims block. Configure attribute mappings based on the SAML attributes available in the user profile. (For more information about SAML attributes required by Alation, see Configure SAML Attributes.)
In the Name field for an attribute claim, specify the
urn:oidof the attribute.Clear the Namespace field: it must be empty.
Expand the Choose name format block and select URI in the Name format field.
Important
Don’t leave the default value Omitted (Default) of the name format. Authentication will fail with this value even if the attributes are provided in the URI format.
Save your changes.
After editing Basic SAML Configuration and Attributes & Claims, the properties page of your application will look similar to the following:
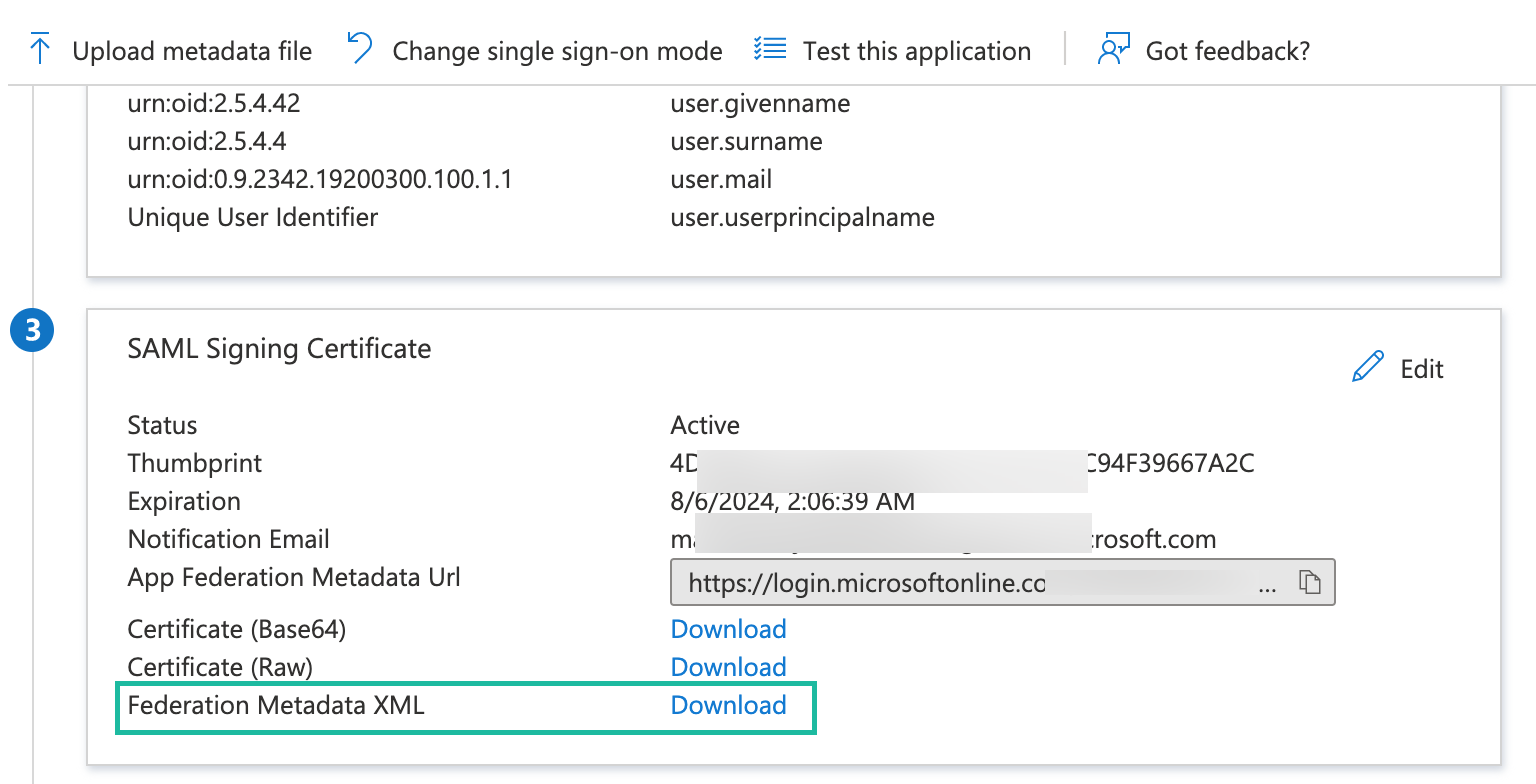
Alation doesn’t require a SAML Signing Certificate. However, if your environment requires the use of such a certificate, you can set it up.
In the SAML Signing Certificate section, locate Federation Metadata XML and click Download to download the certificate and save it on your computer. This will save the idp_metadata.xml file to your computer. You will need to upload this file to Alation in a later step.
To test the setup, click Test in the Test single sign-on with <your_app_name> block.
Next, assign users and groups to your app.
To create an application for from a preconfigured app:
Log in to the Azure portal.
Navigate to Enterprise applications.
Click New application. This takes you to the Browse Microsoft Entra Gallery screen.
In the Search bar, type Alation Data Catalog. The gallery will update to display the Alation Data Catalog app.
Click the Alation Data Catalog app’s tile. A slide-out panel will open on the right with the app’s details.
In the slide-out panel, click Create to add your app. Once it’s added, you’ll see the properties page.
Click on the Get started link in the block 2. Set up single sign on.
On the Single sign-on page, select SAML. This opens the Set up Single Sign-On with SAML page. Most required fields in the Alation Data Catalog app are preconfigured, but you’ll need to fill in the fields specific to your configuration.
Select the pencil icon for Basic SAML Configuration to edit the settings. A slide-out panel will open on the right with the relevant fields.
In the Identifier text box, check that the URL is:
http://alation.com/.In the Reply URL (Assertion Consumer Service URL) section, click Add reply URL and enter a URL in the following format:
https://<Alation’s base URL>/saml2/acs/. Example:https://my_data_catalog.com/saml2/acs/.To configure the app for service provider-initiated login (SP-initiated login), in the Sign-on URL text box, enter a URL in the following format:
https://<Alation’s base URL>/. Example:https://my_data_catalog.com/.Note
SP-initiated login means users will start the login flow by visiting the Sign-on URL directly.
Click the Save icon on top left to save your changes. You’ll return to the SAML properties page.
Select the pencil icon for Attributes & Claims to edit the SAML attributes. The Attributes & Claims page will open.
The Alation Data Catalog application expects the SAML assertions in a specific format, which requires you to add custom attribute mappings to your SAML token attributes configuration. The following screenshot shows the list of attributes that are already preconfigured in the app. Review them as per your requirements.
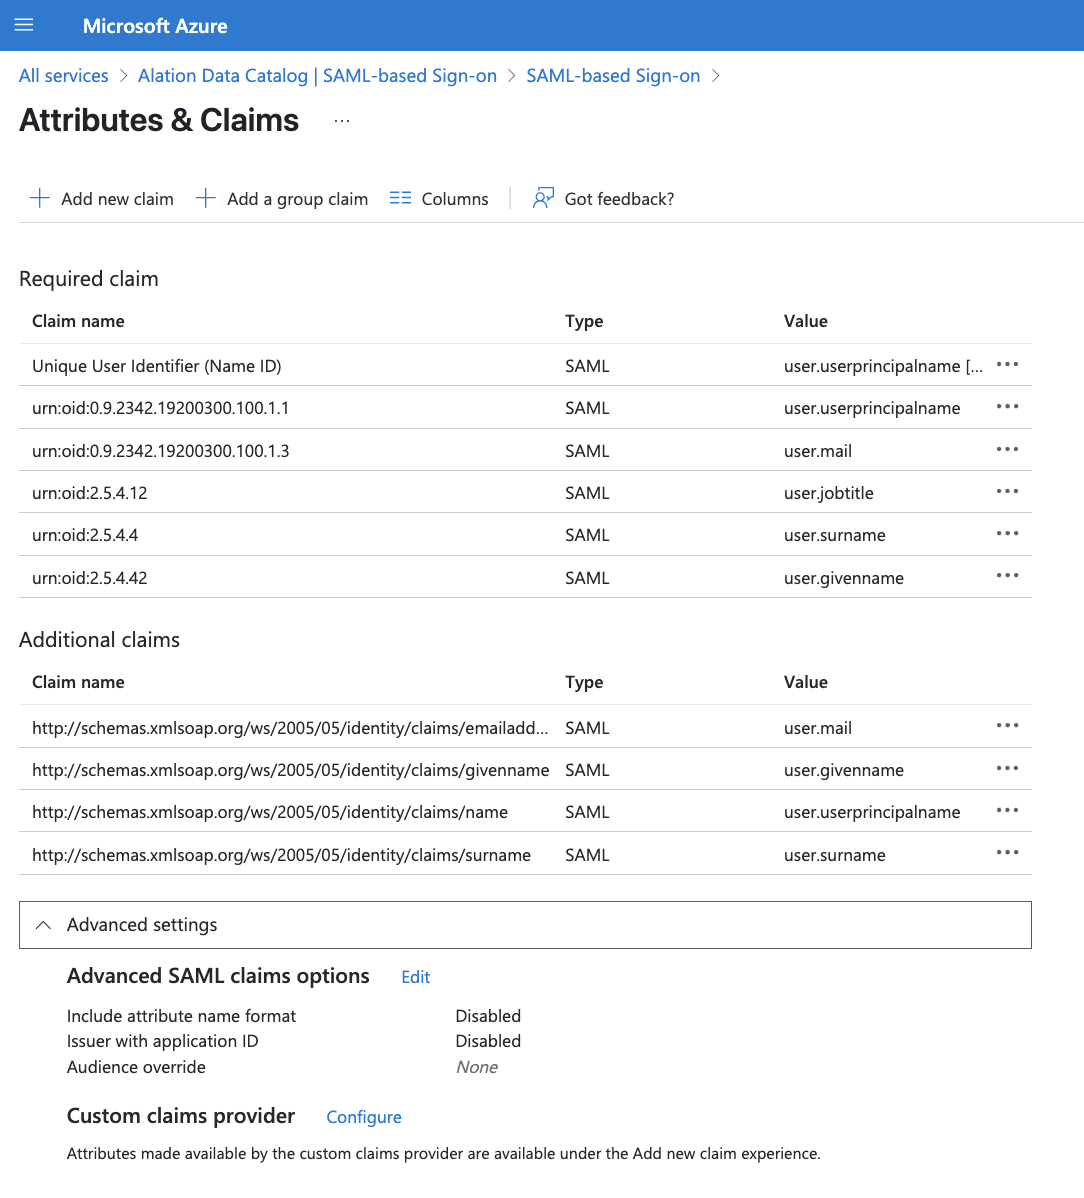
Select the Unique User Identifier (Name ID) claim. The Manage claim page will open. From the Name identifier format drop-down, select Persistent, then click Save.
For each of the required claims listed above, repeat the process:
Select the claim, choose URI as the Name identifier format, and click Save.
Note
The preconfigured claims use Omitted as the default name identifier format. Don’t leave it as is. Authentication will fail with this value because the attributes are provided in the URI format.
Once you’ve done these modifications, click the cross icon on top right to close the Attributes & Claims page and return to the SAML properties page.
The next block of settings is SAML Certificates. Alation doesn’t require a SAML Signing Certificate. However, if your environment requires the use of such a certificate, you can set it up.
In the SAML Signing Certificate section, locate Federation Metadata XML and click Download to download the certificate and save it on your computer. This will save the idp_metadata.xml file to your computer. You will need to upload this file to Alation in a later step.
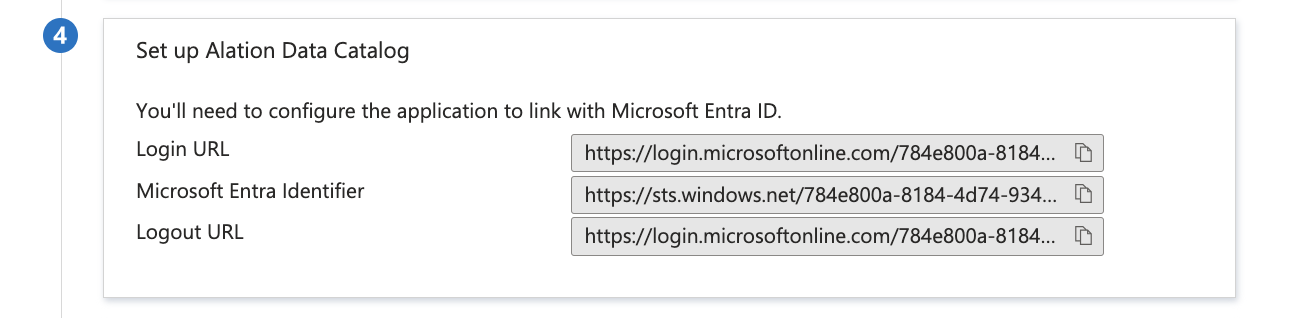
In the Set up Alation Data Catalog section, copy the relevant URL(s). You’ll need them for later configuration steps.
To test the setup, click Test in the Test single sign-on block.
Next, assign users and groups to your app.
Assign Users and Groups to the App
On the properties page of your application, click on the Users and groups option in the left sidebar.
Click Add user/group. Search and select the users and groups and assign them to the app.
Complete SAML Configuration in Alation
Log in to Alation and open Admin Settings > Authentication.
In the Account Authentication Method table, click Edit for SAML. The SAML properties page will open in a new browser tab.
Complete the SAML configuration following the instructions on the SAML properties page and upload the idp_metadata.xml file.
Click Save.
Warning
Saving the properties doesn’t activate SAML yet.
Before activating SAML, ensure that all required users are assigned to the SAML SSO application in Entra ID. Users with the Server Admin role must be assigned so they can log in and manage the application after SAML is enabled.
Go back to the browser tab with the Authentication page.
Activate SAML authentication by clicking Activate for SAML in the Account Authentication Method table.
Next, you can configure SCIM provisioning if you wish to manage users and groups from Entra ID.
Configure SCIM Provisioning
STEP 1: Configure SCIM Sync on the Alation Server
Perform the configuration for SCIM on the Alation server using the steps in Configure SCIM Integration. As a result, you will have a SCIM authentication token from Alation that should be provided in the properties of your Entra ID app.
STEP 2: Configure SCIM Provisioning in Microsoft Entra ID
Log in to the Azure Portal.
Open the properties page of your SAML SSO application in Entra ID.
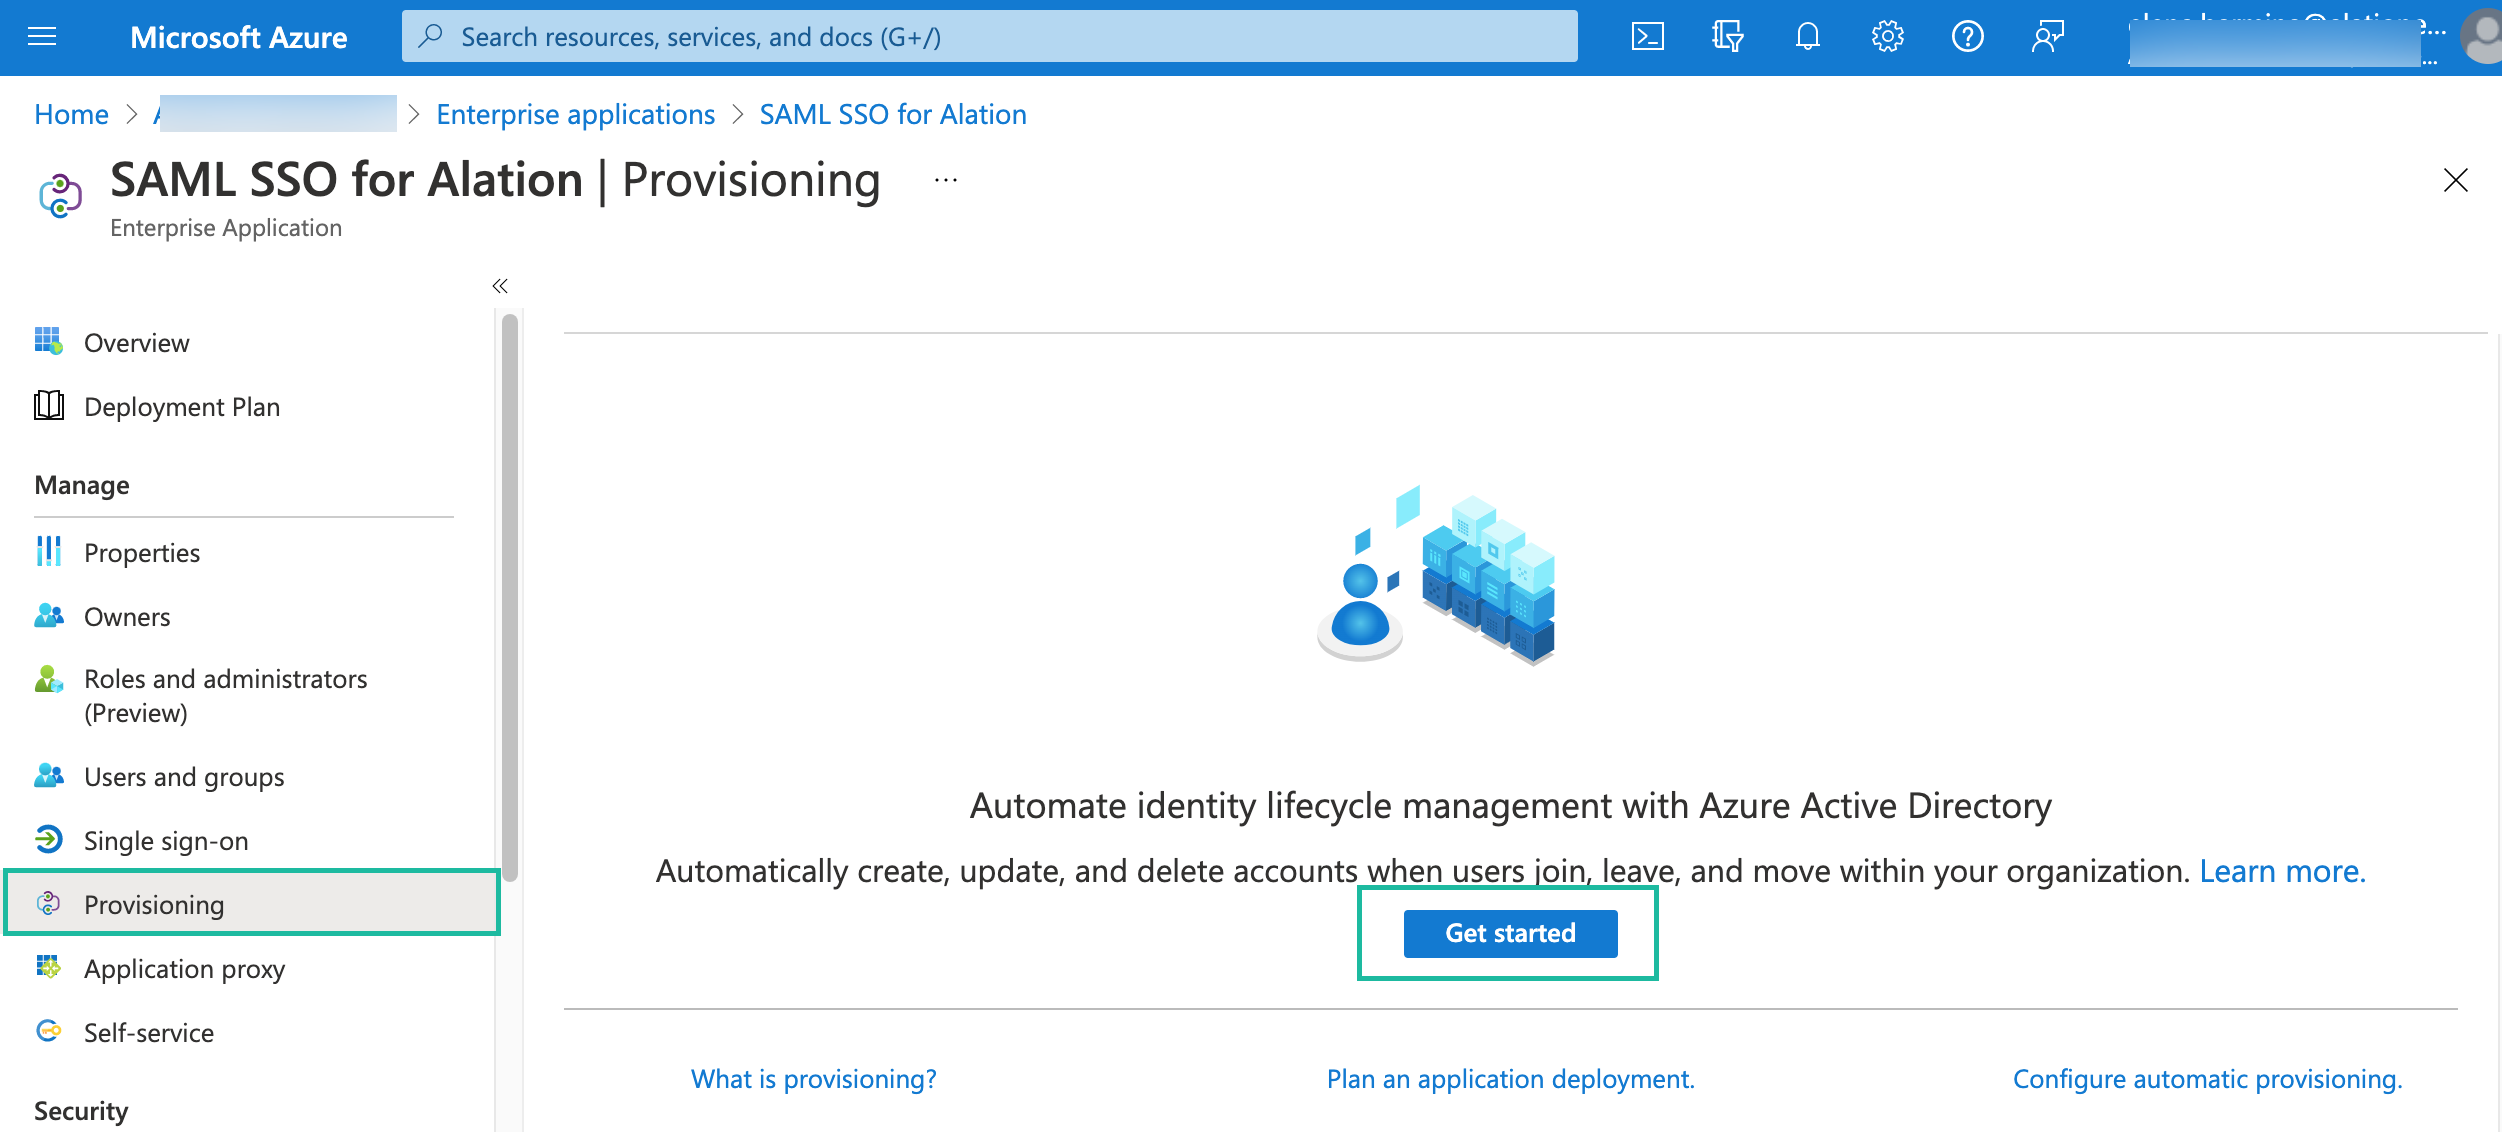
Click on the Provisioning tab on the left and click Get started on the Provisioning page:
For Provisioning Mode, select Automatic.
Provide Admin Credentials:
Tenant URL:
https://<base_URL>/scim/v2/Secret Token: provide the token value from Alation
Click the Test Connection button to verify the connection. If the connection can be established successfully, you will be able to configure Group and User attribute mappings.

Under Mappings, click Provision Microsoft Entra Groups.
Under Target Object Actions, make sure that all actions are selected:
Create
Update
Delete
Remove the attribute mapping:
ObjectId - ExternalId, only leaving the attributesdisplayNameandmembers. Your configuration should be similar to the following: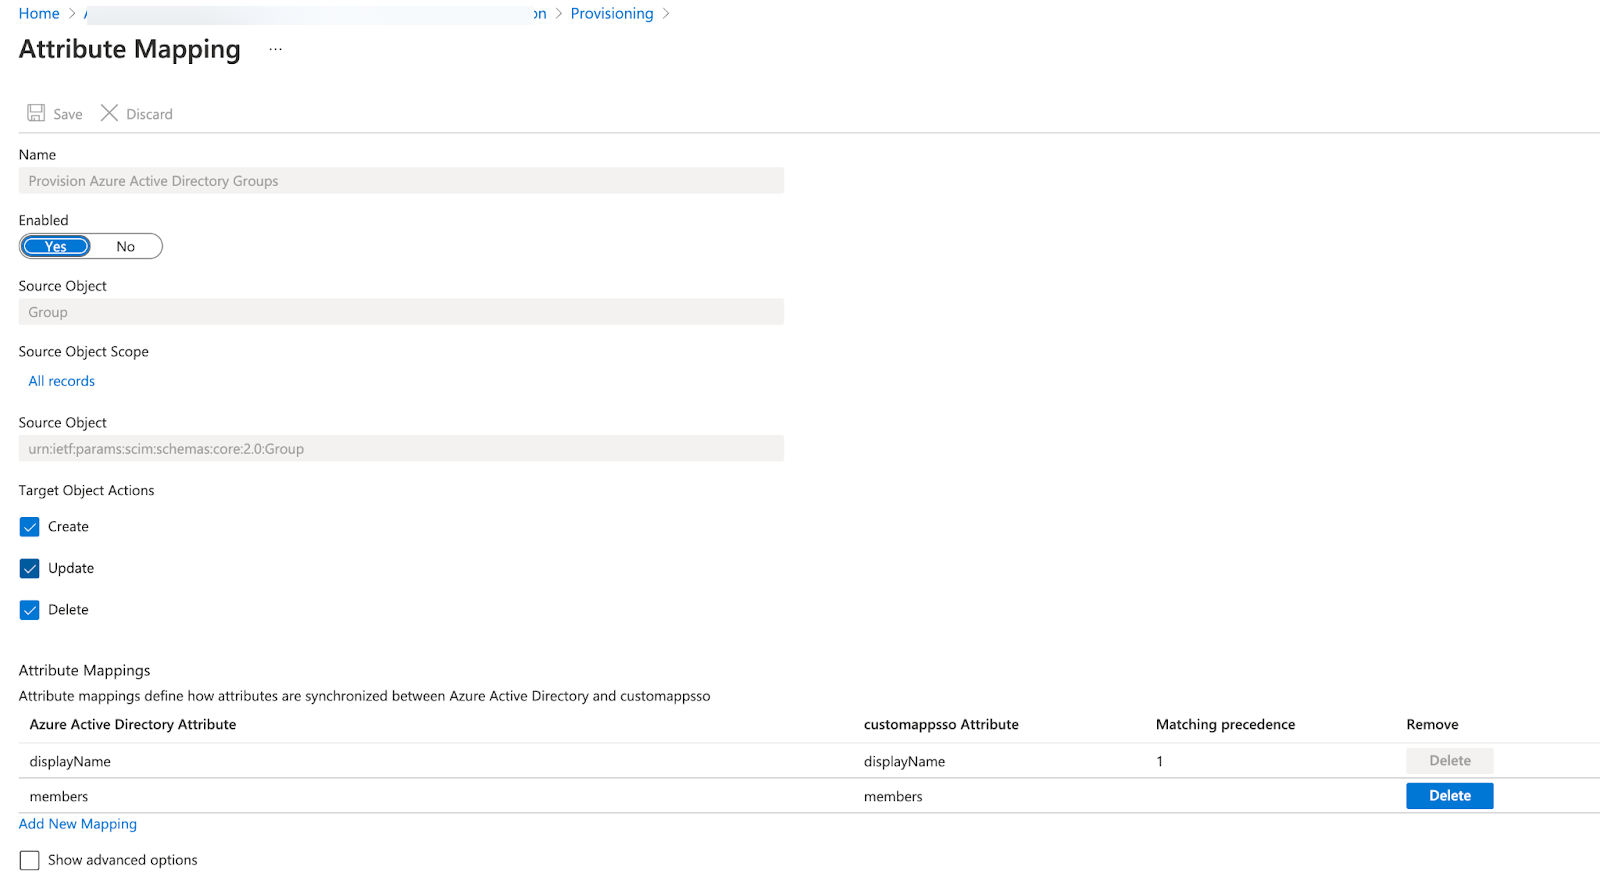
Save.
Under Mappings, click Provision Microsoft Entra Users.
Remove most of the attributes, only leaving the following list:
userPrincipalNameSwitch([IsSoftDeleted], , "False", "True", "True", "False")displayNamemailgivenNamesurname
Save.
Check that the users and groups that need to be synced to Alation have been added under the Users and Groups tab of the application.
Perform provisioning. See How Application Provisioning works in Microsoft Entra ID in Entra ID documentation for details.
Important
You can monitor the provisioning process by tailing the
scim-debug.logfile from the Alation shell. See Monitor SCIM Provisioning below.
The users and groups that are pushed from Entra ID to Alation should be created in Alation after the push. If user or group properties change, the changes will be reflected in Alation after the automatic provisioning (40 min after the change) or after provisioning is performed on demand. If a user or group is unassigned from the application, this user will be suspended in Alation and the corresponding SCIM group will be deleted.
Monitor SCIM Provisioning
When you are performing a SCIM push from Entra ID on customer-managed instances of Alation, you can monitor the process by tailing the scim-debug.log file from the Alation shell. To tail the log file:
Use SSH to connect to the Alation server.
Enter the Alation shell using the following command:
sudo /etc/init.d/alation shell
Navigate to the directory /opt/alation/site/logs.
To tail the
scim-debug.logfile:tail -f scim-debug.log
To exit the tail mode, press Ctrl+C.
Limitations of SCIM Integration with Microsoft Entra ID
Nested Groups Are Not Supported
Currently, Entra ID does not support reading or provisioning nested groups.
SCIM API Request Throttling
Alation supports a maximum of 20/sec read and write throttle for its SCIM endpoints. If your account exceeds this threshold, Alation returns a 400 HTTP status code (Bad Request). Note that this request limit may occur during the initial provisioning when a relatively large number of requests are made to initially provision all users and groups.