Manage Data Products
Alation Cloud Service Applies to Alation Cloud Service instances of Alation
Creating and maintaining data products involves taking responsibility for their accuracy, usefulness, and reusability. This topic explains how to manage data products throughout their lifecycle.
Important
To manage data products, you must either be their owner or have the appropriate permissions assigned within the Data Products App. See Configure Access in the Data Product App for information about what users can manage data products.
Note
The Data Products App includes a dedicated public API. You can find the Data Products API documentation on Alation’s Developer Portal.
In this topic:
Access the Manage My Data Products Page
As a Data Product Admin, the Manage My Data Products page is the starting point for managing your data products, including creating them, viewing their configuration, and editing them. See Access the Data Products App on how to access the Data products App in Alation.
To access data product management actions:
On the Manage My Data Products page, from the Data Products table, locate the data product you want to manage.
In the rightmost column, click the three-dot icon to open the available actions, and select from the following options:
Copy Link: Copies the URL of the data product to your clipboard.
Manage Permissions: Opens the Manage Product Permissions dialog. For details, see Manage a Data Product’s Permissions.
Evaluate Data Product Chat: Opens the Chat Evaluations list. For details, see Evaluate Data Product Chat.
Manage Feedback: Opens the Chat Feedback Management page. For details, see Manage Chat Feedback.
Delete Data Product: Deletes the data product. See Delete Data Product.
Add a New Data Product
For details on creating a data product, refer to Get Started with Creating Data Products and Create Data Products Using YAML.
Note
You can also use the Data Products Builder Copilot to help you create a data product.
Manage a Data Product’s Permissions
To assign data product permissions to users or groups:
In the left-hand navigation, select the Data Products App.
From the App’s menu, select My Data Products.
Click the three-dots icon for the data product and from the menu that opens, select Manage Permissions. Alternatively, click the data product name to open its catalog page. Click the three-dot menu icon on the top right of the page to open the data product options. Select Manage Permissions.

Click Add User/Group and find and select users or groups to add them to the Product Roles table.
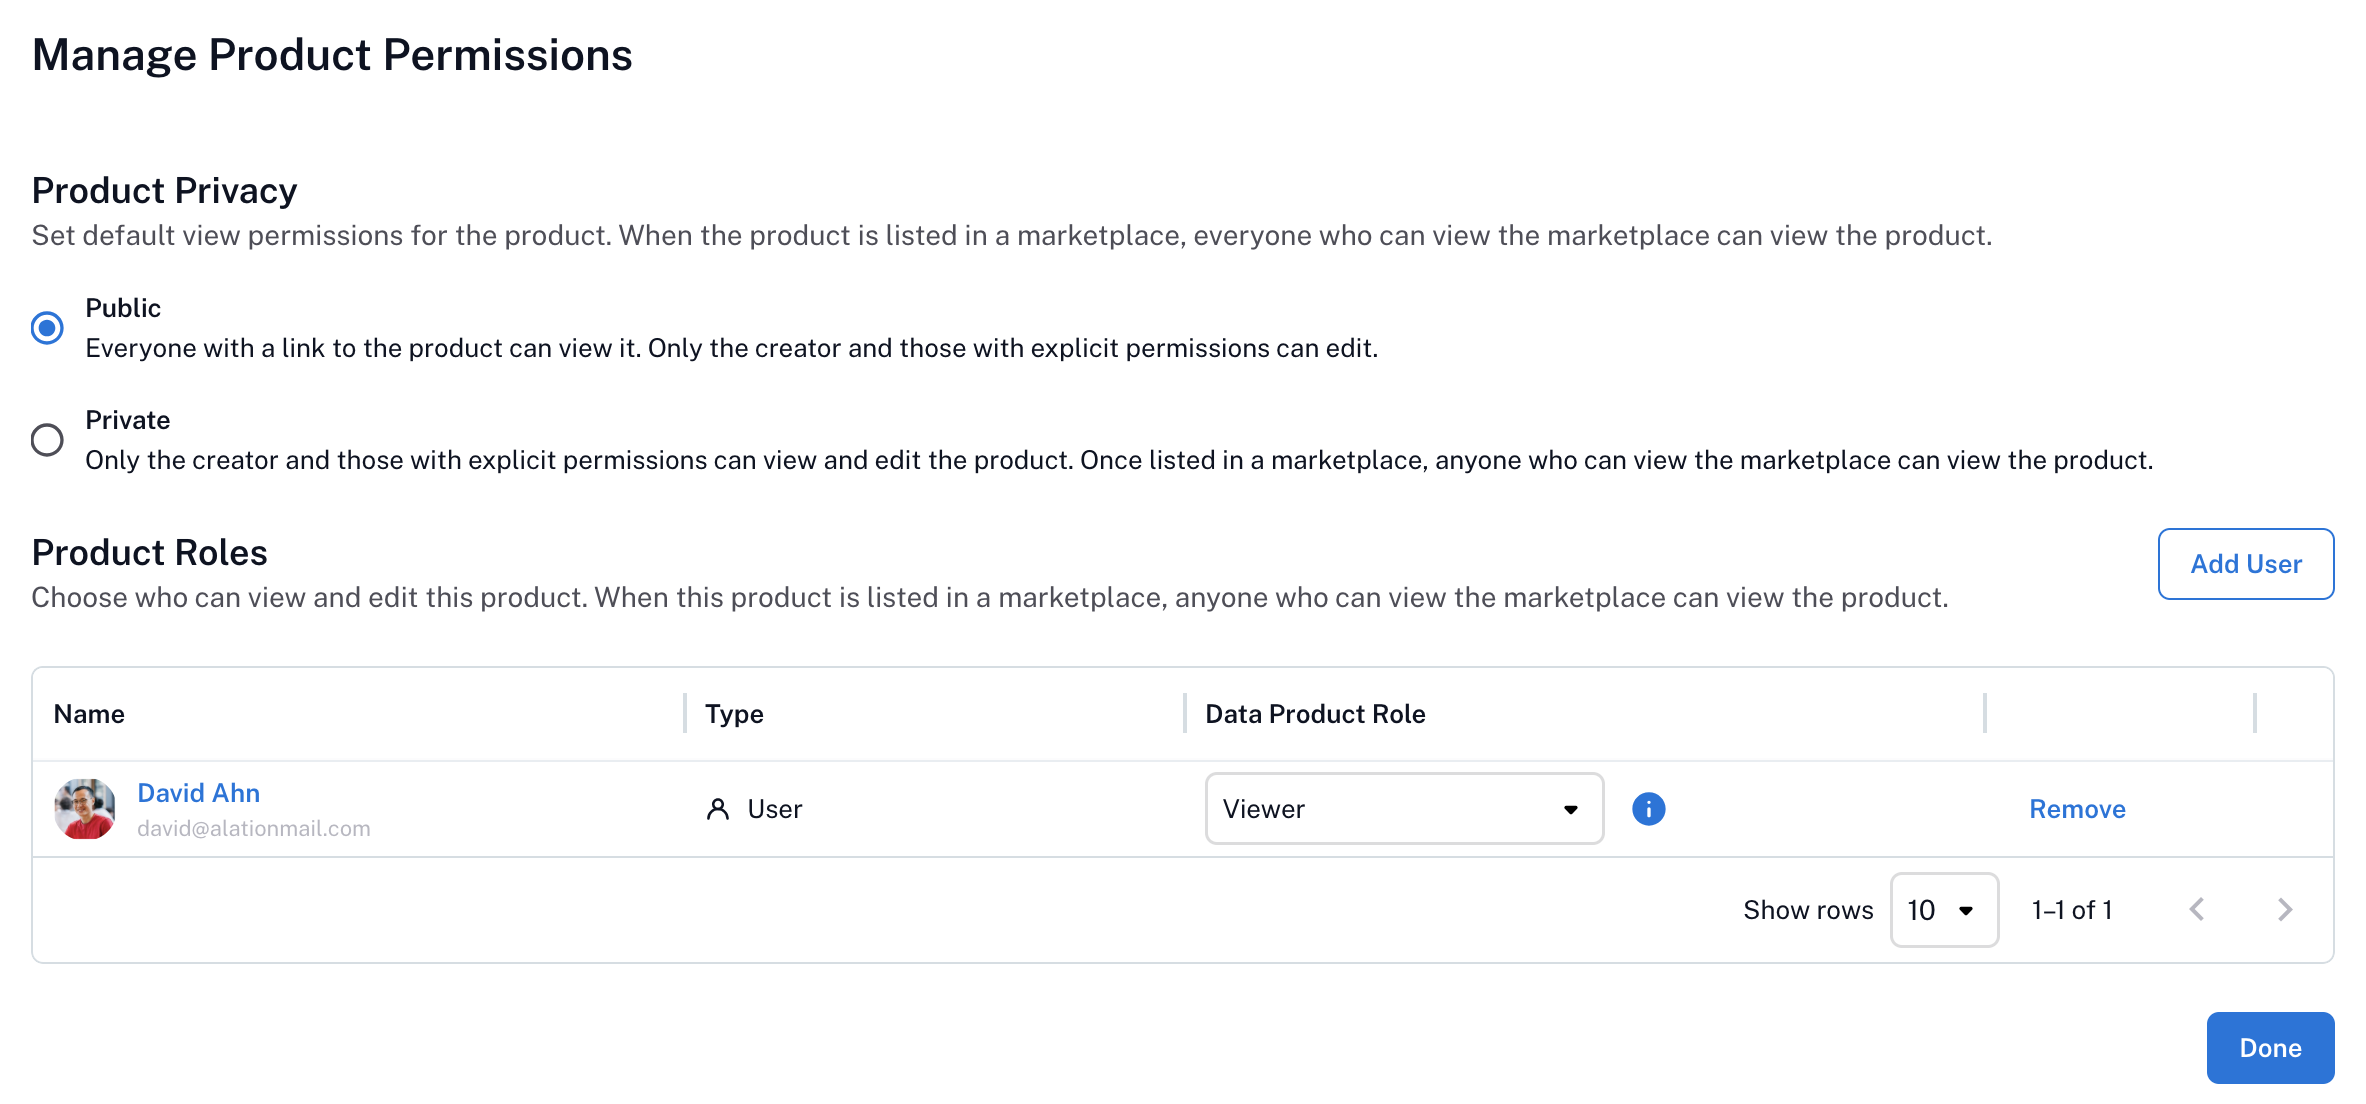
In the Data Product Role column of the table, choose the appropriate role: Admin or Viewer.
Click Done.
Edit a Data Product
To edit a data product:
In the left-hand navigation, select the Data Products App.
From the App’s menu, select My Data Products.
From the list of data products in the Data Products table, find the data product you want to work with.
In the rightmost column of the Data Products table, click Edit. The data product editor opens.
Edit the data product configuration as needed. Use the Preview toggle on top left to preview the changes in real time.
Click Save.
Validate the Data Product
If your Marketplace definition includes minimum standards, users are able to validate the data product definition before saving it.
If your data product fails validation:
Check that all required metadata fields are present.
Confirm that the schema section in each record set includes name, description, and type.
Review the error message in the response. It will list missing or invalid fields.
Make corrections to the YAML file.
Save the file.
Download the Data Product Definition
You can download the data product YAML specification to get a copy on your local machine:
In the left-hand navigation, select the Data Products App.
From the App’s menu, select My Data Products.
From the list of data products in the Data Products table, find the data product you want to work with. Click the data product name to open its catalog page.
Click the three-dot menu icon on the top right of the page to open the data product options.
Select Download Data Product to download the corresponding YAML file.
List a Data Product on the Marketplace
Once you data product is ready for consumers, list it on the Marketplace:
In the left-hand navigation, select the Data Products App.
From the App’s menu, select My Data Products.
From the list of data products in the Data Products table, find the data product you want to work with. Click the data product name to open its catalog page.
Click the three-dot menu icon on the top right of the page to open the data product options.
Select List Data Product in Marketplace to submit the data product to the Marketplace.
Unlist a Data Product from the Marketplace
You can unlist a data product in two ways, depending on your role in the Data Products App.
From the Data Product
As a Data Product Admin for a specific product, you can unlist the data product from on its catalog page:
In the left-hand navigation, select the Data Products App.
From the App’s menu, select My Data Products.
In the Data Products table, find the data product you want to work with. Click the data product’s name to open its catalog page.
Click the three-dot menu icon in the top right of the page to open the action menu.
Select Unlist Data Product in Marketplace. This removes the data product’s listing from the Marketplace. The data product no longer appears on the Marketplace landing page. It remains accessible to users who have sufficient permissions to view it outside of the Marketplace.
From Manage Marketplace
As the Marketplace Maintainer or Marketplace Admin, you can unlist a data product from the Manage Marketplace page:
In the left-hand navigation, select the Data Products App.
From the App’s menu, select Manage Marketplace.
In the Data Products table, find the data product you want to work with.
For this data product, click Unlist in the rightmost column. This removes the data product’s listing from the Marketplace. The data product no longer appears on the Marketplace landing page. It remains accessible to users who have sufficient permissions to view it outside of the Marketplace.
Delete a Data Product
In the left-hand navigation, select the Data Products App.
From the App’s menu, select My Data Products.
From the list of products under the Data Products table, locate the one to delete.
In the rightmost column of the Data Products table, click the three-dot menu icon.
Select Delete Data Product. Your data product is deleted.