SSO with Snowflake for Data Product Chat
Alation Cloud Service Applies to Alation Cloud Service instances of Alation
When using Snowflake as a data source for data products, the recommended authentication method for Chat and Chat Evaluation is Snowflake OAuth (Open Authorization) via your SSO (Single Sign-On) provider.
This topic explains how to configure OAuth-based SSO authentication for Snowflake-backed data products in Alation:
Configure Snowflake OAuth:
Prerequisites
Permissions:
Alation: You must have Server Admin role.
Snowflake: You must have the
ACCOUNTADMINrole or a role that has been granted theCREATE SECURITY INTEGRATIONprivilege (GRANT CREATE SECURITY INTEGRATION ON ACCOUNT TO ROLE <YOUR_ROLE>;).
Data Source: A Snowflake data source must already be cataloged in Alation.
Network: Ensure the Alation instance can communicate with your Identity Provider (IdP).
Team: You may need help from your IdP administrator to set up the Alation client application.
Step 1: Determine Your OAuth Integration Path
Before enabling authentication for the data product Chat and evaluation features, you must select the OAuth configuration path that aligns with your organization’s Snowflake and identity provider architecture.
Data products are built on existing catalog data sources. Your Snowflake data source may already be using OAuth for Compose </OpenConnectorFramework/DataSourceConnectors/Snowflake/SnowflakeOAuth/index>.
Important
Your existing Snowflake OAuth configuration for Compose is not automatically valid for data product authentication.
However, it may affect what you can reuse, what you must recreate, and which setup steps apply to you.
Note
How to check that the Compose OAuth configuration already exists:
Open your Snowflake data source page in the Alation catalog.
Click the three-dot menu in the top-right corner and select Settings.
Open the Compose tab.
Verify the following settings:
Enabled in Compose: Toggle is enabled.
Enable OAuth 2.0 in Compose: Checkbox is selected with valid configuration data.
Select Your OAuth Method
Snowflake supports two primary OAuth 2.0 methods. The choice depends on whether you prefer to manage user credentials directly within Snowflake or leverage an existing external identity provider (IdP).
Snowflake Built-in OAuth: Uses Snowflake’s native OAuth service. This option is for organizations that do not require integration with an external identity platform.
External OAuth: Integrates Snowflake with an organization’s external OAuth 2.0 authorization server (IdP). External OAuth via an IdP is the recommended enterprise standard for production environments to ensure unified identity management.
Note
For detailed information on OAuth support in Snowflake, see the Snowflake documentation.
Use the logic below to find your specific starting point:
Case A: No Existing Compose OAuth
If OAuth is not enabled for Compose, you are starting from scratch.
Choose either Built-in or External OAuth based on your security requirements.
Case B: Existing Built-in OAuth in Compose
You cannot reuse a Built-in OAuth Compose integration for Data Product features. Each integration is scoped specifically to its original purpose.
You must create a completely new Security Integration in Snowflake specifically for Data Products. See: Step 2A: Configure Snowflake Built-in OAuth for Data Products.
Case C: Existing External OAuth in Compose
If you already use an IdP (like Okta or Entra ID) for Compose, you can leverage the existing Authorization Server configuration. However, you cannot reuse the same Client App.
Create a new Client Application in your IdP specifically for the Data Product authentication path. See: Step 2B: Configure Snowflake External OAuth for Data Products.
Step 2A: Configure Snowflake Built-in OAuth for Data Products
Use this approach if you want to use Snowflake’s built-in OAuth service.
1. Create a Snowflake Security Integration for Alation
On Snowflake, create a Snowflake OAuth integration, using the CREATE SECURITY INTEGRATION SQL command.
Important
The redirect URI must point to the following endpoint on your Alation instance: /api/datasource_auth/oauth/callback.
Minimal Required Configuration
The example below shows a minimal required set of parameters for the security integration:
CREATE SECURITY INTEGRATION <integration_name>
  TYPE = OAUTH
  ENABLED = TRUE
  OAUTH_CLIENT = CUSTOM
  OAUTH_CLIENT_TYPE = 'CONFIDENTIAL'
  OAUTH_REDIRECT_URI = 'https://<alation_instance_URI>/api/v2/auth/callback';
Note
The name of the security integration will be visible to users on the consent screen following authorization.
Parameter details:
TYPESpecifies the type of integration. Must be set to
OAUTH.ENABLEDEnables or disables the integration. Set to
TRUEto enable.OAUTH_CLIENTSpecifies the client type. Use the value
CUSTOMfor integrating with Alation.OAUTH_CLIENT_TYPESpecifies the client type. Use the value required by your environment.
OAUTH_REDIRECT_URISpecifies the client URI. Use the format
https://<alation_instance_URI>/api/datasource_auth/oauth/callback.For
<alation_instance_URI>, provide the URI of your Alation Catalog instance.
Extended Configuration
You can optionally use more parameters, depending on the security requirements at your organization and your specific use case. The example below shows an extended configuration for the security integration:
CREATE SECURITY INTEGRATION <integration_name>
  TYPE=OAUTH
  ENABLED=TRUE
  OAUTH_CLIENT = CUSTOM
  OAUTH_CLIENT_TYPE='CONFIDENTIAL'
  OAUTH_REDIRECT_URI='http://<alation.company.com>/api/datasource_auth/oauth/callback'
  OAUTH_ISSUE_REFRESH_TOKENS = TRUE
  OAUTH_REFRESH_TOKEN_VALIDITY = 3600
  OAUTH_ENFORCE_PKCE = TRUE;
Optional parameter details:
Refresh tokens
Refresh tokens can greatly minimize the frequency with which Compose users must re-authorize with the Snowflake authorization server. This can be particularly useful for features such as scheduled queries and Excel Live Reports. You can consider including these refresh token parameters:
OAUTH_ISSUE_REFRESH_TOKENS—Controls whether refresh tokens can be used to acquire new access tokens without re-authorization from the user.OAUTH_REFRESH_TOKEN_VALIDITY—Configures the lifetime of refresh tokens and defaults to 90 days.
PKCE (Proof Key of Code Exchange)
You can consider including the
OAUTH_ENFORCE_PKCEparameter to make the OAuth flow more secure. By default, this is not required by the Snowflake security integration.
2. Collect Authentication Information
From the Snowflake security integration, collect the authentication information for Alation.
Client ID and Client Secret
Retrieve the client ID and secret generated by Snowflake after creating the security integration. You can use the SQL command below. For more information on this system function in Snowflake, refer to SYSTEM$SHOW_OAUTH_CLIENT_SECRETS.
SELECT SYSTEM$SHOW_OAUTH_CLIENT_SECRETS('<integration_name>');Note
The command will return two client secrets to facilitate uninterrupted rotation. You don’t need
OAUTH_CLIENT_SECRET_2.
Step 2B: Configure Snowflake External OAuth for Data Products
Use this approach if your organization uses External OAuth 2.0 via an identity provider (IdP).
Alation supports Snowflake external OAuth using IdPs that support the authorization code grant type.
2. Register Alation in the IdP as a Client App
Add Alation as a client application in the same IdP used for Snowflake, using these parameters:
Redirect URL
https://<alation_base_URL>/api/v2/auth/callback
Note
Some IdPs require a trailing slash:
https://<alation_base_URL>/api/v2/auth/callback/
Scope
Refer to the information on scopes in Snowflake documentation to configure the scope. You can add the SESSION:ROLE-ANY parameter to allow users to use any Snowflake role assigned to them. Alternatively, create specific role-linked scopes.
3. Collect Information for Alation
For configuration in Alation, collect the values listed below from your IdP. These values can usually be found in the authorization server settings, the IdP metadata file, and in the client app’s settings:
From the client app that you added for Alation, collect:
Client ID
Client secret
From the authorization server in the IdP, collect:
Authorization endpoint
Token endpoint
Scope
Refresh token support
PKCE support
The username claim attribute
Step 3: Create an Authentication Profile
To link the OAuth configuration on Snowflake to a data product, create an external authentication profile in Alation:
Click the gear icon in the top-right corner to open Admin Settings.
Select Authentication.
Locate Authentication Configuration Methods for External Systems.
From See configurations for, select:
Alation Cloud Service, or
An Alation Agent (Choose the name of an Alation Agent to create the configuration for an Agent. An Agent name will only be listed if you’ve installed the Authentication Service Add-on on that Agent).
Click Add Configuration and select OAuth.
Populate the fields and click Save.
Refresh the page and record the Config Name for the profile you created.
OAuth Fields Reference
Note
Provide the optional values if they are present in and enforced by your identity provider (IdP).
Field |
Description |
|---|---|
Config Name |
The profile identifier (≤ |
Client ID and Client Secret |
|
Scope (optional) |
|
Subject (optional) |
Token claim used as the username (for example, |
Token validity buffer (optional) |
Buffer time in minutes before token expiration (Default: |
Grant Type |
|
PKCE Verifier (optional) |
Enable or disable Proof Key for Code Exchange (PKCE) in the authentication flow. Enabled by default. |
Authorize Endpoint URL |
|
Redirect URL |
A valid redirect URL for the identity provider. It must match the Redirect URI configured in the security integration and end with |
Token Endpoint URL |
|
User Info Endpoint URL |
|
Note
Learn more about the external auth profiles in Authentication Configuration Methods for External Systems.
Step 4: Assign User Roles and Permissions
For all Alation users connecting to the data product Chat, ensure that they are explicitly assigned default roles within Snowflake, as the PUBLIC role is not automatically assigned to users without a default role when making connections with an external OAuth token.
Note
A default role isn’t required if a role is specified as a default scope in Alation or the authorization server.
Required Snowflake Permissions
Users must have SELECT privileges on the relevant database objects.
Insufficient permissions result in the error: Schema ‘<schema.name>’ does not exist or is not authorized.
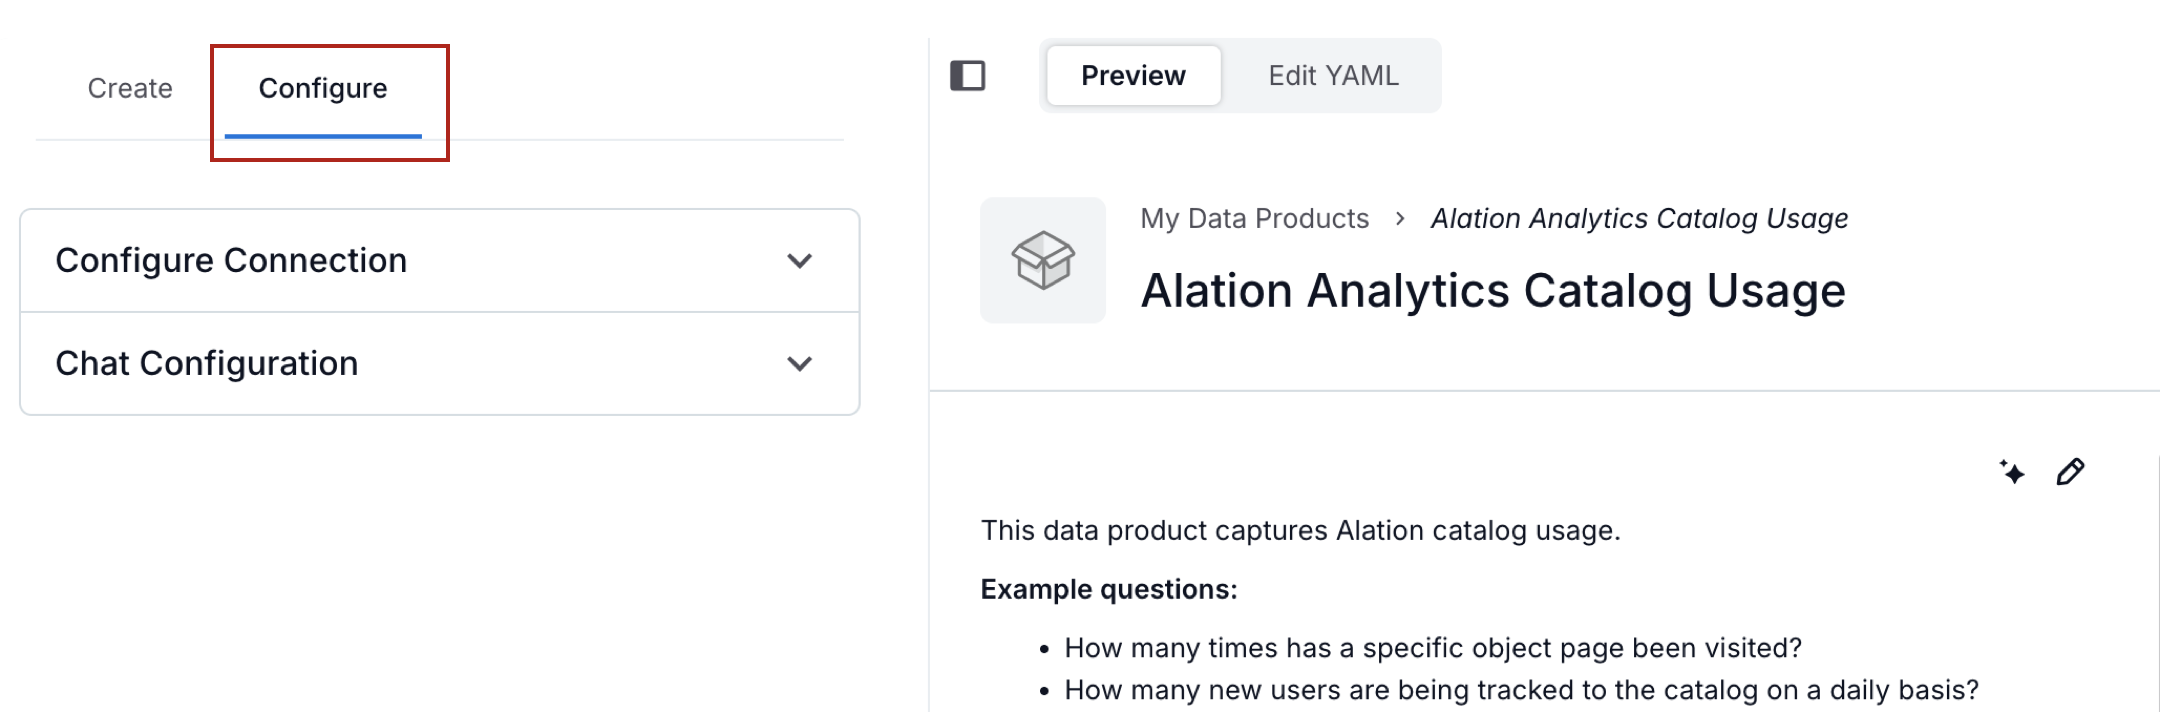
Step 5: Configure SSO Authentication for the Data Product
To enable SSO authentication for Chat with a Snowflake data product:
Navigate to Data Products App from the left-side navigation.
Select My Data Products.
Locate the data product to configure.
Choose one of the following paths:
From the Data Products table, click the Edit icon. You are taken to the data product builder page. On the right side of the page, select the Configure tab.
From the Data Products table, click the data product name. The catalog page of the data product opens. Click the three-dot menu on the top right and select Configure Chat.

Under Configure, expand Configure Connection.
Select OAuth.
From the list of available authentication profiles, select the one you created in Snowflake for this configuration.
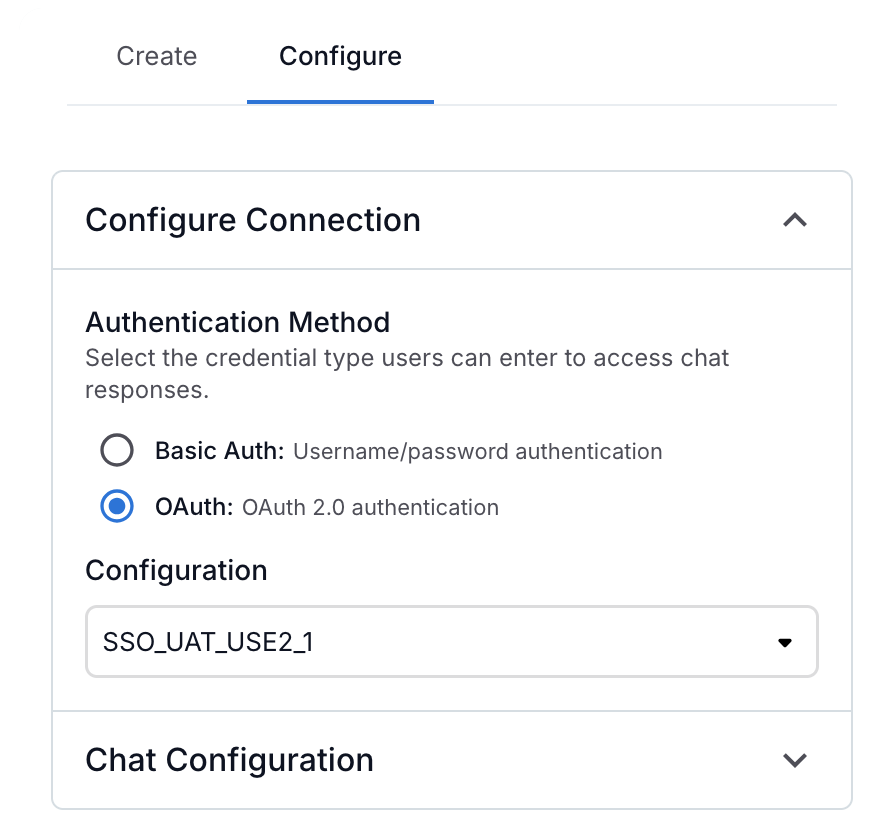
On the top right of the data product builder, click Save.
Authenticate via Chat
Once the authentication configuration is complete:
Navigate to Data Products App from the left-side navigation.
Select My Data Products.
Click a data product’s name to open it.
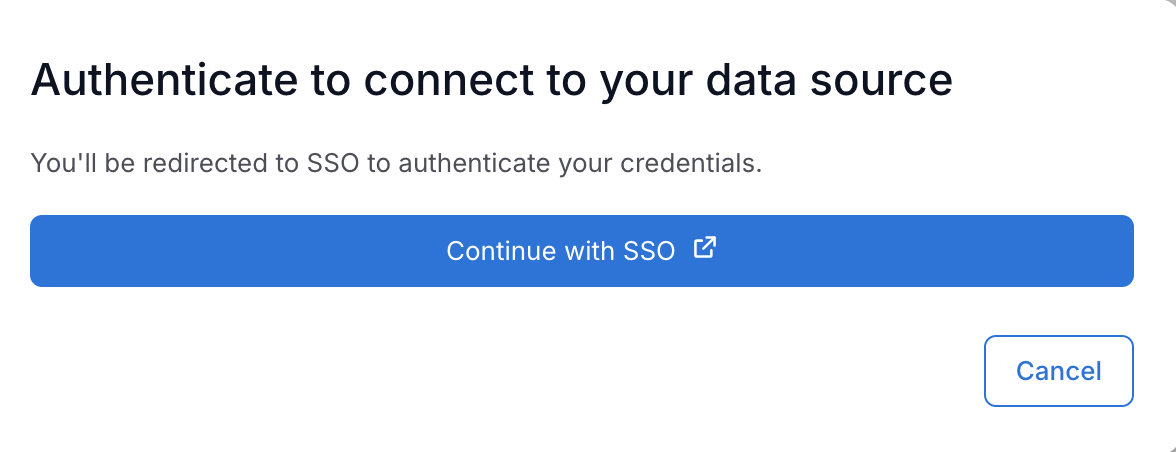
Click the Chat button on top right.
Click the connection indicator Missing connection.
Select Continue with SSO.
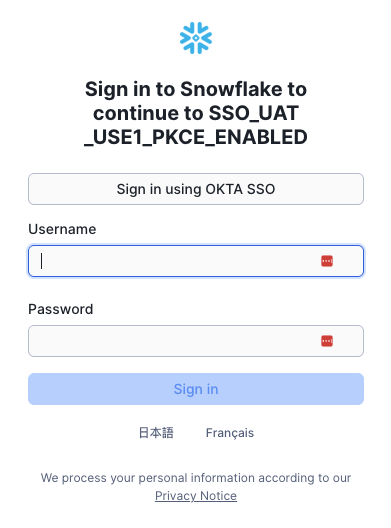
Snowflake’s login page appears. Choose Sign in using SSO. The screenshot below shows a Snowflake login screen via Snowflake External OAuth where the IdP is Okta.
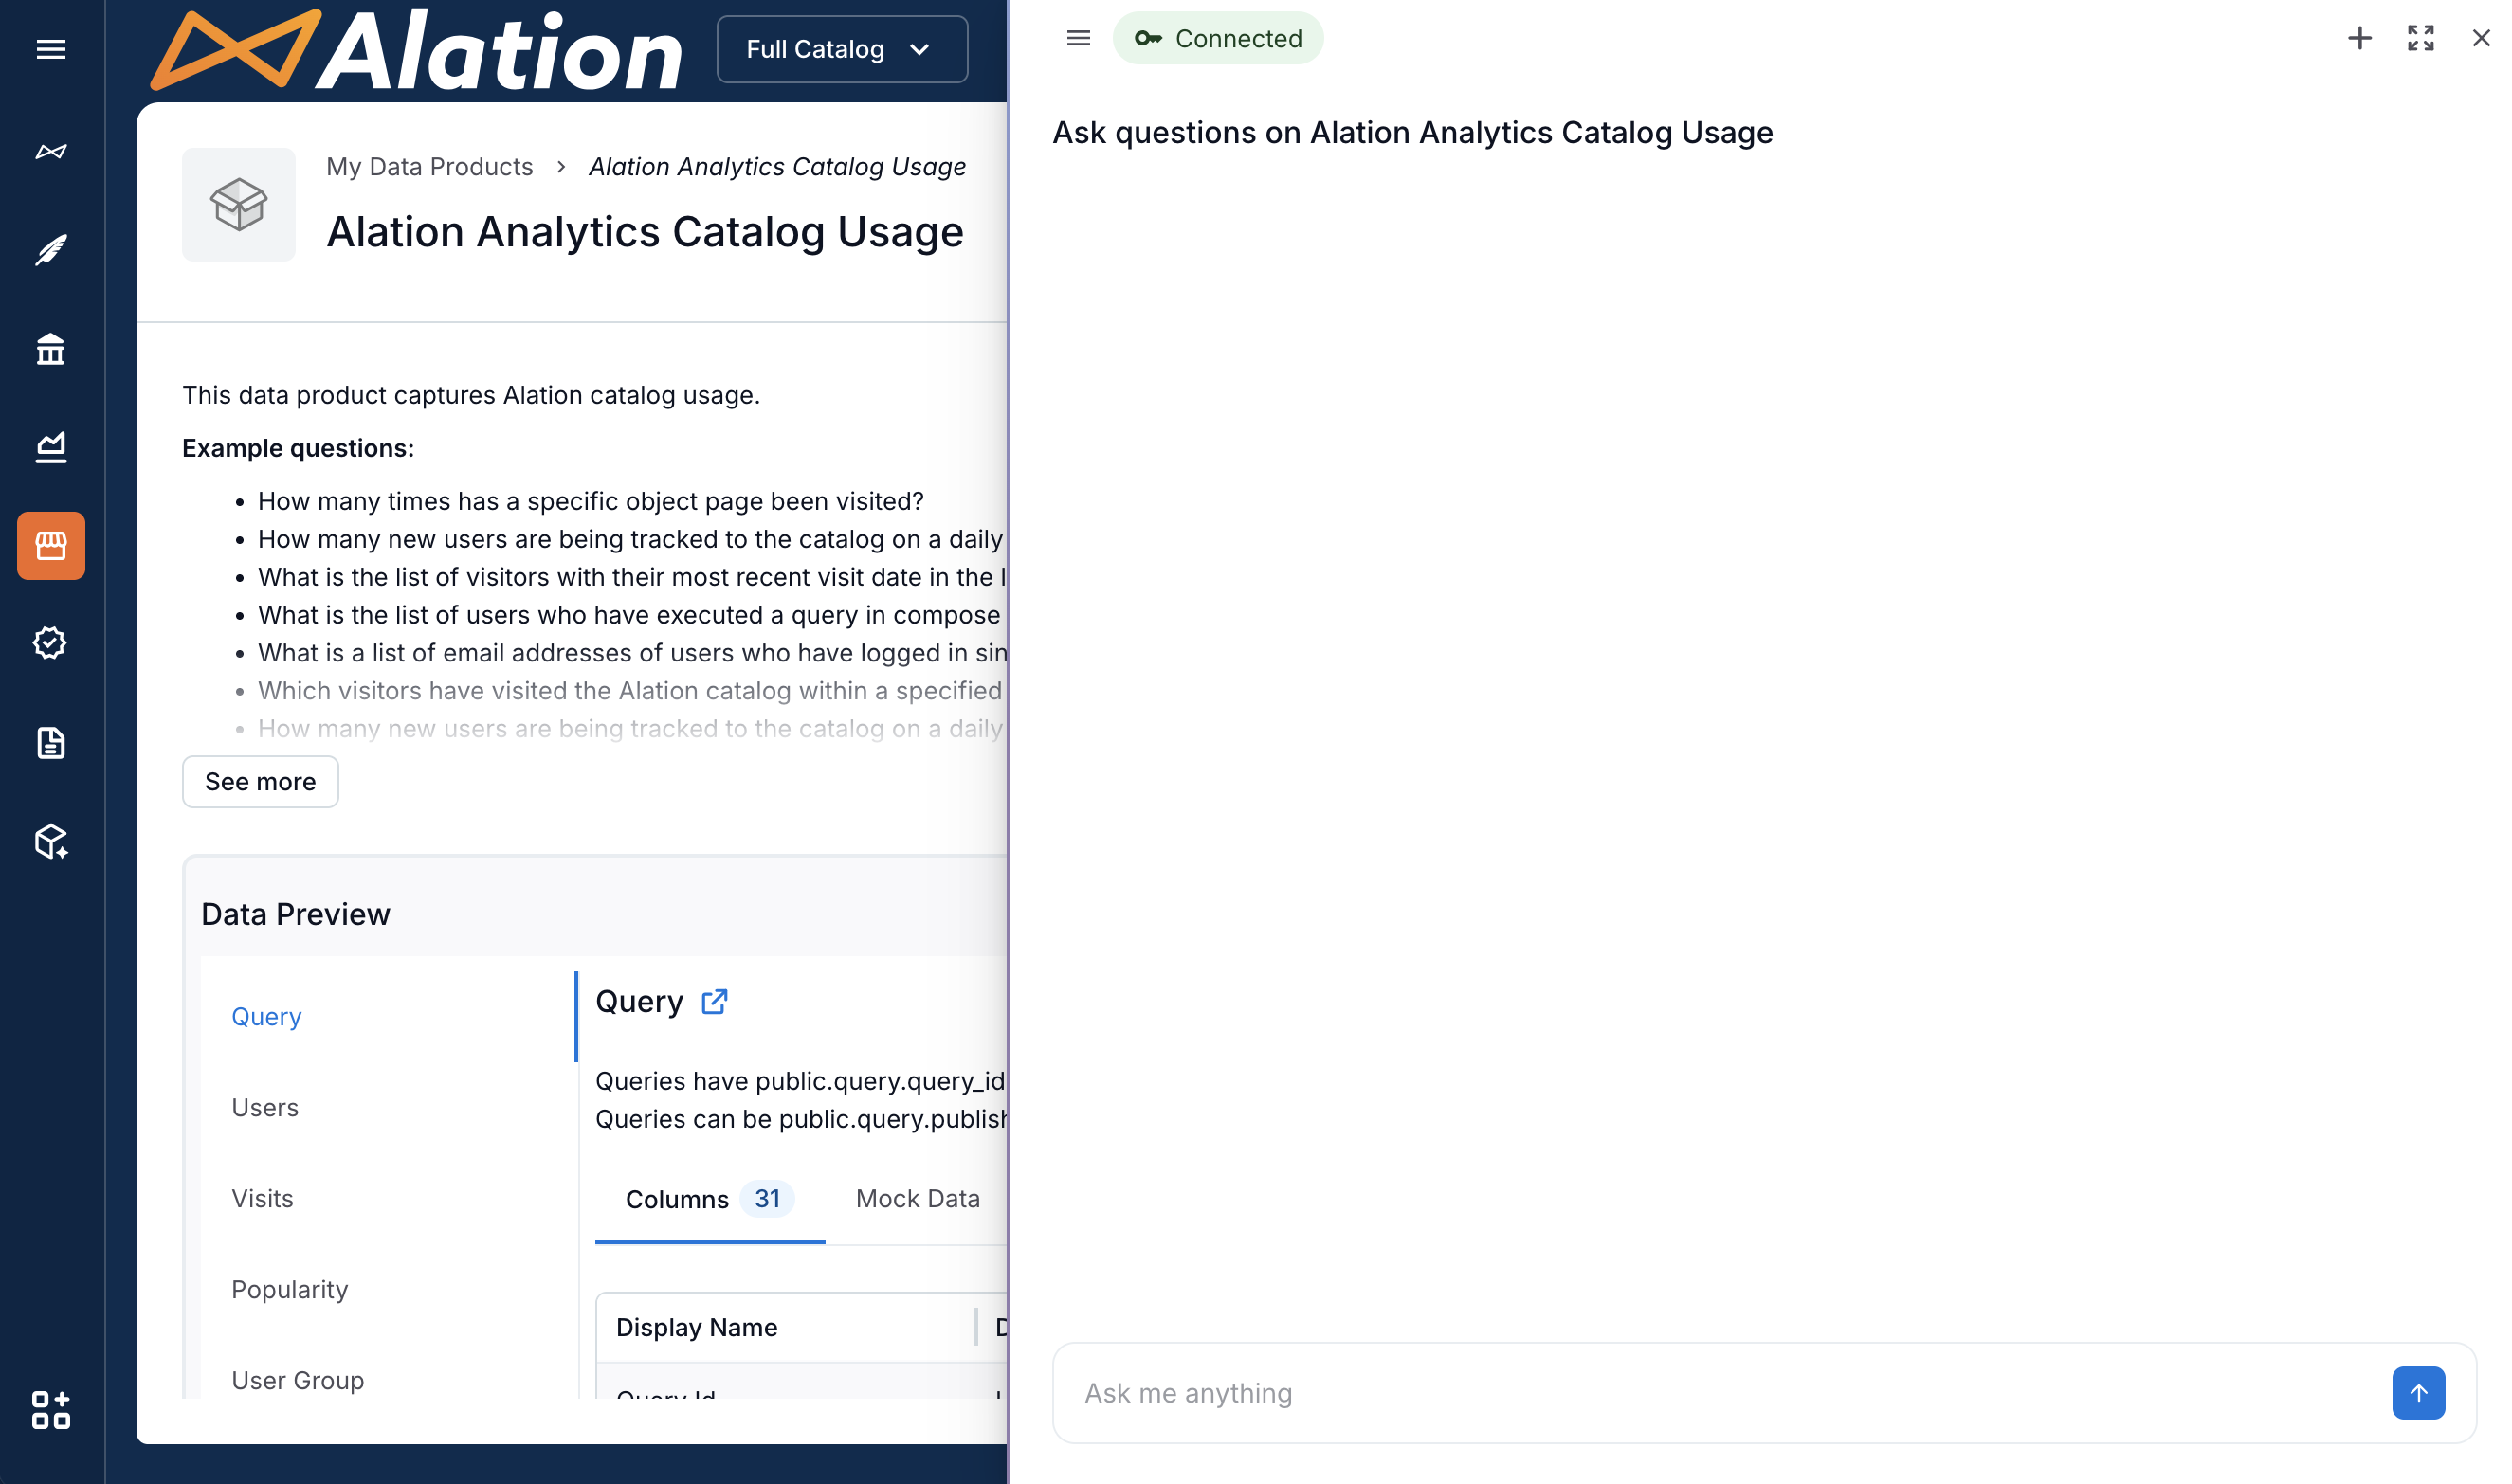
Enter your SSO credentials to complete the authentication. After successful authentication, the Chat is ready for you to ask questions about the dataset.
Type your question at the bottom of the panel and click the Send icon. The screenshot below shows a connected Chat that is ready for user input.