Configure Redshift Compose SSO with IAM Identity Center Using SAML Federation
Alation Cloud Service Applies to Alation Cloud Service instances of Alation
Customer Managed Applies to customer-managed instances of Alation
Core Connector Core connectors are included with all Alation platform tiers (subject to each tier’s connector limits) and are fully supported by Alation.
This topic explains how to configure Single Sign-On (SSO) in Compose for an Amazon Redshift data source using AWS IAM Identity Center (formerly AWS SSO) as the identity provider. An SSO-enabled connection authenticates to the database for:
Running queries in Compose
Dynamic Profiling (if enabled)
The Upload Data operation
Prerequisites
Before you begin, ensure that you have:
Enabled AWS IAM Identity Center for your AWS organization
Configured the identity source in IAM Identity Center
Assigned the required users and groups to the target AWS account and granted them the appropriate permissions to access the Redshift resource
Required Roles
In Alation
Server Admin. For customer-managed deployments, this role also requires backend access to the Alation server.
In AWS
An administrative role with permissions to create applications and roles, manage users and groups, and access AWS IAM and AWS IAM Identity Center.
The steps are performed in AWS and in Alation. Depending on your deployment (customer-managed or Alation Cloud Service), certain actions are completed on the Alation server backend or via Alation Support.
Step 1. AWS: Create an Application in IAM Identity Center
Create an application in IAM Identity Center for the integration with Alation. As you configure it, record the values needed for later steps:
In the IAM Identity Center console, go to Application assignments > Applications.
Select the Customer-managed tab.
Click Add application, select I have an application I want to set up, and choose SAML 2.0. Click Next.
Enter a display name for the application.
Under IAM Identity Center metadata, click Download to download the metadata file.
Save the metadata file. You’ll upload it in a later step.
You can skip the Application properties block with optional properties.
Under Application metadata, select Manually type your metadata values.
Enter the URL into the Application ACS URL field using this format:
<base_url>/auth/callback/?method=aws_iam&config_name=<config_name><base_url>: Substitute with your Alation base URL.<config_name>: A short, meaningful name for the authentication profile you will create later in Alation, for example:alation-redshift-compose-sso. Record this value.
Example ACS URL:
https://mycatalog.com/auth/callback/?method=aws_iam&config_name=redshift-compose-ssoCopy and save the IAM Identity Center sign-in URL. You’ll need it in a later step of the configuration.
Enter
https://alation.cominto the Application SAML audience field.Click Submit and wait for the application to be created.
Step 2. AWS: Assign Users and Groups to the Application
Make sure all users who need access to Compose have been assigned to the application:
In the IAM Identity Center console, navigate to Application assignments.
Select the application you created in Step 1.
Assign the users and groups who should have access to the Redshift data source through Alation Compose.
Step 3. AWS: Create an Identity Provider
You create an identity provider in the AWS account where the Redshift cluster has been configured.
Open the AWS IAM console and navigate to Identity providers.
Click Add provider.
For Provider type, select SAML.
Enter a name for the identity provider.
For the Metadata document, upload the metadata file you downloaded in Step 1.
Create the provider and wait for the process to complete successfully.
Copy and save the ARN (Amazon Resource Name) of the identity provider for use in a later step of the configuration.
Step 4. AWS: Create an IAM Role for Redshift Access
In the IAM console, navigate to Roles and click Create role.
For Trusted entity type, select SAML 2.0 federation.
Under the SAML 2.0-based provider, choose the identity provider you created in Step 3.
Select Allow programmatic and AWS Management Console access.
Attach permissions policies.
To do a quick test setup, you can attach these AWS-managed policies:
AmazonRedshiftFullAccessIAMFullAccess
For production, we recommend creating a custom least-privilege policy. Below, find an example of a minimal custom policy that allows authentication, reading cluster metadata, listing database objects, and managing users for auto-provisioning.
{
  "Version": "2012-10-17",
  "Statement": [
      {
        "Effect": "Allow",
        "Action": [
            "redshift:GetClusterCredentials",
            "redshift:DescribeClusters",
            "redshift:DescribeClusterSubnetGroups",
            "redshift:DescribeClusterParameterGroups",
            "redshift:DescribeClusterSecurityGroups",
            "redshift:ViewQueriesInConsole",
            "redshift:ListDatabases",
            "redshift:ListSchemas",
            "redshift:ListTables",
            "redshift:CreateUser",
            "redshift:AlterUser",
            "redshift:DropUser"],
        "Resource": "*"
      }
      ]
}
Enter a name for the role and create it.
Copy and save the ARN of the newly created role. You’ll need it in a later step of the configuration.
Note
AWS may add a default condition block to the role’s Trust Relationships. This condition can be safely removed for this Redshift SSO configuration:
Default (with condition):
{
  "Version": "2012-10-17",
  "Statement": [
    {
      "Effect": "Allow",
      "Principal": {
      "Federated": "arn:aws:iam::<account_id>:saml-provider/<idp_name>"},
  "Action": "sts:AssumeRoleWithSAML",
  "Condition": {
    "StringEquals": {
      "SAML:aud": "https://signin.aws.amazon.com/saml"}
      }
  }
  ]
}
Updated (condition removed):
{
  "Version": "2012-10-17",
  "Statement": [
    {
      "Effect": "Allow",
      "Principal": {
      "Federated": "arn:aws:iam::<account_id>:saml-provider/<idp_name>"},
  "Action": "sts:AssumeRoleWithSAML"}
    ]
}
Step 5. AWS: Configure Attribute Mappings in IAM Identity Center
Prepare the following ARNs:
In the IAM Identity Center console, navigate to Applications > Customer-managed applications.
Select the application you created.
On the application’s page, select Actions and choose Edit attribute mappings.
Update the attribute mappings as shown below. Provide your specific values for
<role_arn>and<idp_arn>.Attribute
Value
Note
Subject
${user:email}The user identifier. Maps to
https://aws.amazon.com/SAML/Attributes/RoleSessionName.https://aws.amazon.com/SAML/Attributes/RoleSessionName${user:email}The user identifier. Maps to
https://aws.amazon.com/SAML/Attributes/RoleSessionName.https://redshift.amazon.com/SAML/Attributes/AutoCreatetrueAutomatically creates the Redshift user if one doesn’t exist.
https://aws.amazon.com/SAML/Attributes/Role<role_arn>,``<idp_arn>``https://redshift.amazon.com/SAML/Attributes/DbUser${user:email}Sets the Redshift username to the user’s email.
https://redshift.amazon.com/SAML/Attributes/DbGroupsreadonly(Optional) Assigns the user to the readonly DB group upon login.
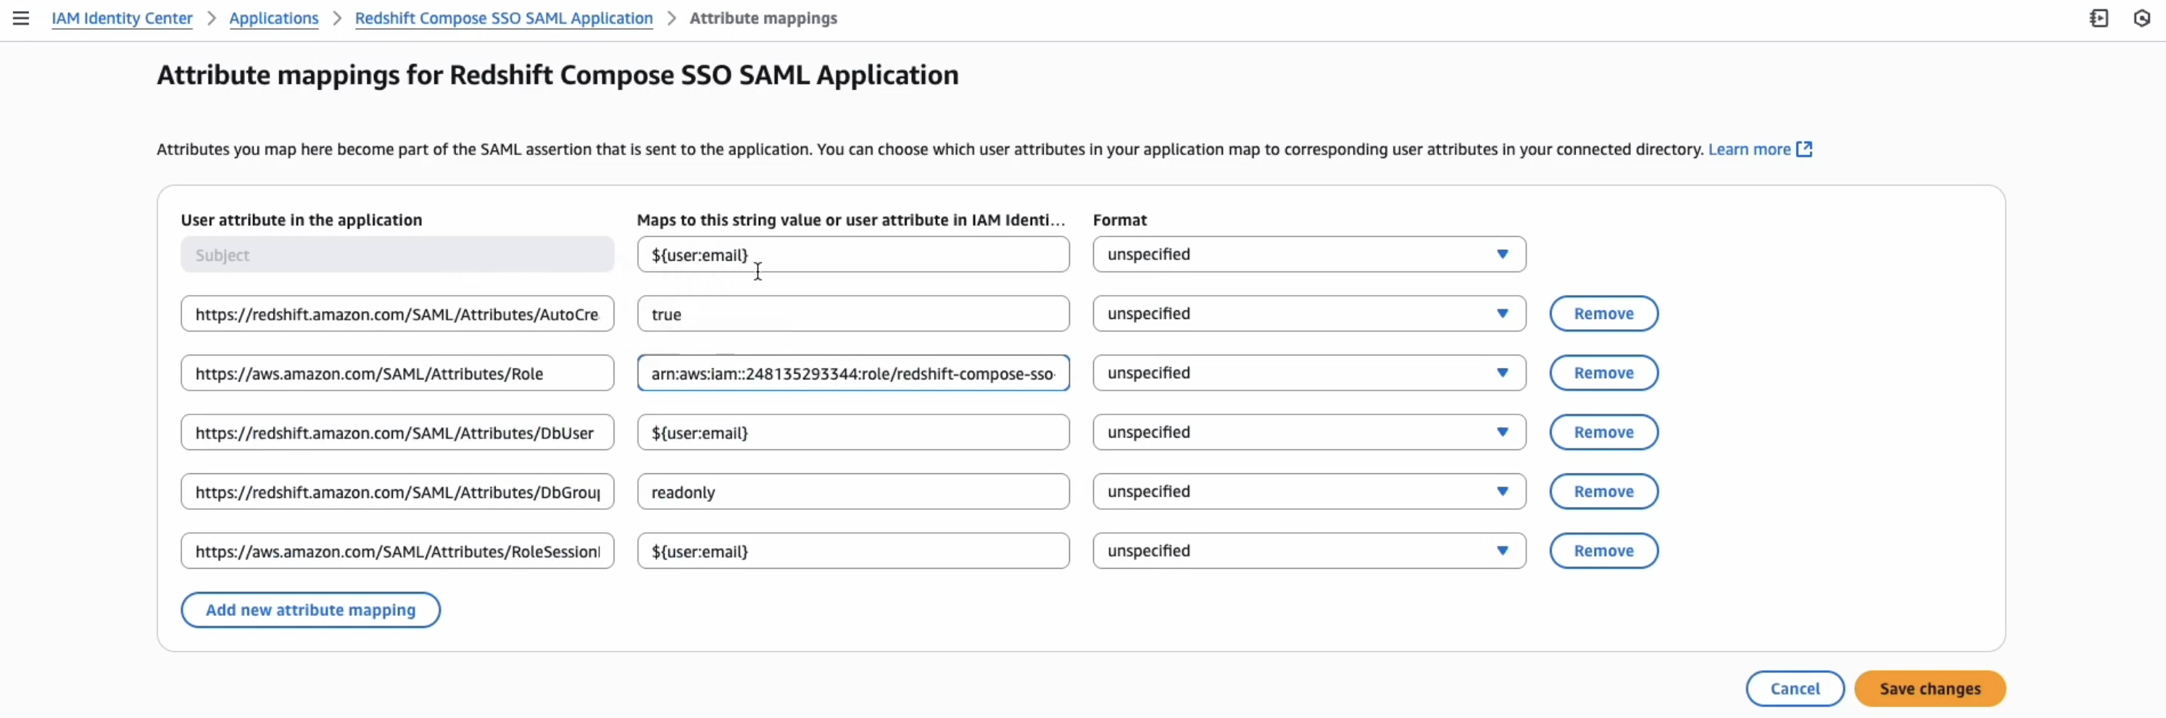
Save the changes.
Step 6. Alation: Create an External Authentication Profile
Prepare values from Step 1:
<config_name>: The config_name value you provided when creating the applicationThe IAM Identity Center sign-in URL
Log in to Alation as a Server Admin.
Go to Admin Settings > Authentication tab.
Add a new configuration with the method AWS IAM. See Authentication Configuration Methods for External Systems for detailed steps. To configure the fields, use the values from Step 1:
Config Name: Enter your
<config_name>.Redirect URL: Paste the IAM Identity Center sign-in URL.
Save the configuration.
Step 7. Alation: Add a Compose Connection for the Redshift Data Source
Open the Settings of the Redshift data source and go to the Compose tab.
In Compose Connections, click + Add Connection.
Enter the connection URI, using the format below. The
AutoCreate=trueparameter ensures user provisioning during login.redshift:iam://<cluster-endpoint>:5439/<database>?tcpKeepAlive=true&ssl=true&AutoCreate=trueExample:
redshift:iam://test.us-east-1.redshift.amazonaws.com:5439/alation?tcpKeepAlive=true&ssl=true&AutoCreate=true
You can include additional parameters as required by your Redshift configuration, for example:
ClusterID: If the cluster ID is the same for all users.
DbUser: If the cluster requires an explicit database username.
Important
If your Redshift configuration requires DbUser, each user must create their own connection in Compose. Instruct users to add DbUser with their database username (DbUser=<database_user_name>).
Step 8. Alation: Create Compose Configuration Profile
Customer-managed Alation: Perform this step on the backend of the Alation server.
Alation Cloud Service: Request this configuration via Alation Support. You’ll need to include this information in the ticket:
Your Redshift data source Alation ID
<config_name>from Step 1.
To create a Compose configuration profile on a customer-managed instance:
Use SSH to connect to the Alation server.
Enter the Alation shell.
sudo /etc/init.d/alation shell
Enter the Django shell.
alation_django_shellIn the Django shell, run the following commands:
Create a Compose authentication profile, substituting the placeholder values
<your_data_source_id>and<config_name>with your real values:from rosemeta.models import DataSource from datasource_auth.models import AuthServiceConfiguration ds_id = <your_data_source_id> AuthServiceConfiguration.objects.create(ds=DataSource.objects.get(id=ds_id),method_name='aws_iam',config_name='<config_name>')
Map authentication tokens to JDBC parameters:
c = AuthServiceConfiguration.objects.get(ds_id=<your_data_source_id>, config_name='<config_name>')
c.jdbc_config['auth_obj_to_jdbc_param_map'] = {
  'AccessKeyID': '{AWSAccessKey}',
  'SecretAccessKey': '{AWSSecretKey}',
  'SessionToken': '{AWSSessionToken}'
  }
Enable IAM URI patterns:
c.jdbc_config['jdbc_uri_enabler_patterns'] = ['redshift:iam:']
Note
Depending on your Redshift configuration, you may need to include other URI parameters in the pattern list, for example:
c.jdbc_config['jdbc_uri_enabler_patterns'] = ['tcpKeepAlive\\=true&ssl\\=true&AutoCreate\\=true']Save the configuration:
c.save()
Test the Configuration
You can test with a user account that exists in IAM Identity Center and has access to the AWS resource cataloged in Alation as the data source.
Test Connection in Compose
Log in to Alation as a user who has access to the Amazon Redshift data source and needs to use Compose.
Navigate to Compose.
Click the Connection Settings link to open the Connection Settings dialog.

From the Choose a Connection list, choose the default connection or create a new one using the required format. Depending on whether or not the
DbUserparameter is required by your Redshift configuration, either create a new connection including theDbUseryou’re testing or select the default SSO connection you configured on the Compose tab (Step 7).Note
If your Amazon Redshift configuration requires the
DbUserparameter, then your users need to add it to the SSO-enabled connection URI, for example:redshift:iam://test.us-east-1.redshift.amazonaws.com:5439/analytics?ClusterID=prod-cluster®ion=us-east-1&ssl=true&AutoCreate=true&DbUser=martythompson.Open the Connect as list. It should include an option +Add New (SSO Login). This means that SSO enablers in the URI of the connection have been recognized by Compose.
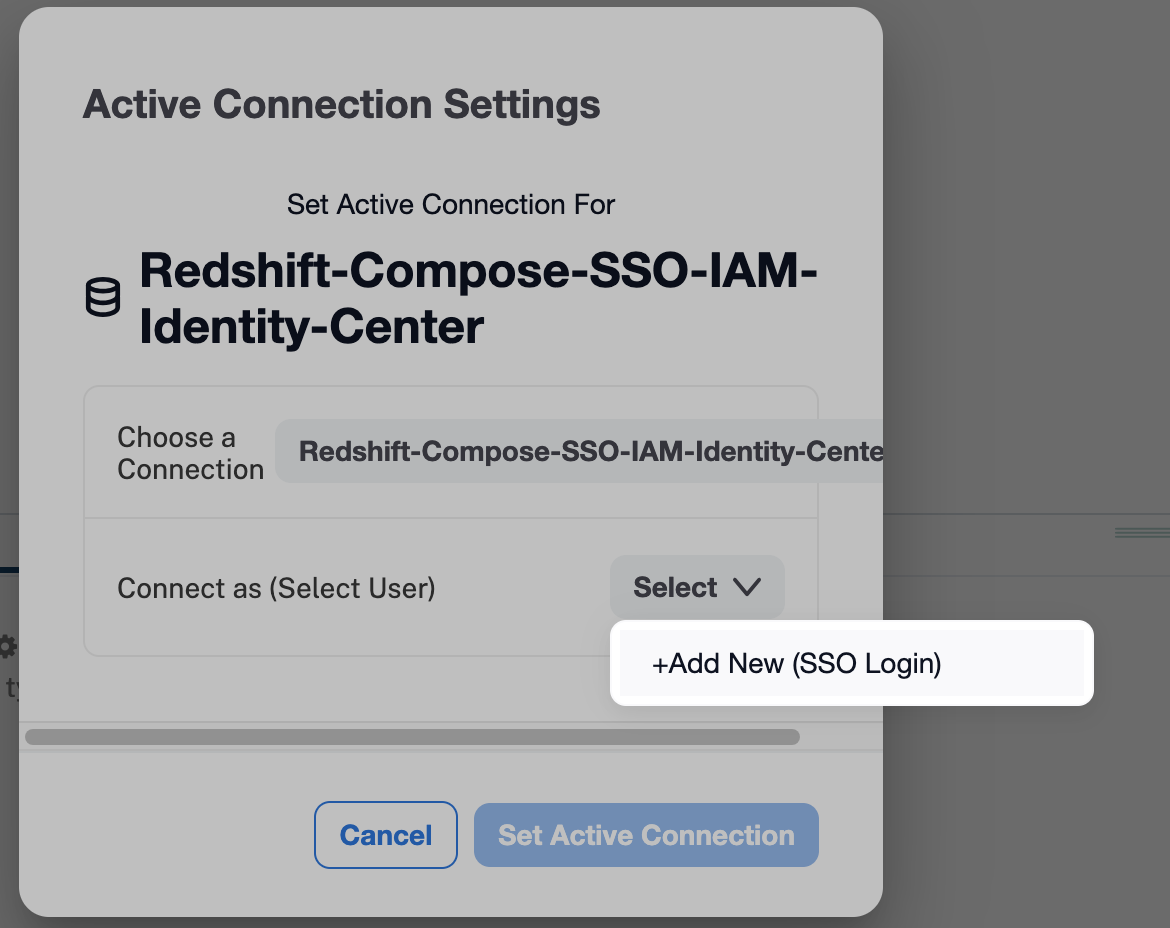
Click +Add New (SSO Login). This should open the AWS Identity Center login screen in a new tab.
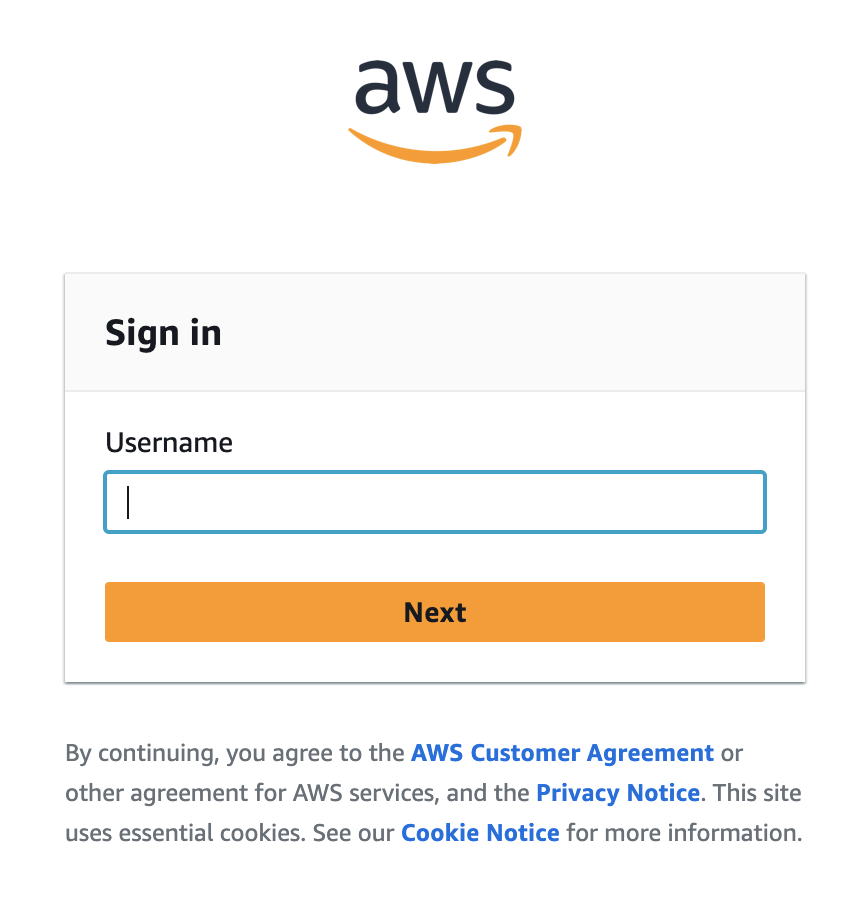
Log in with the test user’s credentials. If the SAML assertion response returns multiple roles, you will see the select role screen allowing you to select a role. Select a role and click Continue. The tab will close and you will be authenticated in Compose.

Test Dynamic Profiling
This test applies if Dynamic Profiling is enabled for the Amazon Redshift data source:
In the Alation Catalog, open a catalog page of a column in your Redshift data source.
Click Run Profile. The Data Source Authorization dialog should pop up.
Use the SSO-enabled connection from the list of saved connections or create a new one for your test user.
Click Set as Active Connection to apply the connection.
A new browser tab should open where you will be redirected to the AWS Identity Center login screen. Enter the IdP credentials to authenticate.
Upon authentication, you will be able to profile the column.
Test Data Upload
Similarly, you can test Data Upload:
Go to the Amazon Redshift data source page in the catalog.
On the upper right, click the Options menu (the three dots icon), and then select Upload Data.
Try to test-upload a table: the authentication flow should be the same as described above in Test Dynamic Profiling.
Troubleshoot Compose SSO with Redshift
If the authentication request fails, the UI will display an error and connection will not be established. See Troubleshoot SSO Authentication with Amazon Data Sources for known error scenarios.